As an Amazon Associate I earn from qualifying purchases.
I do a lot of pickling and preserving, and I do it for many reasons: To capture abundance, to hold onto seasons past, to transform good into great. It is this last that drives me. Most preserved foods do not outshine their fresh state. Some can be just as good, only different. But a precious few foods undergo a magical transmogrification when they are preserved.
Fresh pork leg transformed into prosciutto is a classic example. As are wine and cheese from grapes and milk. So too with fresh garlic. No matter how much I love fresh garlic, it is but a shadow of these preserved cloves. Eating them for the first time was a revelation, a culinary epiphany: I must have this garlic on hand. Always.
I did not come up with this method of preserving garlic myself. It comes from my colleague Paul Virant, a fellow traveler, cook and preservation junkie who did me the honor of hosting a Hunt, Gather, Cook dinner at his Michelin-starred restaurant Vie in Chicago last fall. It was a wonderful dinner, but Paul was just as eager to show me his preservation sanctum sanctorum, tucked away in an unused room above the restaurant.
Walls of jarred deliciousness rested there. Fruits, green things, sauerkraut. Beets of all shapes and sizes. And a set of jars in the corner stuffed with what looked like roasted garlic.
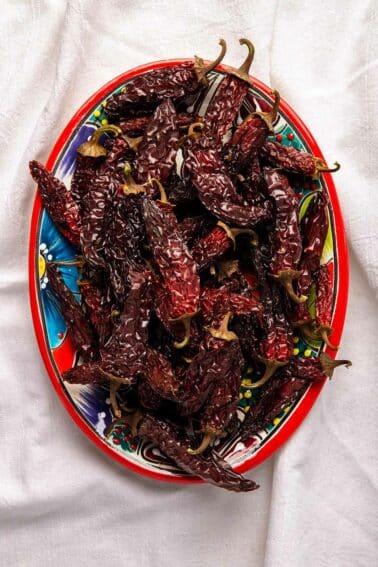
Paul remarked that they were pressure-canned hardneck garlic cloves; hardneck garlic doesn’t store as well as the typical softneck you get in the supermarket, but it is vastly superior in flavor. So Paul puts up jars and jars of the stuff.
The recipe is from Paul’s book: The Preservation Kitchen: The Craft of Making and Cooking with Pickles, Preserves, and Aigre-doux. Virant’s book is one of two preservation books out now by bona fide chefs; the other, Tart and Sweet by Kelly Geary and Jessie Knadler is also excellent. (As a side note, there is a raft of canning books on the market right now, and I would add one more “must buy” to the current crop of books: Marisa McLellan’s Food in Jars.)
But Paul goes where most other canning books fear to tread: He delves into pressure canning. This preserved garlic cannot be made without a pressure canner.
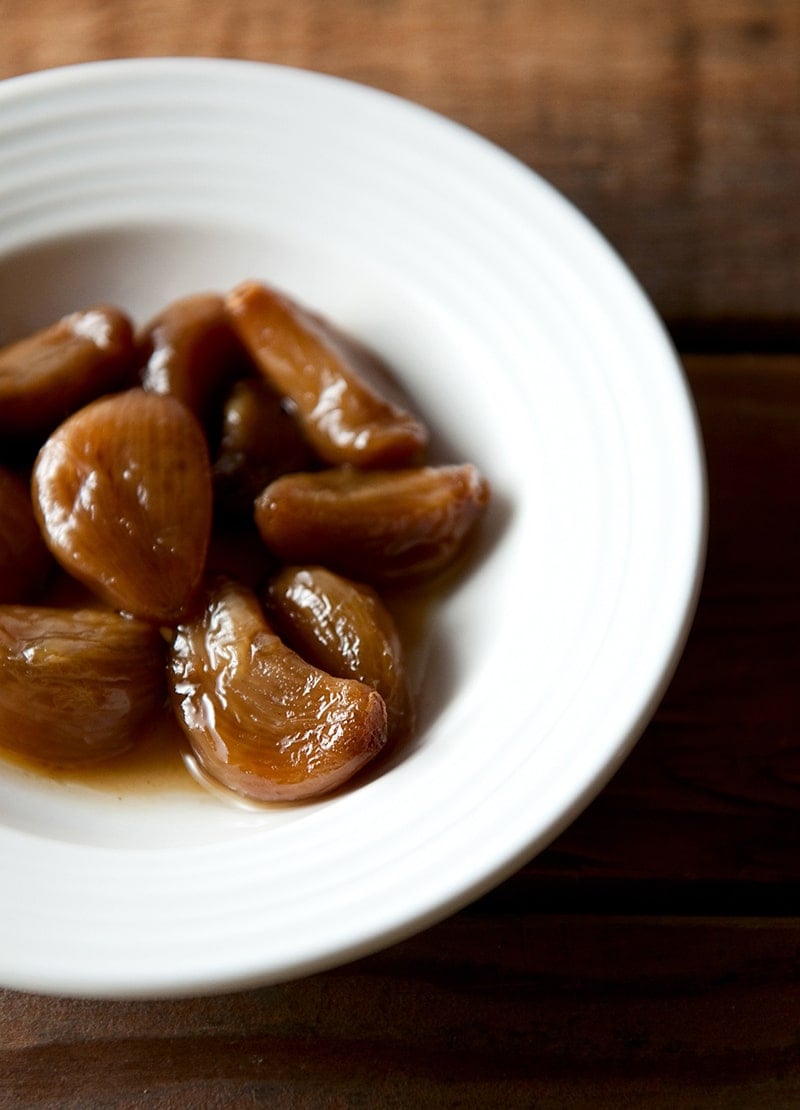
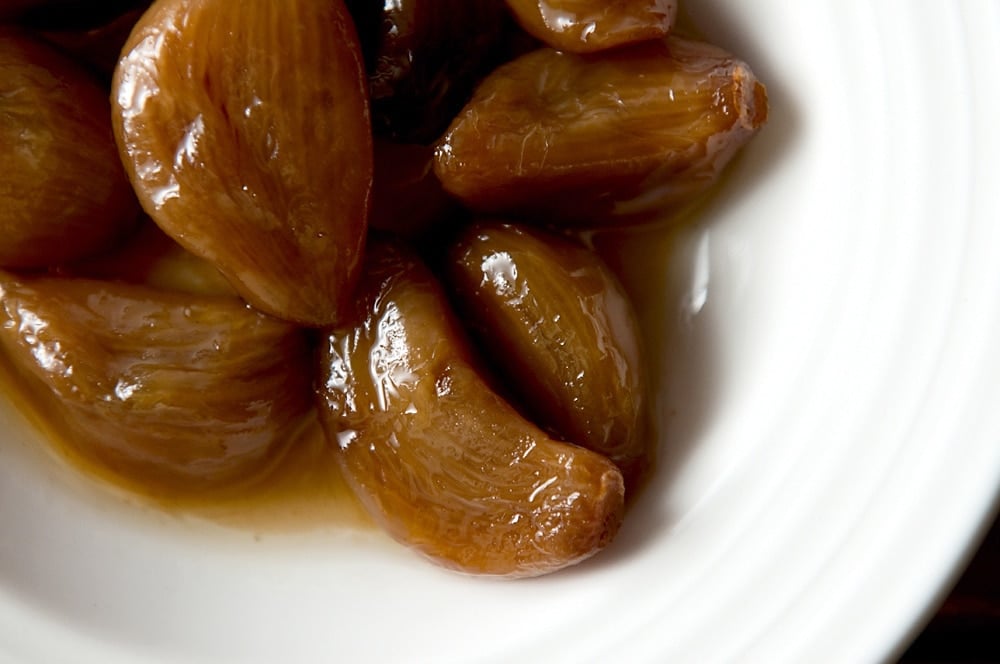
I simply don’t have words to describe how wonderful this stuff is — imagine roasted garlic that holds its shape, sweet, savory, soft, unctuous and just salty enough for you to want to eat another. And another.
I like to put a few cloves on a plate with other things, as an accent. Or you can spread them on bread. Or toss them in with eggs in the morning. They are a fantastic addition to a pan sauce.
I am posting this now because it is garlic season in most of the country. Fresh garlic is all over farmer’s markets now, and while all fresh garlic is excellent, use the hardneck variety if you can find it. It has a hard central stalk in the middle, and its cloves tend to be larger than those of a softneck.

The hardest part of this entire process is peeling the cloves. But that’s not really that hard either. There is a great trick to peeling lots of garlic: Put the cloves in a bowl, top with another bowl of equal size, and shake them vigorously for about 15 seconds. The skins will all knock themselves off. (Here is a video of the process.)
The only other hurdle here is the pressure canner. If you are a hunter, angler, gardener, forager or cook, you really need to get one. They will change your life, in a good way. And all those stories of them exploding are from the 1950s. Modern pressure canners are safe and sturdy. Follow the directions carefully and you will be fine. I admit to being nervous about using the pressure canner the first few times, but I got over it.
If you make this preserved garlic, I guarantee you will, too.
Preserved Garlic
Ingredients
- 5 cups of peeled garlic cloves, about 2 pounds of whole garlic
- 1/2 cup extra-virgin olive oil
- 1 tablespoon kosher salt
- 1/2 cup sugar
- 1/3 cup sherry vinegar
Instructions
- Turn your oven to 220°F. Place 5 half-pint jars on a baking tray in the oven. (Use clean, unused lids for this recipe.) This will sterilize everything. I always put an extra jar in because yields can be variable; large garlic cloves can change things, so it's best to be ready for extra.
- In a large saute pan, heat the oil and cook the garlic cloves over medium heat. Sprinkle the salt over them. Cook, stirring often, until they begin to brown. This can take anywhere from 8 to 20 minutes, depending on the heat you're using and how moist the garlic cloves are. Once they are starting to brown, mix the sugar into the pan and continue to cook until it begins to caramelize, about 2-5 minutes.
- Add the vinegar, turn up the heat to medium-high, and cook this down for a minute or two.
- Remove the jars from the oven. Pack the garlic and the oil and juices into the jars. Leave 1 inch of headspace. Wipe the rims of the jars and seal.
- Put your pressure canner on your most powerful burner. Use your finger to wipe a film of oil around the inner edge of the canner, as this will help create an airtight seal; read your canner's directions for more detail on this. Get your tap water as hot as it will go and pour enough water into the pressure canner to come up about 2 inches. Put the jars of garlic into the canner and follow its directions to seal the canner.
- Turn the heat up to high under the pressure canner and allow it to vent for 7 minutes before setting the weight at the 10 PSI marker. Let the pressure build to 10 PSI before setting the timer. Process 10 minutes for half-pints, 20 minutes for pints. (If you are at altitude, you will need to go up to 15PSI. Follow the directions on your canner.)
- Turn off the heat and allow the PSI to return to zero before taking the weight off the steam vent. Carefully open the canner, making sure you don't get scalded by the steam. Left out the jars and let them cool before storing them in the pantry.
Notes
Nutrition
Nutrition information is automatically calculated, so should only be used as an approximation.


Thanks for the delicious recipe Hank! Preserving the harvest and making the first of this year’s Christmas presents. One question, I am new to pressure canning and wonder if the ratio of vinegar to oil is important? The oil and vinegar started to seperate as I was packing the jars and it got me wondering if some jars were getting a different ratio. I’m hoping the high heat of the pressure canner negates this concern, but wonder your thoughts? Thanks again and keep the great recipes coming!
Bryan: It separates. Don’t worry about it.
Would there be any reason NOT to substitute finely chopped garlic scapes for the garlic cloves, and then follow the same steps? I’ve got 20lbs of garlic scapes I need to do something with. I can only freeze so much of the stuff in olive oil…. 🙂
I was thinking about pan roasting garlic with skin on prior to canning. The skins come right off after roasting without much effort. This is how I roast garlic. I believe that this method improves flavor. Have you tried this method prior to canning?
Thanks for your input.
Really nice resource here! Great work!
Best Regards,
Matt
Can you pit up fresh garlic I mean seal fresh garlic with out cooking it?
Irma: No. Sorry. Garlic is best pressure canned, although you can pickle it.
I was wondering if i could cut the salt in half…i’m supposed to be on a low salt diet.
Tracie: No. The salt is important in the preservation process.
I just bought a huge bag of garlic from Costco with no real plan in mind. I looked in my ball home preserving book and could only find roasted garlic jelly. Why is it such a challenge to find creative pressure canning recipes? Some place I read on the web that as home canners, we just don’t have the proper tools to safely pressure can all that we want to. I’ve been using mine for a year now, but have stuck pretty closely with tested pressure canning recipes – for chili beans and soup.
The pH needs to be below 4.7 to protect against botulism. Don’t skip the vinegar, lemon juice, citric acid, etc. called for in canning recipes.
This is pressure canned, folks. NOT water bath canned. The recipe works fine.
This looks yummy. But I have just been reading about preserving peppers and things in oil and the increased risk of botulism. Would your recipe be considered safe by the USDA?
Who knows? I am not a fan of the USDA. They are hyper conservative and their methods tend to destroy flavors in food. I can tell you I’ve done it for a few years now with no problems.
The National Center for Home Food Preservation is a great source for canning – both pressure canning and water bath canning. This is my go-to website!!!! https://nchfp.uga.edu/how/can_home.html
I’ve been using and loving my All-American pressure canner for about a year. Just did this tonight with my crop of hardneck garlic. Oh wow!!!! Thanks for the recipe. Pretty sure I’m heading to the market to get more garlic 🙂
I can not wait this is what I will be doing tomorrow. Love your site.
Great!
What do I do if I dont have a pressure canner?
So it’s not a problem to have the cloves not really submerged in the oil/vinegar liquid? Ok to have so much air in the jars? I had little liquid in each jar, less than half full on average (did a couple batches to fill my pressure canner). Consulted with canning friends and decided to top off with vinegar/water mix to leave about 1 inch of head but submerge garlic cloves. Hope that doesn’t throw off the flavor too much.
I have pressure canned garlic cloves in half pint jars. They cook completely and turn into a wonderful dark amber spread. Once the jars are opened we have found they last quite well in the fridge. Its my go to for anything that is garlic.
I’ve been lacto-fermenting our garlic, and it’s lasted all year long. Just dip into the fermentation vessel, get out the garlic and away you go. We also just fermented a mess of puréed garlic scapes and that works beautifully, too.
Trying this out now … smells fantastic 🙂 Joan , mine kinda went a little mushy too , will be trying the roasted method next time myself. Will have to hit up a farmers market as I have used almost all the ones from my garlic.
Thanks for the recipe !
Rich
So I got back to this recipe today, and did the garlic in the oven like I wrote last time. It turned out perfect. One problem: I only got 4 little half-pint jars, and that’s the end of the garlic harvest for me. The rest of the garlic will be stored for long term dried use.
I tried this recipe last week and it was fabulous. We have been slopping the golden goop all over everything. Okay, not ice cream. I used honey from our own bees instead of sugar…perfect. Next we’ll spread it alongside olive tapanada on tomatoes…or cucumbers,…or turkey breast…or grits and sauteed mushrooms…
The only problem I had with the method was that the garlic started turning to mush before it browned. It could be that the pan was too crowded, heat too low, or just plain wrong pan. At any rate, I continued with the recipe anyway and no one batted an eye at the texture. everyone loved it. But I would like to see that whole-clove look just like the picture.
Next time, I think I will roast the garlic in the oven the way I often have, simply coated with olive oil and stirred once or twice. Then the other ingredients I’ll heat gently on the stove, pour it over the roasted garlic packed into the jars, and proceed as directed.
Looking forward to it, as I can see that the jars I already made are not going to laast until next garlic harvest. Thanks for the recipe, Hank. It’s definitely a keeper.
Hi Hank, thanks for all the great recipes and inspirations over the years. I have been pressure canning for a while now and am wondering why you recommend “sterilizing” in the oven before canning? It should not be necessary with pressure canning, besides, heating the oven to 220 doesn’t quite reach the 240 that the food inside the jars will reach with pressure canning. I would worry about the dry heat of the oven damaging the rubber seals on canning lids, especially for a step that does not seem all that necessary. It would also be much harder to handle jars and lids that are preheated that hot. I have never had to do more than rinse them before putting in the canner.
Seems like an excellent recipe that I will have to try soon. Also, I second the recommendation of the All-American. Ours has been worth every penny.