As an Amazon Associate I earn from qualifying purchases.
Lye. Isn’t that the stuff the Mafia uses to dissolve the bodies of those who’d made an unfortunate choice to use another waste disposal or vending machine company? Isn’t it drain cleaner, a deadly poison? So how on God’s Green Acre can lye be useful in the kitchen?
Relax. I am here to tell you that lye can be your friend, especially when it comes to curing green olives. Good lye cured olives, I have discovered, are uniquely smooth and luscious in a way that brine or water-cured olives can never be. Done right, they can be <gasp!> even better than a brine-cured olive or an oil-cured olive. Seriously.
Let me start by admitting that I was as terrified about using drain cleaner to cure olives as you are. Intellectually I knew it would work, and knew I’d eaten lye cured olives before, as have most of us: They are those nasty black canned things also known as Lindsay olives. That knowledge, however, did not bolster my desire to do any lye curing anytime soon.
Then I did some research. I’d seen all sorts of references to how the lye cure — actually a cure in water that had percolated through wood ashes, which are a source of lye — being used “since Roman times.”
Many hours of searching later, I found that the Roman agricultural writer Rutilius Taurus Aemilianus Palladius is the source of this, in his De Re Rustica, written in the 300s.
“Mix together a setier of passum, two handfuls of well-sifted cinders, a trickle of old wine and some cypress leaves. Pile all the olives in this mixture, saturate them with this paste in garnishing them with several layers, until you see it reach the edges of the containers.”
Passum is freshly extracted grape juice, so the lye in the ash-water interacting with this would make an interesting brew. There would be so much sugar going on in there that you could get both a lye cure and fermentation going at the same time. Freaky.
Since then the Spanish have been masters of lye cured olives. Most Spanish table olives are cured at least in part with lye, but their process is far different than that used in to make the hideous Lindsay olive. I am modifying a method I found in an agricultural book written in 1817.
Incidentally, other popular modern olives that use a lye cure include the French lucques, Italian cerignola and Spanish manzanilla.
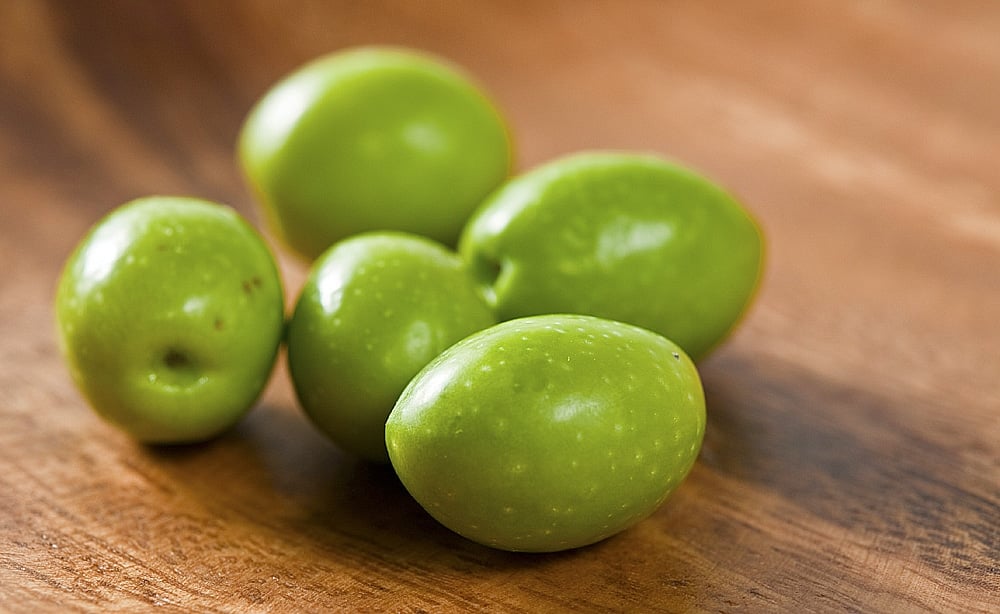
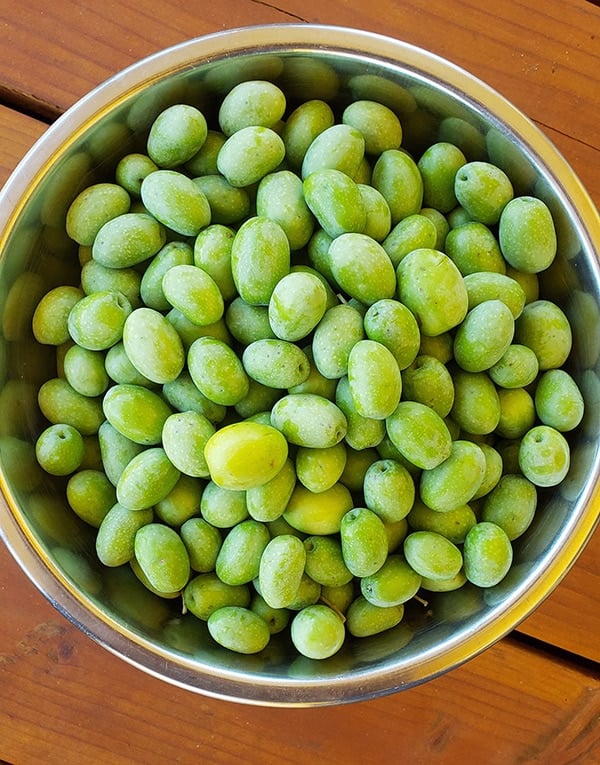
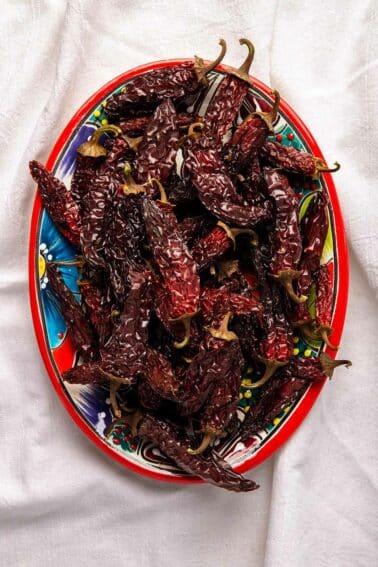
First thing you need to know about lye cured olives is that you must use fresh green olives. Not black ones, not half-ripe ones. The lye process softens the meat of the olive, so you want it as firm as possible.
When you are picking your olives, watch out for olive fly. The larva of this nasty little bug burrows into an olive and eats it from within. Thankfully infested olives are easy to spot: They will ripen faster than healthy olives, and there is a tell-tale scar on the olive that looks like this:
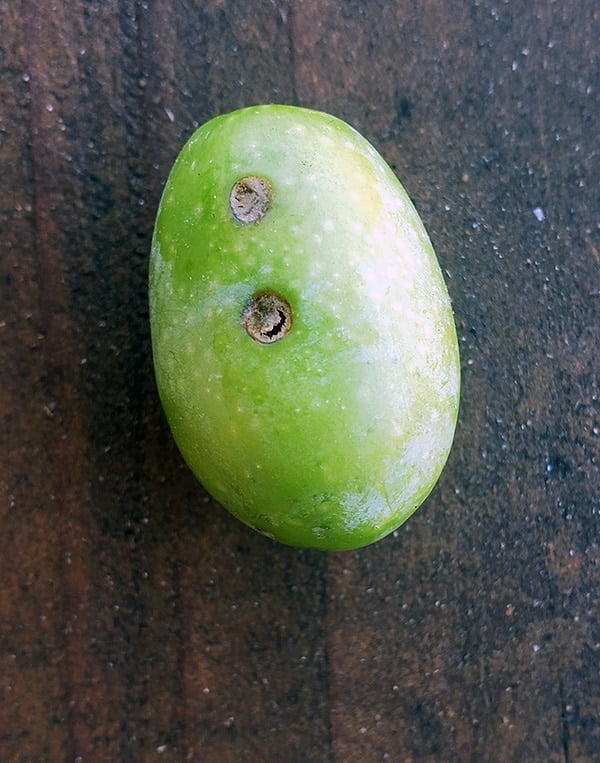
Toss that olive. While the worm is not poisonous, I prefer my olives sans extra protein, thank you.
What sort of lye do you use? The traditional brand to use is the classic Red Devil Lye, which is an old brand of drain cleaner. Drano used to be this way, but apparently has additives now. Don’t use it.
I now buy food grade lye because, well, it’s easy to get on Amazon, and I also like making pretzels at home, too, and they use lye to get that signature crust.

Isn’t lye a deadly poison? Sorta. Sodium hydroxide is one of the nastiest bases we know of; a base is the opposite of an acid. On the PH scale, distilled water is the median, at 7. Your stomach acid’s PH is about 1 1/2 — enough to burn a hole through a rug. Lye’s PH is 13.
Bottom line: Raw, pure lye will burn the hell out of you, but it is not a systemic poison. That means that even if you eat an olive that still has a lot of lye in it — as I did — all you will taste is a nasty soapy flavor. If you eat a bunch of them, the alkaline PH in the olives will counteract your stomach acid and it might give you indigestion. That’s all, and that’s a worst-case scenario.
That said, you need to be careful at that one moment you are moving raw, pure lye from the container to the crock you are curing into.
LYE CURED OLIVES STEP BY STEP
Follow these instructions and you will be fine:
- Wear glasses if you have them. Wear long sleeves and pants and closed shoes. You will probably not get lye on you, but better to be safe.
- Pour 1 gallon of cold — not tepid, not hot, but cold — water into a stoneware crock, a glass container, a stainless steel pot, or a food-grade plastic pail. Under no circumstances should you use aluminum, which will react with the lye and make your olives poisonous.
- Using a measuring device that is not aluminum, add 3 tablespoons of lye to the water. Always add lye to water, not water to lye. A splash of unmixed lye can burn you. Stir well with a wooden spoon.

You’re done. You use cold water because the reaction between lye and water generates heat, and the hotter the lye-water solution, the softer the olives will become. Now that it is mixed, the lye solution can’t hurt you, so go ahead and add your olives.
Stir them in with that wooden spoon and put something over all the olives so they do not float. This is vital. Olives exposed to air while curing turn black. Don’t worry, they will absorb the water and sink in a few hours, but to start you need to submerge them.
Let this sit at room temperature for 12 hours. The alkaline solution will be seeping into the olives, breaking the bonds of the bitter oleuropein molecules, which then exit the olive and go into the water. After 12 hours, pour off the solution into the sink. It should be pretty dark in color.


Quickly resubmerge your olives in cold water. You want to minimize the exposure to air. You now have cured olives.
I know, I know, a lot of recipes say to repeat the lye process another time — sometimes three more times — but that will destroy a lot of flavor; there are a ton of water-soluble flavor compounds in an olive that the lye solution washes away. Trust me. Your olives, unless they are gigantic, will not be overly bitter even after just a light, 12-hour lye soak.
Now you need to cleanse your lye cured olives. They will have a fair bit of lye solution within them now. Keep changing the water 2 to 4 times a day for 3 to 6 days, depending on the size of the olives. After 2 days, taste one: It should be a little soapy, but not too bitter. It’ll be bland, and a little soft. Once the water runs clear you should lose that soapy taste.
Time to brine. If you have large olives, make a brine of 3/4 cup salt to 1 gallon of water. And use good salt if you can. You will taste the difference. Kosher salt is OK, but ideally use a quality salt like Trapani, which is from Sicily. It’s not that expensive, but it is worlds better than regular salt.
Let the olives brine in this for 1 week. Keep them submerged, or you will get darkening. After a while they will sink. After 1 week, pour off the brine and make a new one, only this time, use 1 cup of salt per gallon.
Now you can play. The traditional Spanish cure would add some vinegar to the mix, as well as bay leaf and other spices. I’ve played with adding a touch of smoked salt, chiles, black pepper, coriander, mustard seed, garlic — think Mediterranean flavors.
But before you do this, taste your freshly brined olives. It will be a revelation. They will remain beautifully green, unlike brined olives. Salty, olive-y and very, very buttery. This is the Lay’s Potato Chips of olives. I dare you to eat just one.


@Antoinette, @Judi, you may be able to use Home Depot buckets without *apparent* issue, but realize that they are not considered safe for storing food. On the Home Depot web site entry for their buckets, it says, “Buckets are not food grade” https://www.homedepot.com/p/The-Home-Depot-5-gal-Homer-Bucket-05GLHD2/100087613
This means there is a possibility of the dye or other chemicals leaching from the plastic into your olives, and potentially making you sick. To be safe, consider getting containers marked as “food grade”. Right now, you can buy a set of three 5-gal buckets on Amazon for about $35. They’re definitely more expensive than Homer buckets but not extremely costly, you can use them for other ferments when your olives are done, and most importantly do not contain plastics or dyes that are potentially harmful.
Yes Home Depot buckets is what I use. Been doing this for about 10 years.
Can I use home Depot buckets?
Hank,
I have a couple of olive trees in the back yard. No idea what kind they are. One of the trees has very purple olives. The other one has mostly green and some with just a slight purple blush. Can I use these now? I know that for oil I wait until they have purpled and the internal flesh is pale yellow. Can you brine olives that are still green before they turn purple or is it a certain varietal that ripens and stays green?
Thanks,
Sam
Sam: You need to lye cure olives when they are green with no purple. You are too late for this year.
Hank I ‘ve done this cure a number of times and this seems to be the a good recipe. I have cut the lye cure time down to less than ten hours. I like a bit of flavor to the olive and I have found that I like to savor the pit. It seems to hold the “olivey” flavor at that duration of cure. Then I go rinse as you have described for a couple of days, sometimes only twice a day, however, The brine that I used was made with Himalayan Pink Salt. Wow, this is a good way to go in my opinion. Then I go to spices, I like garlic and chiles, my family has voted for bay leaves and garlic with some pickling spices. Not too much, just enough to pass on the flavors of bay, coriander, dill and such. Thanks for your contributions to olive growers and connoisseurs like me. I grow mine in Trinity County, Ca.
My olives lost the green colour, are darker. Maybe you could help me with an advice? Thank you
I am on my fourth day of rinsing. They do not taste soapy, but they are a bit bitter still. The consistency is right on, color perfect. Do I keep rinsing or go to the salt now?
Laura: Go to the salt.
Do you can olives in a hot water bath or cold pack in water bath?
Teddy: No. I just keep them in a jar in the fridge. They will last months that way.
i wonder if this process could work for lupini beans as well. Lupini beans, like olives, are extremely bitter and need to be soaked for many days before it all leaches out.
I have a large bucket of oak ash from my wood oven. Have you experimented with curing olives in ash like that Roman article did, or in some other way?
Also, I’m going to be trying your approach soon with Arbequina olives, which are fairly small. The brine ratio you recommended was for “large olives”. What kind of a ratio of salt to water would you recommend for small olives? And, if I’m weighing my salt, how much does your 3/4 cup of salt weigh?
Thanks Laura – a great story about Lindsay Olives… I’m from Kingsburg and really enjoy being the the middle of Olive country… I too have cured Olives for years, but a can of Lindsay or Oberti’s really hit the spot at times… I’ll even ‘take a shot’ of the wonderful juice from the can!
I think a minimum of 3 lye stages is needed – if you have colossal another lye stage or 2 may be needed…
I worked near Butler and Peach in Fresno – and would harvest (with homeowners permission) Olives from the neighborhoods near there – the City even relocated several Olive trees after road improvements into a center island – they provided several good crops before I retired…
Speaking of which – the trees I’ve sourced for this year are only about a block away – lets hope the homeowner lets me snag a bucket or two…
Excellent info provided! I truly enjoyed reading this article, as my family has been home curing olives for generations…..as a matter of fact, I am from Lindsay Ca., and my Grandfather happened to be VP of Lindsay Olive Growers back in the day…….
So I have to say, tongue in cheek, I’m mildly offended at your references regarding our black canned olives because I find Lindsay Olives to be delicious….but alas, I am biased! I’ve been raised on them, and I must say when it comes to black canned vs green home cured, I proudly go both ways!
Here is an Interesting fun fact, Lindsay olives actually get their black color from the process…which was regarded as a trade secret for many years in the olive making industry! I have heard some pretty comical stories about business men in the olive industry sharing a few cocktail drinks to try to pry the coveted secret process from LOG’s chemists back in the 60’s and early 70’s. It is truly funny and highly nostalgic for me to look back at these precious family memories and stories, so for that , I will forgive you for not liking our “nasty black canned things”, otherwise known as the “hideous Lindsay Olive”. You brought a smile to my heart, in that these black olives have earned our precious small town a spot on the map and are now a legacy shared with the world via your research and wonderful article!
As a seasoned little Lindsay Lady, I wanted to share my knowledge and experience, because home curing olives is an art. My recipe was passed from Grandpa Kimball to Grandpa Burner and shared through out our family. It’s a labor of love….it is time intensive,but so very worth the work! Fall and Football season aren’t complete unless one can enjoy a bowl of these delicious little treats with a cup in hand in which to spit the pit.
For home curing purposes, I prefer my green olives pit in. My family recipe calls for 3 lye baths each 12 hours between changes. Fresh water changes happening twice at 6 hours each, then twice at 12 hours each. Finally, we brine and change five times at 12 hours each. Ideal ambient temperature between 60 and 70 degrees.
During the last two brine changes, we infuse flavor….some we keep as plain in the salt brine, others we add garlic, or jalapeño. These three are my personal favorites…..but we have also tried, rosemary, cilantro, and a dill pickle flavor as well…..be creative I’ve never met an olive I didn’t like!
I usually cure 10 gallons of olives at a time. Over the years, we have passed down our curing buckets, stir sticks, measuring cups, ect. We only use plastic or glass….and I highly recommend using a large plastic colander to place over your olives before pouring out for lye, water and brine changes. This will get the fluids out but keep olives in.
Make sure you mix lye solution in a well ventilated area wearing disposable gloves and safety glasses, never fill your containers to a point they are heavy or cumbersome to dump for changes, and always make sure your olives are submerged in lye bath by covering with a washcloth or cheese cloth. Once olives are cured, change brine solution once a week….if your water gets cloudy it’s time for a change!
I sincerely want to thank you, Hank , for sharing your research….and your recipe. Your article and illustrations are delightful! Home cured Olives are a tradition in my family is passed on through our generations….all of my children have been taught to cure and each of them look forward to fall, olive picking, curing and finger licking!
Excellent article! I have a few questions though. Do I soak the olives in the second brine for another week, and then pickle them? And also, should I soak them in new fresh water before I jar them in a salt and vinegar brine? My plan ultimately is to preserve them in a flavored brine with garlic, bay leaves, and chili peppers. I’ll also be sealing them in jars with a water bath. Thanks again for the info.
Jacob: Nope. Cure with lye until they are no longer bitter, then put in the brine of your choice. Do not water bath can. No need.
After the last brining do you leve them in this and put in jars? Must they then be refrigerated?
Looks like a fun thing to try. Can you recommend a source for fresh, uncured green olives that would be able to ship to the upper peninsula of Michigan?
I’ve made lye from wood ashes. Its easy peasy stuff to do, really. I used it to make hominy. Even burning paper produces sufficient ashes to make lye. The water-lye solution produced comes out clear. You’d think the water would come out sooty looking but it doesn’t.
Hi,
I tried your recipe and after a week of rinsing, our olives are still very bitter. Do I need to wash the olives in lye a second time or will the salt pull out the bitterness ?
Thanks !!
John: Yes, I’d do the lye treatment a second time.
Having the same issue as Jessica. Hope someone responds!
Thank you for this! I’m curing olives for the 1st time and having trouble deciphering between normal bruising & spots and olive fly. I feel like I’m cutting many open to find nothing, some have small indications of what may be tunneling, and one olive so far was obvious with one larvae in it. Any suggestions? Should I avoid any and all spots? I have about 15lbs. The majority of the olives have smallish spots and obvious bruising. They are barounis, picked on 9/17/16. Thank you!
Great. First I get into canning, then pickling. Now I’m into fermenting and apparently the next step is curing olives in Draino. It’s only a matter of time before I’ll be drinking coffee made from beans eaten and then pooped out by cats in the jungle.
How do you keep these after curing, Hank? I can only get raw green olives in 17lb lots, so I need a way to make them shelf stable.