As an Amazon Associate I earn from qualifying purchases.
Splitting fish for pan frying or grilling is a great way to serve an almost boneless fish, so it’s easy to eat and pretty on the plate. Here’s how to butterfly fish, step by step.
Butterflying, also known as kiting or splitting fish, is a basic skill you will want to know, especially when dealing with smaller fish such as trout, bass or perch. It keeps the fish whole but largely debones it. The technique is ideal for either quick pan frying or for stuffing the fish, in this case a rainbow trout from the Sierra Nevada.
To start, you need a large cutting board or other work surface, a very sharp fillet knife, a pair of kitchen shears… and a fish.
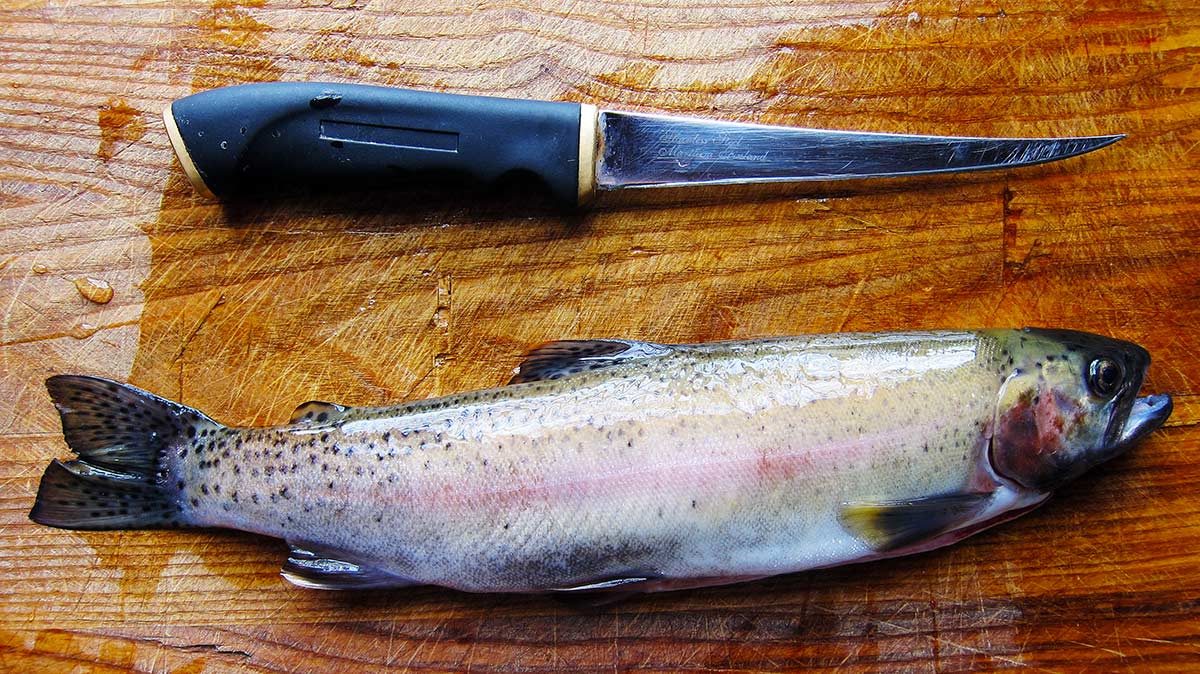
Make sure the fish is scaled and gutted first, and be sure to remove the gills.
Start by making sure your knife is sharp. I know I just mentioned this, but it is important. You will mangle your fish if your knife is not sharp.
Butterfly Fish Step by Step
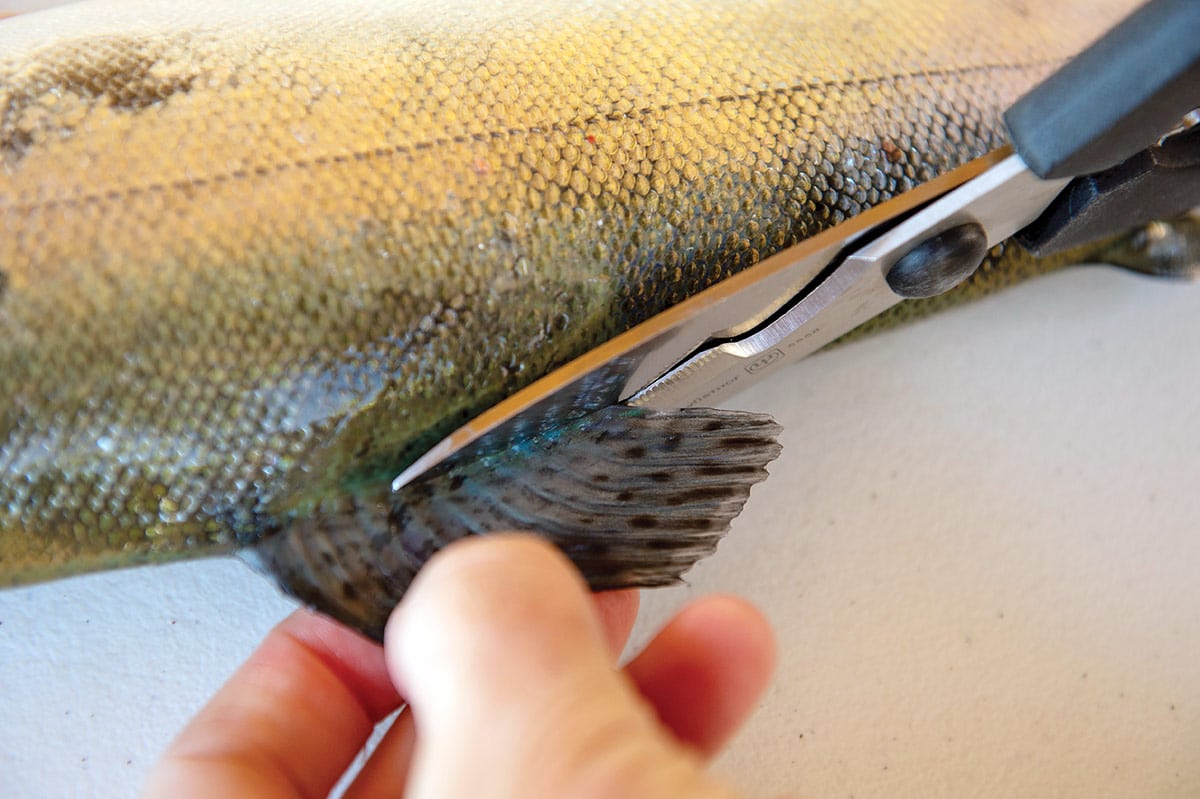
Start by using shears to snip off the fins; leave the tail. You need to remove the dorsal fin so the fish will lay flat after you’ve butterflied it. If you want, slice carefully on either side of the dorsal fin to remove the bones at its base.
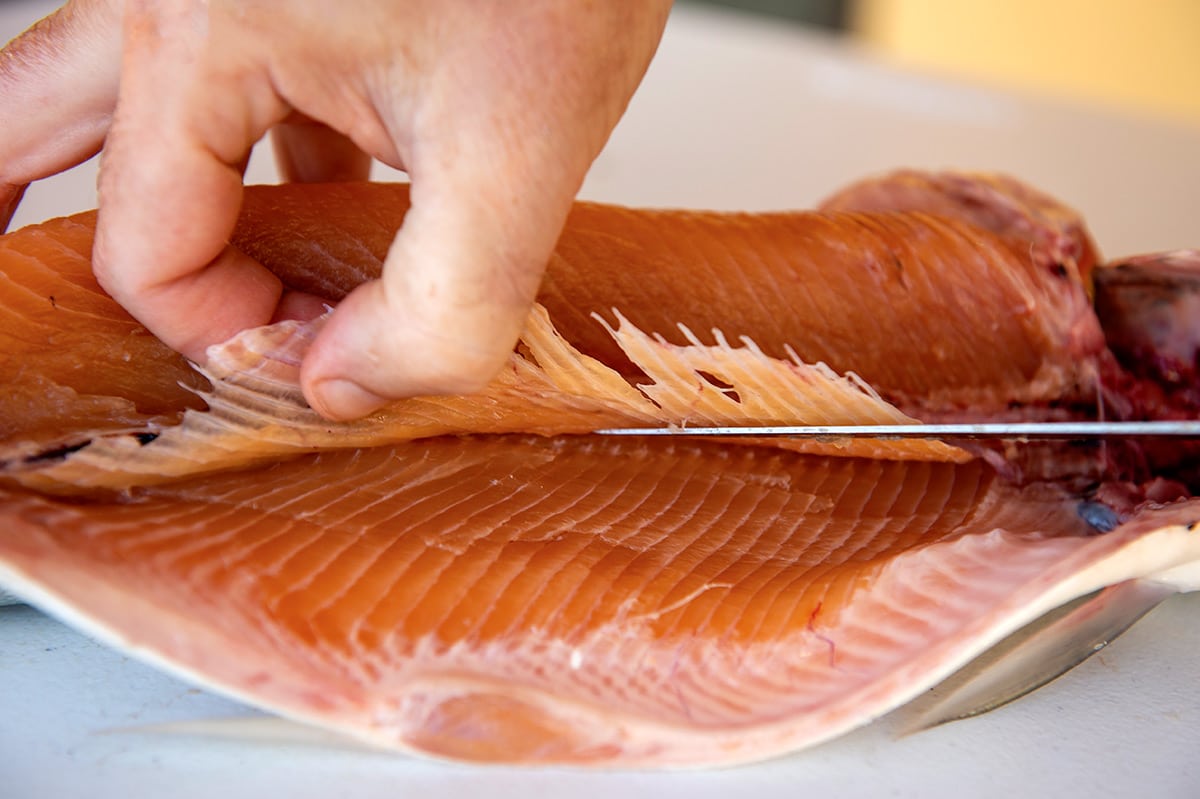
Armed with a sharp knife, remove the anal fin: Like the dorsal fin, it has a set of bones in it you want to remove. Do this by slicing gently on either side of the fin, all the way to the backbone. Tap the tip of your knife against the backbone when you do this. Gently pull out the fin bones.
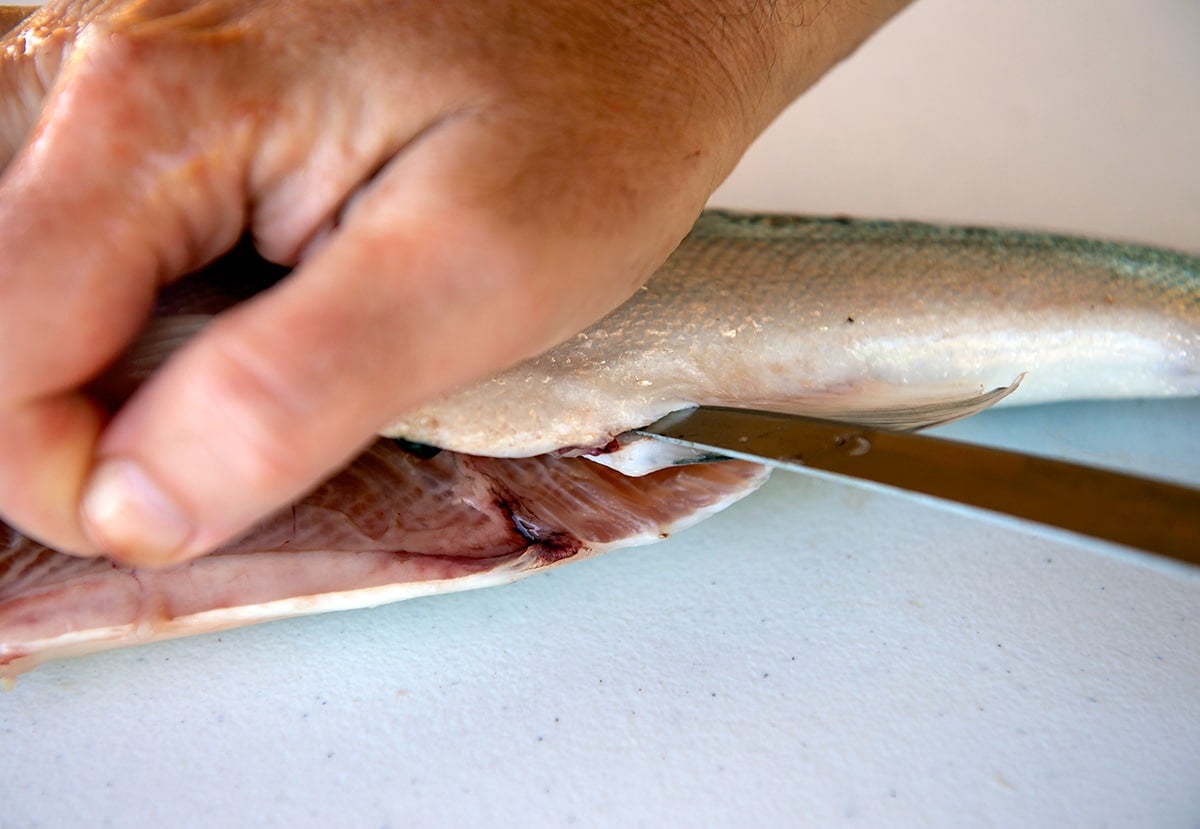
Now remove the ribs. Start from the tail end of the fish, and put the tip of your knife against the backbone where the ribs begin. Slice the ribs free. Do this by slicing from the backbone towards the end of the ribs, gently pressing the knife upward against the ribs — this preserves most of the meat on the fish’s flanks. Do this on both sides.
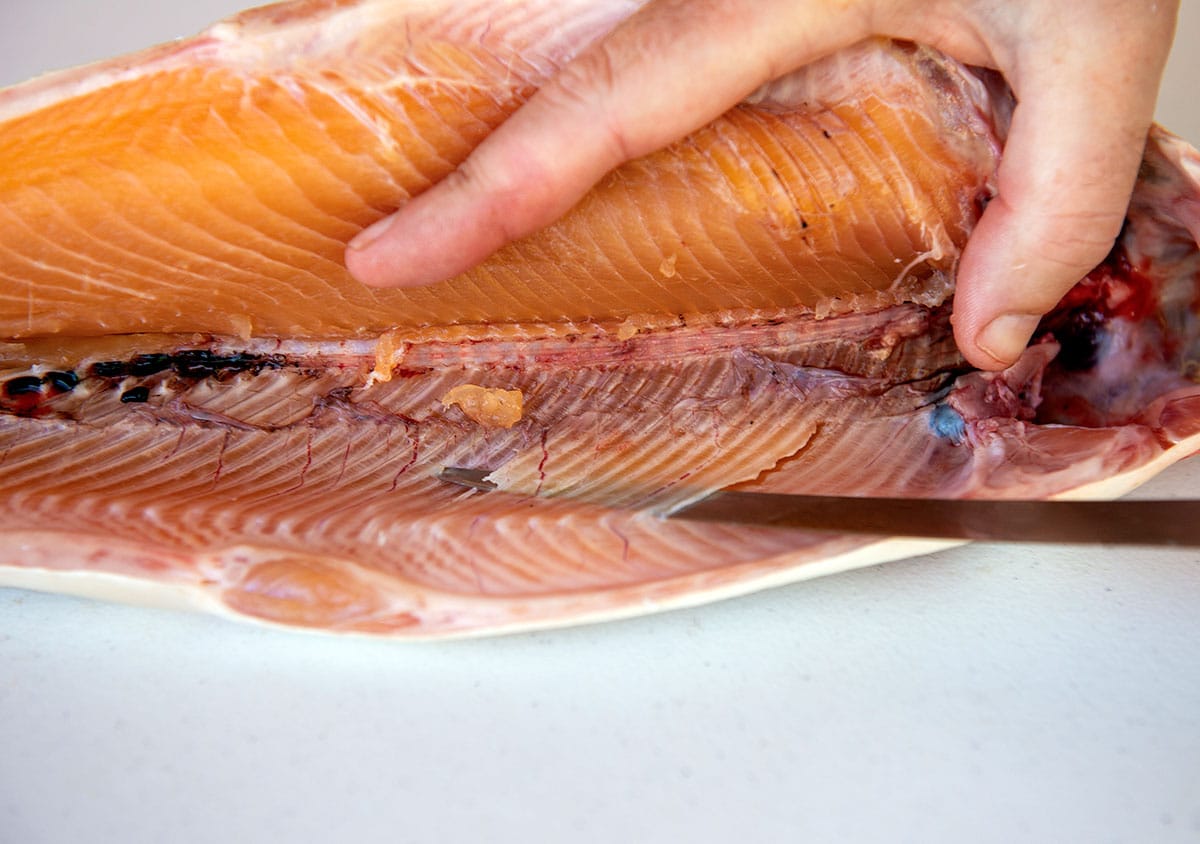
Use the kitchen shears to snip off the ribs close to the backbone.

Removing the Backbone
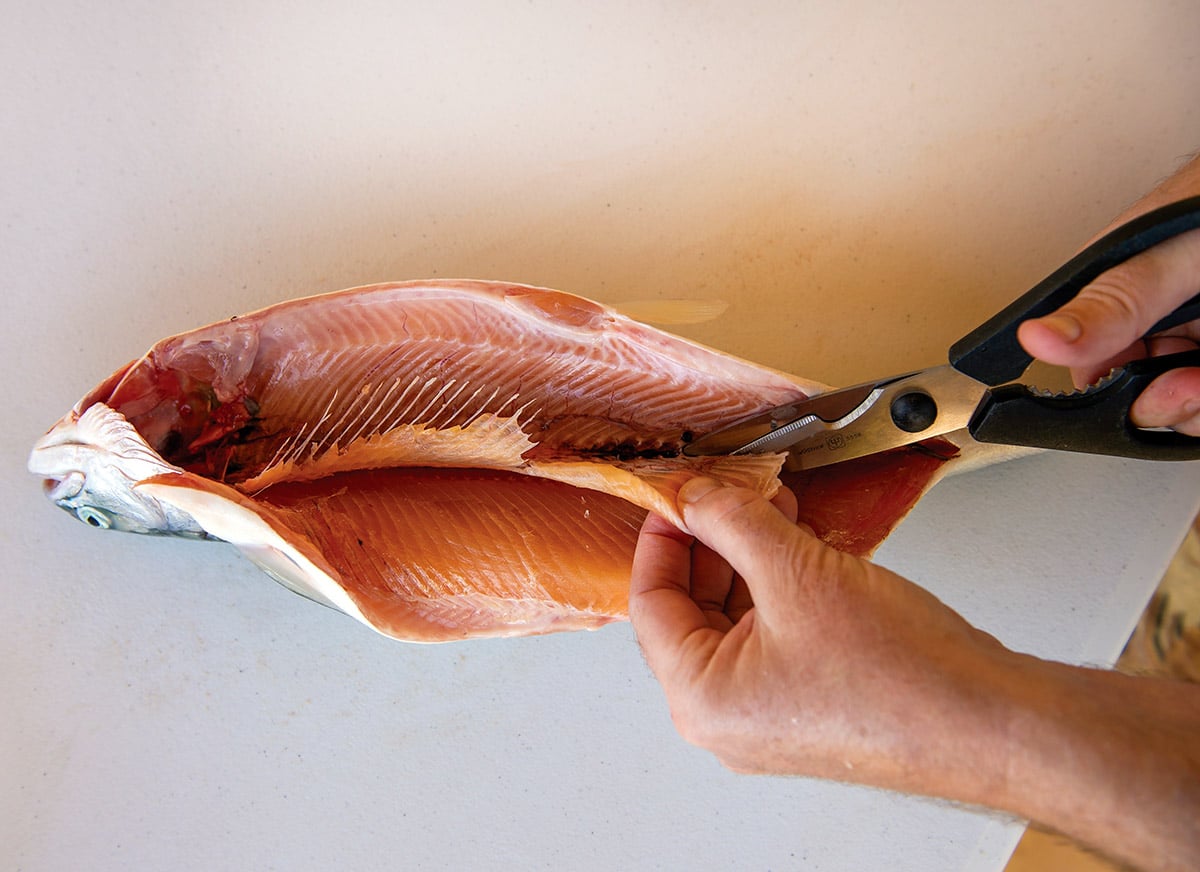
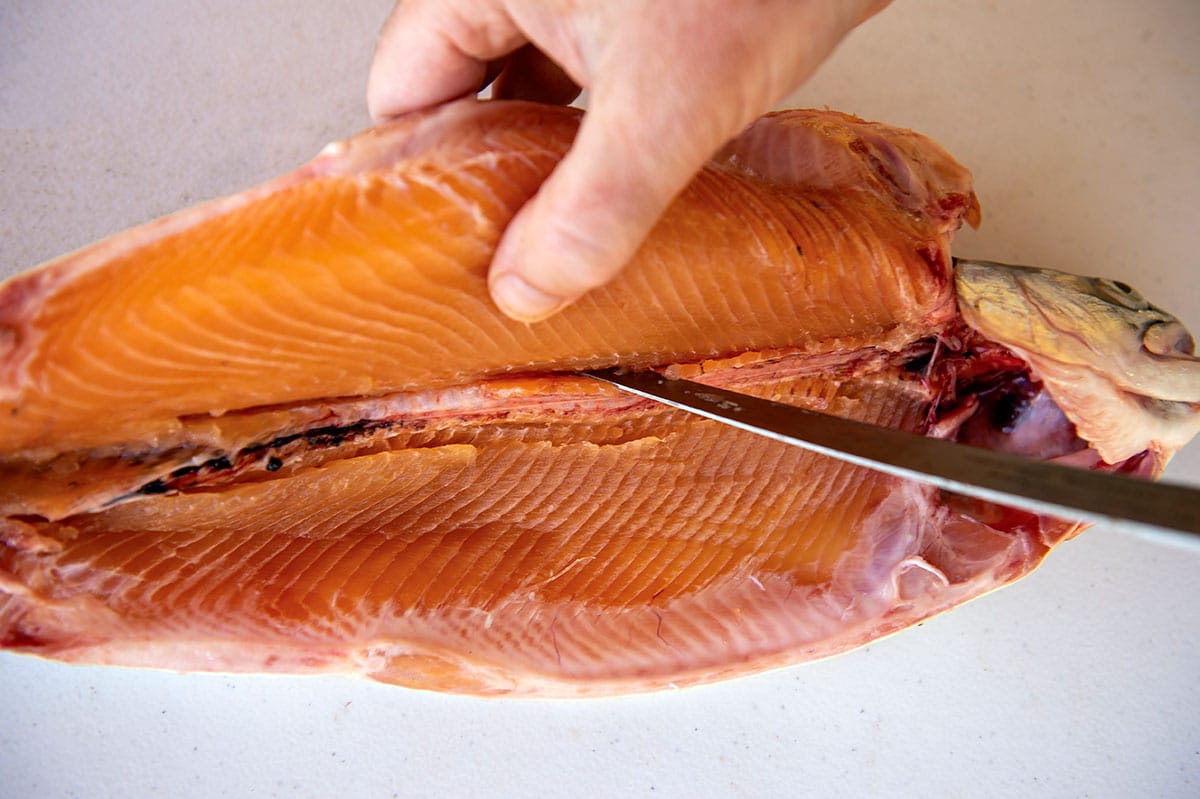
Now you need to remove the backbone itself. Start by freeing the ends of the backbone from the fish’s body. Use the kitchen shears to snip the backbone right behind the head and right in front of the tail.
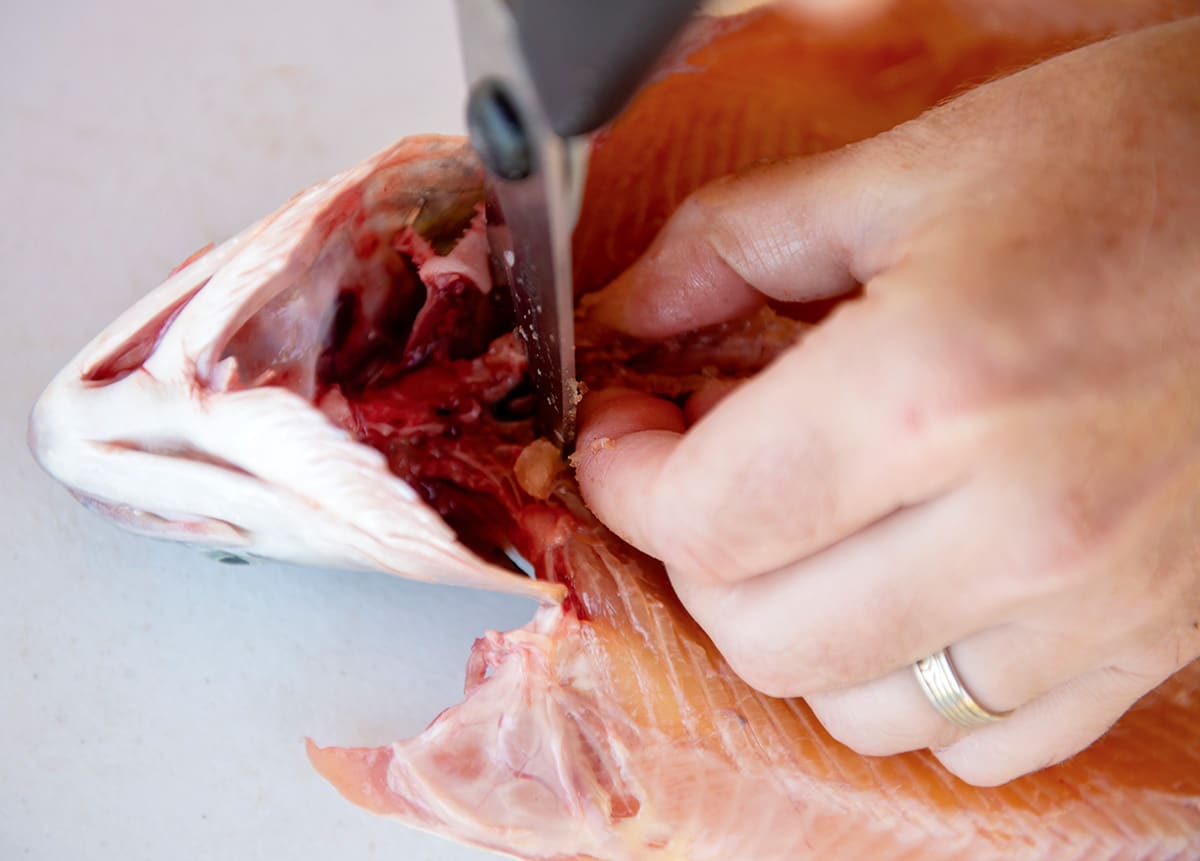
Use the knife to free the backbone from the meat. Be careful not to slice all the way up to the top of the fish and through the skin. When you get close to the fish’s head you will feel resistance: These are the fish’s pin bones.
(I have lots of recipes for trout and salmon here, for when you are ready to cook your butterflied fish.)
In trout, herring, sardines and mackerel, these pin bones are small and insignificant. Leave them, as you won’t even notice they are there once you cook the fish. In bass, bluegills, crappies, perch and rock cod, you will want to use needle-nosed pliers or pin bone tweezers to remove them. If you are splitting fish larger than 18 inches or so, you will need to remove pin bones.
Do this on both sides. You will be left with a fish lying flat and the backbone sticking up in the air.
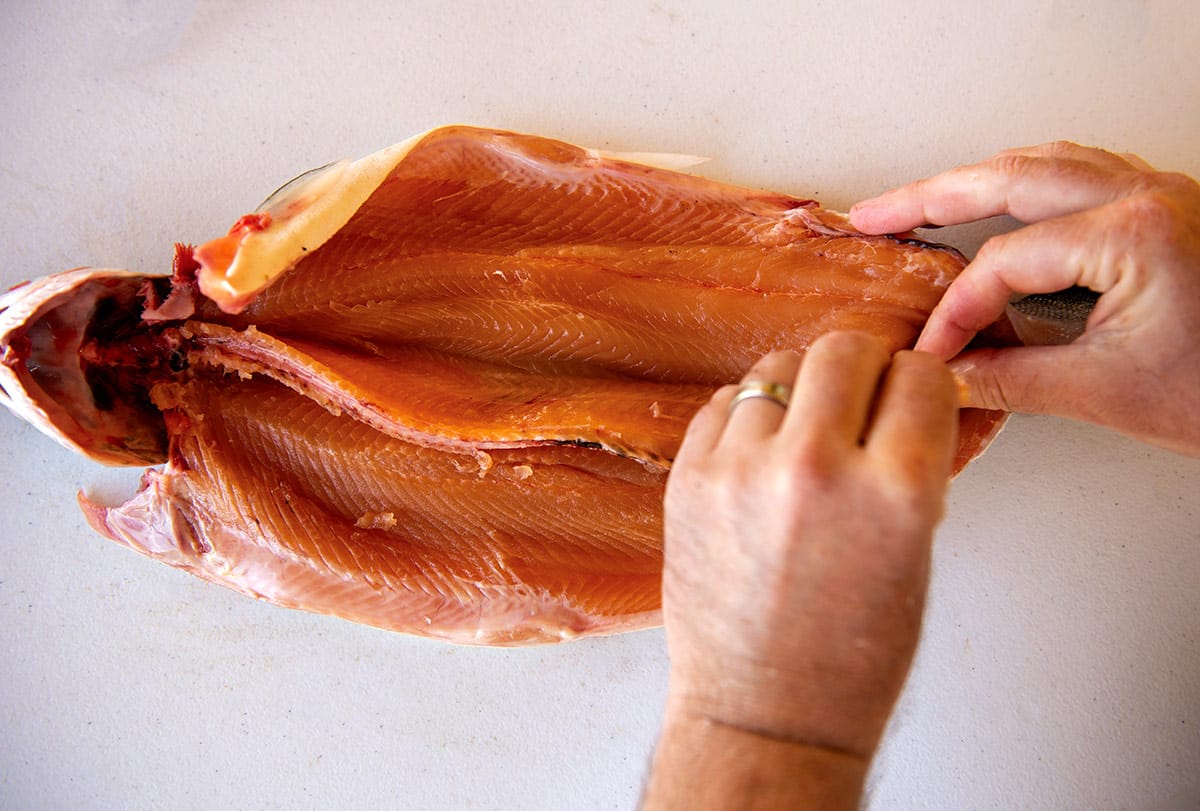
To remove the backbone, use one hand to anchor the fish where it meets the backbone; I start at the tail end of the fish. Use the other hand to gently pull it straight up. As it comes free, use your fingers to keep the fish flat and to preserve as much meat as you can. Gently work your way up towards the head and the backbone should come free.

You now have a fish perfect for stuffing. I like to sew stuffed fish shut, but toothpicks works just fine.

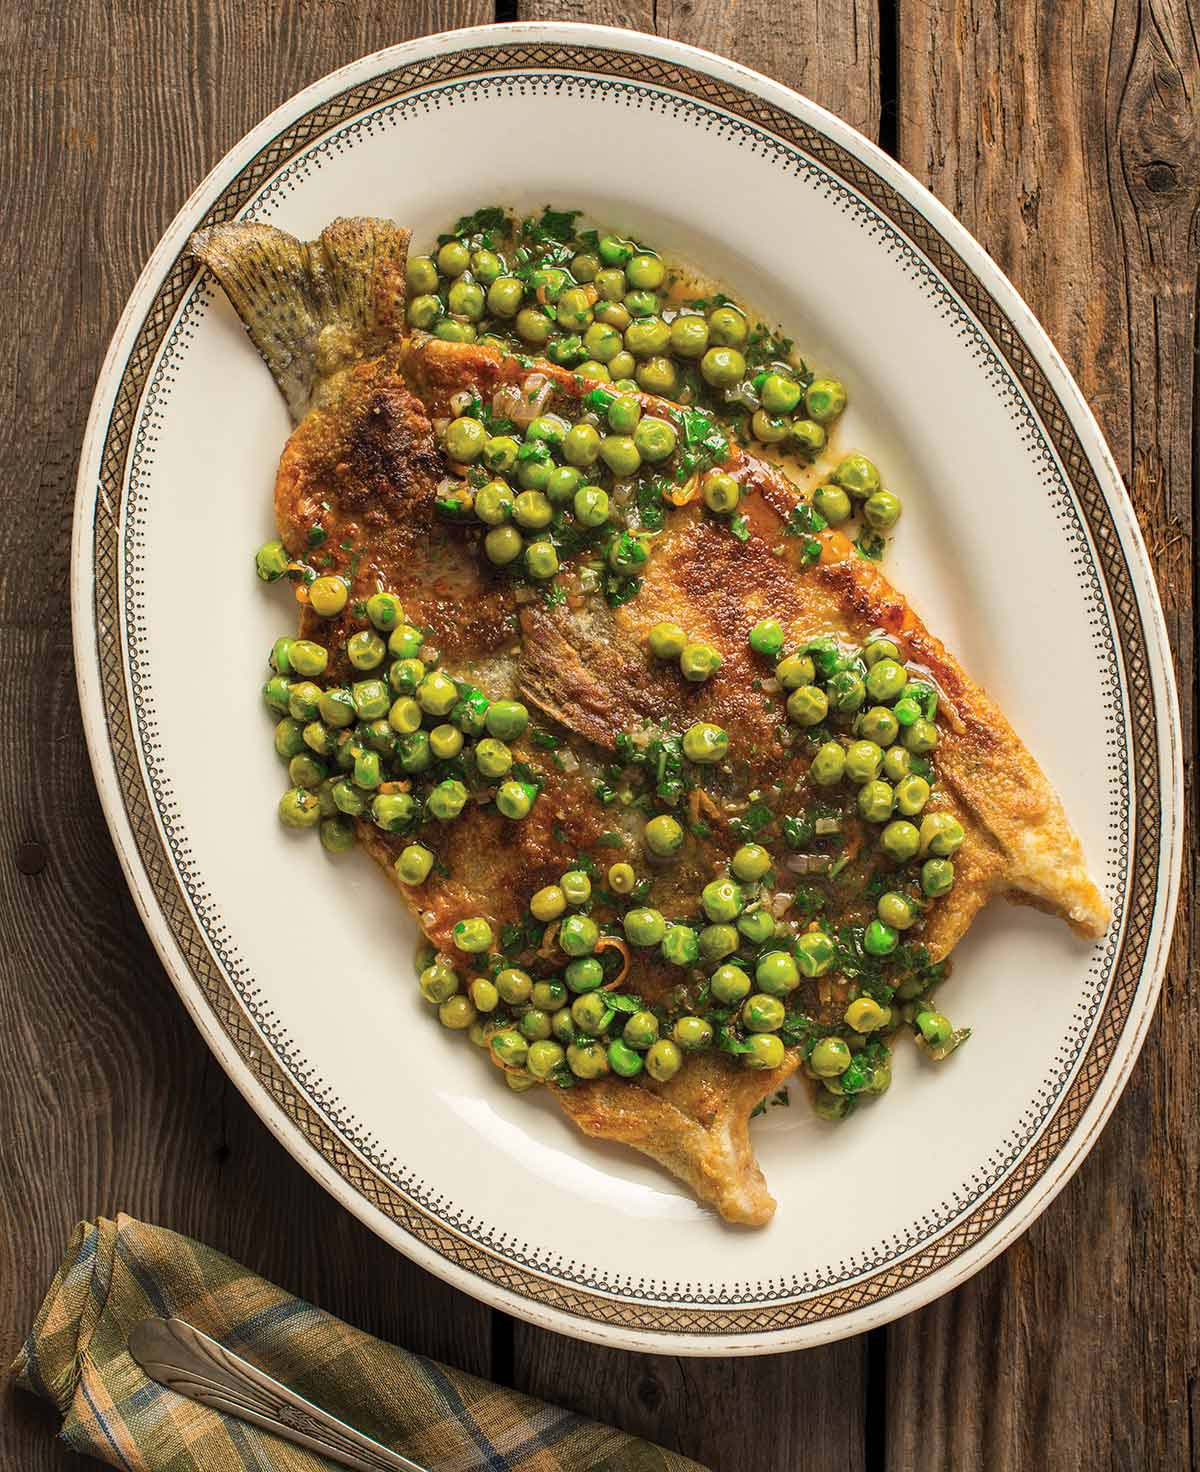
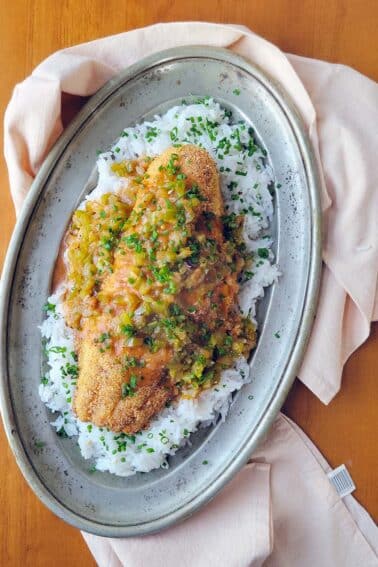
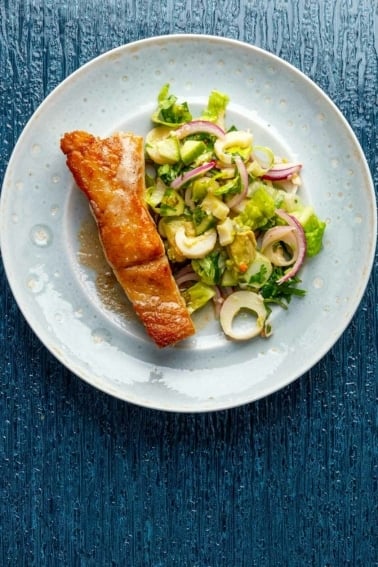
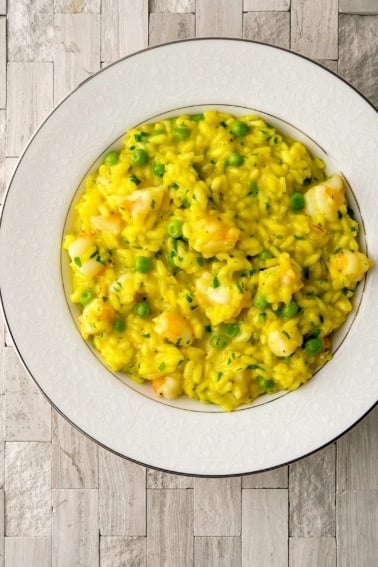
If you want to pan fry the fish instead, remove the rest of the backbone near the tail as well as the head so the fish lies perfectly flat. (That’s the photo at the top of this post, and the recipe is for fried trout with peas.
It takes a little practice, but once you get the hang of it, you can butterfly fish in about 3 to 5 minutes. Enjoy!

Hi, Hank! I’m not new to cooking, but I am new to fish cleaning, prepping, cooking, etc. I’m no dummy, but if you have the time, I’m sure several of us would greatly benefit from a video of you coaching us through the steps… I know I would! Thank you so much! I’m excited!
I would love to see this on video. Any possible chance for this visual learner?
Would this work with panfish, or should I just filet them as usual? I like the idea of having both sides intact. Is there video?
Sarah: I’ve never tried it with panfish.
Just reviewed your steps for butterflying a fish. Question- do you remove the dorsal fin and bones ?
Steven: I generally don’t bother, but you can if you want to.
I’ve been a trout fisherman for many, many years and you still offered some great points. Thank you.
VERY helpful, thanks!
Hi Hank
Just wondering if you have ever butterflied bluegill fillets? I catch some big bluegills and crappies but I’m afraid crappie might be too soft.
Thanks
Ken
For those who want the simplest, but not the most beautiful presentation, for trout and mackerel, these I have done frequently, scale, gut, and remove the gills, and wash the fish. Dry with some paper towels if frying, or if baking (my preference) , put fish on an aluminum foil lined baking sheet (makes clean up much easier) , and season the fish. I use just salt and some butter in the body cavity. I don’t see them up or skewer them closed. Bake the fish at 350 degrees for as long as needed (size of fish matters) so the meat is white and still moist. I then just peal back the top skin and remove the top filet cooked, then I remove the ribs and backbone, then plate the other filet! All the skins and heads get wrapped in the cooking foil and put in the freezer til trash day. It’s simple, but not sit down fancy with friends. Just good, skin and bone free eating! I really liked your blog though. It’s a better option for presentation and for cooking on a bar BQ grill! Thank you!
Alternate method I use with gilled and gutted fish (salmon and trout) is to remove the spine first. This allows easier access to remove the rib bones, which is typically where most most meat waste occurs.
I cut along the spine through the rib bones (from head to tail), keeping the knife angled so the point does not pierce the skin of the fishes back. Once you’ve done this on both sides of the spine, you can snip the spine at head and tail and it pops right out. Then, you can lay the fish wide open and remove the ribs-cutting from spine to belly instead of belly to spine. Even on larger fish you can see through the membrane that separates the body cavity from the bones/meat, so you can watch your knife point as you cut to make sure you don’t cut deeply into the filet.
This maximizes retention of belly meat, and belly meat is the best (highest concentration of fat).
To remove pin bones, lay the open fish meat side up on an inverted bowl. This caused the meat to pull back from the pin bones, exposing them so that you can pull them out with needle-nose pliers. Take care to pull the bones at the same angle they are protruding to minimize tearing the meat.
Sorry for the giant comment. LOVE your blog.
Great technique. I love to do this with trout and stuff with a combo of scallops, bacon and green onions. I think you should make a video of the technique and post it. I learned by watching a chef do this in a restaurant where I worked, but would have had a hard time with a written description. I think that means I’m left or right brained or something, or maybe just half. 🙂
This is awesome. I find all the bones in trout to be their biggest detriment but this looks pretty simple and easy to do.
Thanks for the excellent guide Hank
Jon: Either regular thread, or I just use toothpicks or a bamboo skewer.
Another great post Hank… I will be trying this! What do you usually stuff it with and do you just use regular thread to sew the fish back up?
Excellent series of images and how-to description. I’ve found deboning whole fish or game to be a very useful skill to cultivate, as it makes for some very visually impressive impressive dishes that are sure to make your dinner guests exclaim things like, “This looks so awesome! How did you get the bones out?” Perfect conversation fodder. great post…makes me want to go fishing right now!
Brady: That’s called “kiting” a fish, and I tend to do it more with larger fish like rock cod. It is great when you don’t want the head on the fish, but won’t work if you are butterflying to stuff it.
Interesting. When I butterfly my trout I start at the top and leave them connected at the belly. Much cleaner and easier to remove the backbone and ribs. Give it a try!