As an Amazon Associate I earn from qualifying purchases.
You can make an all-duck sausage. Any of you who make sausage know this is no small order. Duck fat is far lower in saturated fat than pork fat, and that low melting point makes its use in charcuterie tricky, to say the least.
But it can be done, if you emulsify the sausage. Emulsify? As in salad dressing or hollandaise? Exactly. Only emulsifying meat is a little harder than a hollandaise. Everything involved in the process must be super clean and super cold, colder even than with regular sausage. Oh, and you need a big food processor. And some dry milk doesn’t hurt, either. More on that later.
I’ve done this before, most successfully with my duck mortadella. Mortadella, incidentally, is what bologna dreams of becoming when it grows up. That sausage is dreamy, light, almost… fluffy. Holly and I ate several pounds within a matter of days.
I wanted this duck dog to be a “red” sausage, and to me that means paprika. Lots of paprika. I also planned to smoke these links cold, something I can do on a cool day with my smoker.
So as I got to work, I soon realized I needed to go a little further with my spices. So, more or less randomly, I chose to add some smoked paprika, marjoram, black pepper and garlic powder. Seemed like a good combination at the time.
In general, the process of making an emulsified sausage goes like this:
- Get everything together: casings, spices, salts, etc. Put equipment in the fridge or freezer.
- Chop meat and fat then partially freeze it so it can stiffen up. Grind it fine and put back in the freezer.
- Mix the meat with some ice cold liquid in a food processor. Hope like hell the emulsion holds.
- Stuff into casings, poach gently to set. Smoke for a few hours if you want.
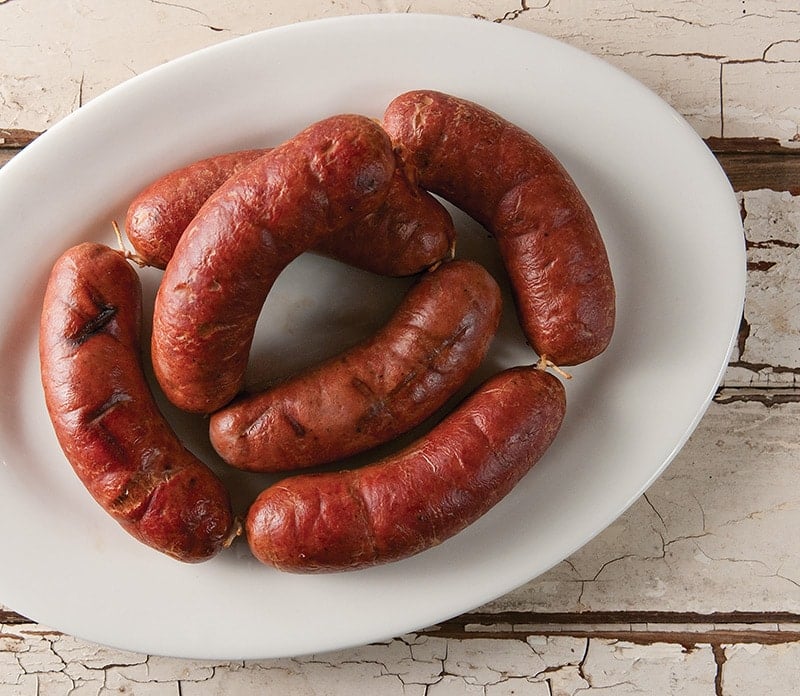
If all goes well, and this time it did, you get a sausage with a very smooth texture that is light yet rich. Ideally, it isn’t too smoky or too heavily spiced. And when you take a bite, it tastes like what you want it to — only in this case I wasn’t totally certain what it would taste like.

So I had to laugh when I took that first bite. It was indeed a hot dog. No getting around it. I rushed over to my charcuterie books and looked up their hot dog recipes. And of course I saw garlic powder, paprika, marjoram, pepper and, usually, nutmeg or coriander. Damn. Reinvented the wheel again.
You do need some special equipment to make this recipe. Gather together:
- A sausage grinder; I use a Weston grinder, but there are many good ones on the market.
- A stuffer (do NOT use the Kitchenaid stuffer, it’s terrible); I use a sausage stuffer from LEM.
- Casings. Traditionally hot dogs are made with sheep casings, but I used regular hog casings, which you can buy in most butcher shops or online.
- You will also need Instacure No. 1, which is sodium nitrite. You need this for color, flavor — and to protect yourself from bacteria. You are smoking the sausages at a very low temperature, a temperature bacteria just love. If you skip the Instacure, you increase your risk of food poisoning, and you will not be making a hot dog. It will look and taste very different, so be forewarned.
- A smoker. I smoked these links over oak, but any hardwood would be fine. I use a Traeger, but there are many good ones out there.
- Duck fat. You need 1/4 pound of duck fat to make this recipe. I rendered my own wild duck fat, but you can buy it in specialty supermarkets or online.
- Dry milk. This really helps your emulsion. The dry milk absorbs water and will make an emulsion more stable.
Phew! Ready now? OK, get all your meat, fat and equipment clean and cold before you start.
New to making sausage? You can find my detailed tutorial on how to make sausages at home here.
Duck Hot Dogs
Ingredients
- 1 1/2 pounds duck or goose meat
- 1/2 pound duck or goose skin
- 1/4 pound rendered duck or goose fat (start with it frozen)
- 18 grams kosher salt, about a tablespoon
- 35 grams dry milk, about 1/2 cup
- 1/2 teaspoon Instacure No. 1
- 1/2 teaspoon black pepper
- 1 teaspoon garlic powder
- 1/2 teaspoon smoked paprika
- 1 teaspoon dried marjoram
- 1 tablespoon sweet paprika
- A scant 1/2 cup ice water
Instructions
- Soak your casings in a bowl of warm water. When they are soft, run water through them to check for leaks.
- Chop the meat into pieces small enough to grind. Set the meat in the fridge. Chop the skin into small pieces, about 1/2 inch each. Set it in the freezer. When the skins are stiff but not rock hard, about 1 hour, grind them through the fine die of your grinder. Do the same for the meat. Check the temperature: If the meat and skin is anywhere below 35°F, you can proceed. If not, put it in the freezer until it gets cold enough.
- You will now need to work fast, so have everything ready. When the meat and skin is between 28 to 32°F, put it into a food processor along with 1/2 of the ice water. Buzz it to emulsify, about 30 seconds to 1 minute. Add everything else to the food processor and emulsify that, which will take a minute or two. (If your food processor is not big enough to handle this job, you will need to split everything into two batches evenly. Keep the second batch of meat, skins and fat in the freezer while you work with the first batch.)
- Put the mixture into the sausage stuffer, which you've been keeping in the fridge. Put the stuffer, now filled with your sausage, back into the fridge as you clean up. Take the stuffer out and stuff your casings.
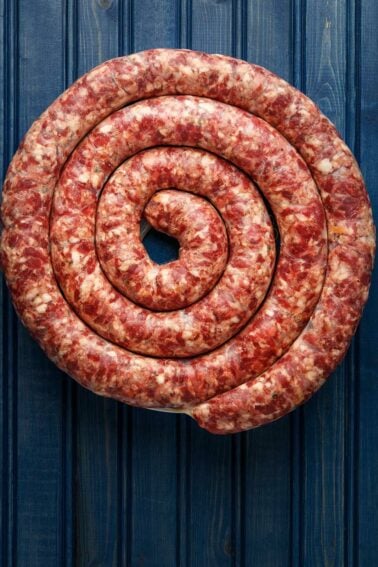
- Tie off links at whatever interval you want; I used hog casings here, and I made the links about 5-6 inches each. (This video shows how I make links.) It is important to tie off your links with kitchen string, even if you normally twist off your links. The string prevents the links from unraveling when you poach them.
- When all the links are tied, hang in a cool place while you get a big pot of water hot. As the water is heating, prick any air bubbles in the links with a pin or needle that you've sterilized in the stovetop's flame. When the water reaches 170 to 175°F -- this is below a simmer -- gently put the sausages in and poach for 25 minutes. Be careful to not let the water temperature get past 178°F, or the links can burst.
- As the links are poaching, get an ice water bath ready. When 25 minutes are up, shock the sausages in ice water for 5 minutes.
- Smoke over oak, applewood, etc. for 3-5 hours. It is important that your smoker be as cool as possible. I turn my Bradley smoker on, but leave the heater off. Once the links are smoked, let them cool on a rack for a couple hours, and then overnight in the fridge before you seal and freeze them. They will last 7-10 days in the fridge or indefinitely once sealed and frozen.
Nutrition
Nutrition information is automatically calculated, so should only be used as an approximation.

could you do something like this with venison?
Miguel: Yes, but with pork fat.
If you don’t have duck fat or skin can you substitue 50/50 meat mixture of waterfowl & pork?
Got any duck fat left? Duck Dogs deep-fried in duck fat.
Love the recipe and your site. There’s no better use for duck fat than duck or pork confit. Keep up the great work
I made these last weekend and they are simply delicious! A few comments:
I didn’t have duck skin, (~shame!~) as I now realize that I am throwing away too many good things when I simply breast out my birds and prepare them for the freezer. This shall never happen again! I can only thank Hank for opening my eyes and beg his forgiveness for past sins. Anyway, i just substituted chicken skin. this worked just fine.
I live in Northeastern Ohio and we had a fantastic duck and goose season this past year. As is typical, more than half my bag was Mallards, but i have many teal, black duck, widgeon and wood duck in the freezer as well (and a good number of Canada geese). Anyway, long story short, despite Peter Arnold’s protestations, these dogs are made of mallard (and proud of it!)
Living where I do, i was able to worry less about keeping food and equipment cold. I set up a clean table in my garage with the doors open and left my grinder, stuffer, assorted bowls and trays and food processor outside overnight. I started with very cold meat, skin and fat. I could go through the whole process without having to stop and re chill. The ambient temperature while working was about 28 degrees. I was a little cold, but it really doesn’t take long once you have your mise en place.
I smoked the dogs in a master-built smoker over apple wood at 125 degrees for 3 hours. I had the apple wood smoking for about 1 hour of that time.
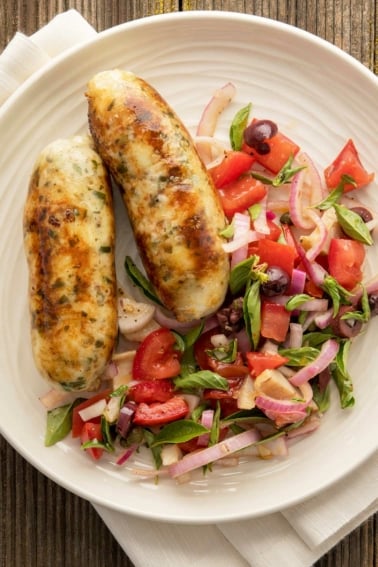
I rested the dogs for 24 hours in the refrigerator and grilled a couple the next day. they were rich, light and amazingly full of flavor! the only thing (besides the chicken skin ~shame!~ ) that I changed in the recipe was to add a touch of onion powder.
I will be making these dogs every year from now on. They really are wonderful!
Thanks Hank!
Man those really look good. Maybe next season those hoodies & buffles might land on my plate like that.
2peasandapot: If you season pre-grind you get a better distribution of seasoning in the meat. If you season post-grind, you run the risk of having clumps of seasoning here and there. It rarely happens, but it’s a risk. Generally I only season-then-grind when I am doing a batch at once. If I am holding the meat for any reason, I season after grinding. Reason: Seasoned meat has salt in it, and that salt will draw out moisture if you hold the meat in the fridge for any length of time.
These look truly awesome. While I can’t hunt in New York City (though sometimes I’d like to), I can certainly buy the stuff. We actually have a bunch of duck fat sitting around from batches of pate etc. Smoking is also, sadly, an urban restriction, but I’m sure they’d be great fried up. One q: is there a difference between seasoning pre-grind vs. post grind?
And I just finished making bratwurst with the rest of the pork and venison…. man, no goose this past season but thanks for the recipe, Hank! It gives me even more impetus to get a few geese next season.
FAbulous recipe, Hank. When I was doing the goose meatballs I had an idea that they would do that if I let them go a little longer in the food processor. I am now terribly sorry I threw out all that goose skin… of course hotdogs use everything. I do look forward to trying these.
About the kitchenaid. It is difficult to use…. made a huge mistake of trying the small nozzle. The casings were too wide so it was such a mess… skinny little stream of meat — squeezing and squeezing. Much better with the larger nozzle but still… not the best. You’d think they would put more thought into their attachments (sold the ice cream attachment on Ebay… HATED IT)
These look incredible, wow!!! 🙂
I hunt along the Bay, because I live in Redwood City. From pulling out and hitching the boat up to having deeks in the water takes me, at the most, all of 50 minutes. What can I say? I am pretty lazy when it comes to driving hours to get cleaner eating birds. I love my duck sausage! But… I finally made it out to Los Banos this year and got a nice strap of greenwings. Plucked and checked out the “Pope’s Nose”. Holy moly! There was almost as much fat on one teal as a drake greenhead I took down early in the season. And it was so clear. Took it home and rendered it all down. When I dipped my finger and got my first taste… Well, it was happiness and nothing else. Now I have a nice mason jar full of duck fat with which you know will be flavoring my morning potatoes. Hank, thanks for the post on rendering, and reaffirming the use of every possible part of the animal.
And totally off topic, would you be interested in keeping bees? I have several hives, and as a forager/hunter/gardener, I can’t see living without all that honey ever again. Just another feather in the cap! If so, give me a shout and I would be more than willing to help you get started.
Todd
I once had some Churro lamb and made hotdogs with that. The dog, some Dijon mustard and cole slaw. That’s a meal!
Peter: You can be assured that no pintails, wigeon or mallards were harmed in the making of these sausages… 😉
I just hope the duck meat was the likes of scoters, goldeneye, bufflehead, maybe the occasional merganser, and not rice fed birds from the valley. Otherwise what a sacrilege to make hot dogs out of ambrosia, don’t you agree?