As an Amazon Associate I earn from qualifying purchases.
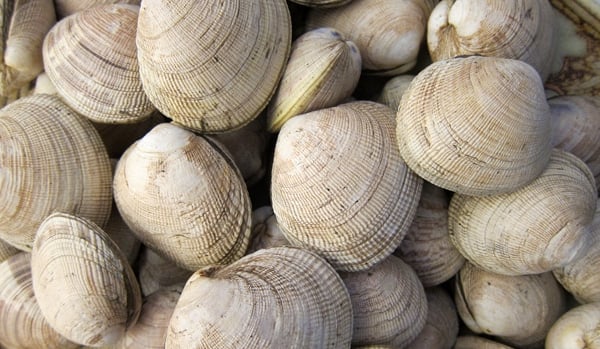
There is a library’s worth of bad information out there about how to purge sand from clams, ranging from mythical to downright scary. Hopefully I can set the record straight. Here’s what you need to know to get the grit out of your clams.
Let me start by saying that the vast majority of clams, mussels and oysters you buy in the market have been purged already. You will almost never need to purge your clams if you bought them at a supermarket. The exception is if you buy from a small purveyor, and in that case just ask: Have you purged your clams?
Wild clams and mussels are an entirely different story.
They should always be purged, clams especially. Different clams need different purging times, too, depending on how and where they live. Hard shell clams in clean sand, like Eastern surf clams, cockles and quahogs, tend to be easier to purge than open-shelled clams like steamers, horseneck clams and geoducks. The worst of them all is the Western bent-nosed clam, which lives in dense mud and can take days to purge.
Adding corn meal to the purging water does nothing. There, I said it. Think about the biology of a clam for a moment to understand why. Clams are filter feeders. The reason they have sand and grit in them is because they live buried in sand or mud. This proximity to grit naturally gets the stuff into the clams, which filter with their shells partially open — which is how the sand or mud gets in. Clams filter microscopic particles, not stones or grains of sand — or corn meal. Clams don’t have gizzards. They don’t need grit to do their jobs. Grit in your shell is just a side effect of being a clam.
The myth is that corn meal somehow causes a clam to “cough up” more grit than it normally would, or that the clam “eats” the corn meal and spits out grit. Well, to test that I did an experiment:
- First, I let 50 Western littleneck clams purge themselves for 18 hours in seawater. They expelled about 47 grams of grit (weighed after drying) after about 18 hours.
- Next, I added exactly 150 grams of coarse corn meal to the purging water and let another 50 Western littleneck clams purge themselves for 18 hours. After that, I carefully removed the clams, poured off the water and spread the corn meal out on a baking sheet to dry completely. Then I weighed it again. The corn meal plus grit weighed 196 grams. You would think that if clams had “eaten” the cornmeal, there would be a decrease in the dry weight of the meal after 18 hours, no?
If you were to bury clams in cornmeal, yes, some would get inside them the way sand does in the wild. But why bother?
Purging clams is mostly a function of time, with oxygen and temperature as ancillary factors.
The single most important ingredient you need to purge your clams of grit is seawater. This is not so hard to obtain if you are getting your own clams. Bring a 5-gallon bucket and fill it 2/3 of the way up with seawater as you leave the clamming grounds. Armed with this, you can purge virtually any clam. Oh, by the way, you cannot purge a clam in fresh water. Fresh water kills clams. And dead clams are, with few exceptions, no good to eat.
Why is bringing home seawater so important? Because clams live at different salinity levels. The average salinity of the ocean is 35 parts of salt per 1000, but in some wide, shallow clam beds the salinity climbs far higher through evaporation. In other beds, the salinity is lower because the clams are near an estuary where fresh water flows. If you bring seawater from where you dug the clams, you need not guess at how salty your soaking water should be.
If for some reason you forgot to bring back seawater, you can recreate it decently by remembering that 35 parts per thousand ratio. Go buy sea salt — actual sea salt, not rock salt, not iodized salt — and dissolve 35 grams of it (about 2 tablespoons plus another teaspoon) into each 1000 grams of non-chlorinated water, which is about 1 liter. You’ll need enough to submerge your clams.
If you want to get fancier, you can use a hydrometer, which measures water density. Where I do a lot of my clamming in Tomales Bay, the average salinity would read 1.024 in terms of specific gravity. This equated to 1/3 cup finely cut sea salt to a half-gallon of non-chlorinated water. Chlorine, needless to say, is not good for living things. What’s your area’s normal salinity? Google it. I bet some scientist somewhere has measured the salinity where you dig clams and put it online.
Temperature matters. Shock kills clams. Put clams living in 75°F water into the fridge and they will not be happy — and open-shelled clams will die. The reverse is also true.
Carry your clams home in your seawater and they’ll be fine. They will acclimate to the changing temperature as you drive home. If it’s really hot or cold out, put everything in a cooler. Keep in mind that clams are capable of filter feeding at temperatures as low as 34.5°F and as high as at least 78°F, which is realistically as warm as you will get in a normal indoor room.
If you’re clamming in winter, where the water is cold, go ahead and do your purge sand from clams in the fridge. But if it’s summer, keep your clams at room temperature, or, ideally, a place a bit colder, like a basement.
How long? Even an hour will help. But you can purge your clams as long as there is oxygen in your seawater. Leave your clams too long, and they suffocate and die. Overnight is what I normally do with a 50-clam limit of Western littlenecks and 4 to 10 horseneck or Washington clams. I submerge the clams by about 1 1/2 to 3 inches of seawater and cover the container they’re in — clams spit water, so you don’t want them sprinkling the inside of your fridge or basement.
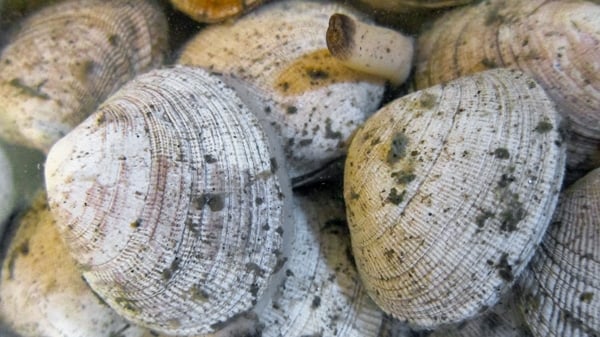
So, to sum up, this is how I purge sand from clams:
- When you are done digging, fill a large bucket full of seawater to take home. Put your clams in it for the drive. If the temperature is very different between the water and your car, put everything in a cooler.
- At home, quickly wash every clam under cold tap water to remove mud or grit on the outside of the shell. Put the clams into a large non-reactive container (galvanized steel will kill them, for example). I use a big Tupperware-style container.
- Either let the seawater you brought home settle for 20 minutes or so, or filter it through a paper towel. You want it as grit-free as possible. Pour the water over the clams, covering by 1 to 3 inches. If you are purging especially muddy clams, hold back any remaining seawater — you’ll need to change it in a day.
- Set the clams in the fridge, at room temperature or in a cool place — somewhere where the temperature is reasonably close to the water they were in — and leave for at least an hour, and up to 20 hours. Check on them once in a while: Most of them should have their siphons out. You will see a lot of icky stuff all over the bottom of the container. Repeat this process for especially muddy clams.
- When you are ready, rinse the clams again. Hard-shelled clams can go into the fridge. Open-shelled clams need to be eaten or shucked.
There you have it. Now you are ready for some tasty clam recipes!






I live on the East Coast and we have access to some pretty large and lovely quahogs. I’ve been told that the best and easiest way to get the sand out of these delicacies is to place them live in a mesh bag and hang them off a dock submerged in the salt water for a day or so. Based on all the other advice I’ve read online, this sounds like it would do the trick. Thoughts?
Mike: That would work for sure!
third line should be with clam liquid , not water
Hi Hank, Been clamming. Saved the clams in a vented bucket while continuing. Brought them home in a dry bucket, put in fridge. When cold and easy to open ,shucked them into container with liquid. I kept the whole clams off of the bottom but in the liquid loosely. I change the container with water a few times, each time sand was on the bottom. Two or three times there was very little debris on bottom. I took each clam and cut off a large part of the black bag , discarded, , placing results in clam shucked liquid. Checked the bottom after all done and drained. Maybe a small piece of grit. Cut foot , in a few pieces, used ribbons with aducter muscles. Great for linguini , ( or spirals) with white clam.. 4doz clams ( mostly cherrys) and lb linguini good dinner.-
Hello Hank,
Thanks for sharing your wisdom and knowledge! You mention either 35 grams of salt or about 2 Tablespoons and one teaspoon. I measured out two Tablespoons and one teaspoon using a digital scale. It equals 3.7 grams on a digital scale. Was 35 grams a typo for 3.5 grams?
Carl: I think you might have misread something. I just remeasured and got the same result with Diamond crystal salt.
We just had clams, harvested and soaked in sea water to puge them for 24 hrs with a water change half way. Is there a time to leave out of the sea water after purging? I gave them a quick scrub under a running tap to get any excess sand and limpetts off and cooked straight waya and they were too salty, like eating sea water. Do they expell the sea water after a time out? They were grit free at least.
Mark: Nope, clams are salty. They never expel seawater to my knowledge.
Help Tip
If you’re a recreational digger such as myself.
We are allowed to dig a peck per day in my town.
After digging I transfer the soft-shell clams from my peck basket to mesh onion bags.
I rinse them in the bags several times before leaving the area.
I place the onion bags full of clams in a cooler, covering them with the brackish water from their area.
Once home I place them on a cool surface, out of the sun, usually in the garage.
I place a bubbler stone in the cooler connected to a small fish tank air pump.
I have had some fantastic results, until recently, when not allowing enough time to purge.
I would tend to leave the clams in the onion bags. If left for a couple days all is usually good.
Next dig, I am going to let them sit in the bags for a short while and then pour off the water into a bucket removing the bags and rinsing out the cooler. place the water back in the cooler and place the clams back in removing them from the onion bags so that all have the same spacing. I think it will provide the results I’m used to even if only overnight. I don’t like seeing friends, family, or myself eating gritty clams.
I also suggest rinsing in cold tap water just before going into the steamer.
Thanks for the info on cleaning clams.
Hey!
We just got a bunch of Purple Varnish clams from the Oregon coast. We brought seawater home. Wondering if they’re ok in there for 2 days? How do we know if they’re dead? Our guide said to purge for 3 days… is that too much?
Megan: Three days is a long time. You know if they are dead if they don’t move. Look at them in the water. They should gape slightly and move a little when you pick them up. If they are tightly closed, they might still be alive. Put them in the fridge, and, after an hour or three, they should gape. Take them out and put them on the counter. As they warm up, they should move a little. If you’ve done these things and they don’t move, they are probably dead. A gaping clam that doesn’t move at all is definitely dead.
Hank, you seem to be saying that the sand/grit in the clams is not siphoned into the digestive system but instead enters into the opening between the two shells presumably by water movement and the normal opening and closing of the shells. If I have that
right, I’m not understanding why purging removes the sand. Why doesn’t the sand just sit
where it is.
Another question, I notice that my clams often have black gunk in what I guess is their stomachs. Would the purging method you describe flush that out of the digestive system?
Yes , when I purge them they still have that black sandy stuff in their stomach. How do you get rid of ?
Adam
Adam: You don’t. It’s part of eating clams. There should be no grit in the black stuff if you purge long enough, but the black matter is always there.
Thank you so much for your advice to purge the clams in saltwater. I live on Martha’s Vineyard and am a recent clammer in the Lagoon. Plenty of them here. The first time I was advised to keep them in cold tap water in the fridge. After I washed and cooked them they were full of sand. We crunched our way through them. This time I looked up for a better advice and found you. I soaked them in seawater and they purged. Not a speck of sand! Thank you.
I purchased 75 clams that were frozen I thought them and put them in salted water to purge per your instructions took them out of the water and let them sit for a little bit and they will not close does that mean they are not good I’m having a clambake today! Please help?
Robyn: They are dead. Freezing kills clams. But if you bought them they should have been purged already. All this said, I have never ever heard of anyone selling frozen clams in the shell.
Hi,
We’re clamming in Gardiner’s Bay in Long Island. Can I leave clams in the basket in the bay overnight? I can secure them to a float. Thanks!!
Keary
Keary: I don’t see why not. Go for it.
Hi Hank,
Read your comments regarding using DIY ocean sea water. Followed your instructions. Let the cherrystones sit covered the DIY water and placed them, uncovered, in the ref for 6 hours. I’m an expat Rhode Islander living in Phoenix. Got these clams at Whole Foods. They are from Long Island and generally very dirty. When I removed them from the ref you could see residue from the clams. When opened they were spotless!. My only question is, there was slim everywhere. What is the that from??
Many thanks!
Geoffrey: Clams exude mucus naturally. I just rinse it off
I made the water salt mixture you suggested with fresh filtered tap water. Since the little neck clams arrived from NY fish market on ice I had the water prepared and in the fridge.
I haven’t seen them siphon yet though. After I dumped out the overnight water I added more. It’s been 24 hours now. Should I take them out of the fridge ? Is it possibly to cold ?
Thanks great site.
Dale: yes, take them out. 24 hours is good enough.
For years, like 20+ years, I have been adding a air pump from a fish tank and them keep them in a cool place. There are a couple of things you have to pay attention to or you can have a mess. These things are cover, do not seal, the bucket so when the clams squirt it does not soak the floor or empty the bucket and you should check them the first thing in the morning. I have never had any sand or mud in any of my clams.
I actually do not know how long you can l can leave them with the air in the bucket, but I have kept them up to 5 day alive this way. At this point the only things that I know you have to worry about is salinity and the amount of air needed for the quantity of clams.
I have also kept live crab for 4 days this way, but I normally an ice chest because it hold more water. You still need to keep the lid from closing or you will cut of there air supply. Somebody did that to me once they closed the lit and when I went out to cook in the morning they were dead because they air supply was cut out. It pissed me off, but the only thing good thing is I only had 3 left.
Takes only 15 minutes to purge clams of sand if sliced chili pepper is put in the water.
Thanks for this information I found it very helpful to have the cornmeal method dispelled. I have noticed spots in northern Manitoba and Ontario, Canada where I fish for Northern Pike and Smallmouth Bass, where large amounts of “clams” (actually freshwater mussels) in freshwater lakes are begging to be harvested. I do not know anyone that eats these. Any suggestions would be welcomed?
Hi Hank, thanks for the info on this site. I foraged some clams from the beach and have been letting then purge in seawater for a couple of days, changing it for new seawater everyday. Noticed that a couple of clams died overnight – not sure if it was the temperature of water or room or if I had too many in the bowl – thoughts on that? Also are the rest of the clams still ok to eat or would the dead clams have contaminated the water? There were quite few that appear to be alive and others that had shell closed so it was hard to tell with those ones
Lyna: The rest of the clams should be good. Get them out of the water now. Two days is plenty! Cook them within a day. They can hang out in a plastic bin with the lid off for a day if need be.
Why might keeping clams in their seawater in the fridge (changed out once a day) not keep them alive for a while?
Michael: It would, if you change the water. Most people aren’t able to do that.
Hi there
My name is leon and I live in bodega and just got a bunch of clams I’m wondering if I hung my clams suspended off my dock in a mesh bag how long can i leave them there and I would think that would be a excellent way to purge them?
Leon: It might work. But you also have to consider things getting your clams, as well as the water quality where your dock is. If the water around the dock is compromised, you could get sick.
That’s how we did it at the oyster farm works well if you’re by the ocean. They’ll keep for weeks. I live inland now, so I have another problem. Lolol
Are mussels purged the same way as clams?
Hey Hank, do you have any recommended spots for clamming for littlenecks in Tomales or Bodega Bay? Was reading online about Lawson’s Landing but went there today. No pebbly/rocky soil in sight (which is where I should be looking, as I understand). Dug around the exposed silt for about 1.5 hours and only found 4 keepers.
Nikhil: I don’t, sorry. They are around, here and there, though.
Did you ever hear the meme about putting the clams in an aluminum pot, cover with sea water then toss in a couple of galvanized nails (not common nails–needs the zinc). The galvanic action is supposed to irritate them and cause them to purge.