As an Amazon Associate I earn from qualifying purchases.

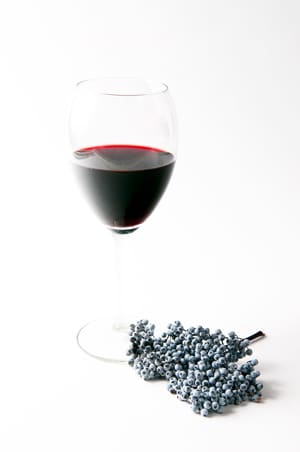
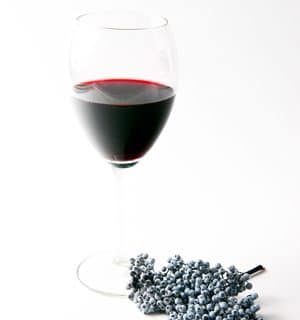
Elderberry wine, made correctly, is every bit as good as wine made from its cousin the grape. Aged, oaked and mellowed, wine from elderberries bears a close resemblance to some of the huskier, more brooding red grape wines; Mourvedre and Petit Verdot spring to mind. Elderberry wine is a wonderful drink when the weather turns cold and you find yourself in front of a fire with friends and food.
Even so, for years I have hesitated to write about elderberry wine on this site. It’s not because what I do is some sort of secret, it’s because what I do involves a lot more time and technical tinkering than almost every other fruit wine recipe I’ve ever read. I make wine pretty close to the way professional winemakers do — I have to, in a state full of grape snobs. It’s a method more science than art.
Balance is what I seek. A fine wine has acidity, alcohol and tannin all in proper proportion. One the prime problems in fruit wines is lack of balance. Some fruits are too acidic. Some too sweet. A few are too tannic. Grapes are the fruit closest to achieving perfection all on their own, which is why they “won” in the great winemaking game of life.
Elderberries, as it happens, come very close to this as well. They have excellent tannin levels, wonderful color, and reasonable amounts of sugar and acid. All you need to do is adjust these levels and you are on your way to making a wonderful wine. As you read these instructions, keep in mind that this method also works with other fruits. Other good wine fruits include: plums, blueberries, blackberries, huckleberries, apples and pears.
Oh, and for the record, I make elderberry wine only from the Western blue elderberry, Sambucus mexicana. You can also use the Eastern blue elderberry, S. nigra. Do not make wine from red elderberries.

Picking Elderberries
It all begins in the field. You want to pick elderberries that are at their peak of ripeness. How do you know when that is? For starters, the elderberry season runs from July to early October, depending on where you are. Within that period, you will get some bushes ripening before others, and even on the same bush you’ll have some clusters riper than the ones next to it.
Look for a cluster that is fully ripe — no green berries — and whose stem has turned pink. If you want to get extra picky, only choose those clusters that already have a few elderberry raisins on them: These will be the ripest.
I snip off the whole cluster with shears and put them in paper grocery bags. At home, I strip the berries from the clusters by hand. A lot of people prefer to freeze the fruit before stripping the berries. This does make the process, which can be tedious, a lot faster, but you absolutely must thaw only a few clusters at a time. Once thawed, the berries get mushy. Pre-freezing also takes up a lot of space, which I don’t have. But either method works fine.
Crushing Elderberries
Now you need to juice or crush your fruit. I normally do this in a clean five-gallon bucket. You can do it all by hand, or crush it with a potato masher, a blender, or your very clean feet (watch out, though, elderberries will stain your skin for days), or even a blender.
Be careful with blenders or food processors, though, as you will want to avoid crushing too many seeds. Seeds contain bitter elements that can overwhelm your wine. Crush just enough to get broken-up fruit.
Elderberries are not pectin-rich, but many fruits do contain a lot of pectin. Pectin is great for setting jam, but not for wine. To prevent your wine from jelling, buy pectic enzyme for these fruits. The enzyme eats up the pectin, and using it also extracts more flavor and color from the fruit skins. Fruits high in pectin include citrus, blackberries, apples, cranberries, gooseberries, and plums. Other low-pectin fruits include apricots, blueberries, cherries, elderberries, peaches, pears, raspberries, and strawberries.
Once you have crushed your fruit, you will need to add water for volume. My recipe below is for 3 gallons, which is a good starter volume. Three gallons makes 15 bottles. For experienced winemakers, 5 gallons is better. Once you have added water, it is time to break out your hydrometer and acid test kit.
Mix the juice and water and pour a little into your hydrometer’s test tube. Drop the hydrometer into the tube and read the scale. Most hydrometers have several ways to measure sugar levels on them, and I prefer Brix (pronounced “bricks”), which is the scale professional winemakers use. An ideal red grape juice being made into wine will have a Brix rating of about 24.5; an ideal white grape juice is about 22.5. You want your sugar levels above 20 and below 28 Brix.
Sugaring Elderberry Wine
It is not likely that your elderberries will be in this window. “Fixing” your juice requires some math. The following formula is adapted from one I found in the excellent book, The Way to Make Wine.
(Target Brix – Initial Brix reading) x 0.125 x gallons of juice = pounds of sugar to add
Let’s say you have crushed 12 pounds of elderberries and added water up to the 3-gallon mark. You check the sugar level, and it comes out to 17 Brix. You want it higher, around 24 Brix, meaning the difference between your target and your initial Brix is 7 points. Following the formula, you multiply 7 x 0.125 x 3, meaning and you find you need about 2.6 pounds of sugar to hit your target. Easy, right?
Not so fast. Sugar acts weird, so once you have determined your target sugar levels, dissolve the amount you think you need in a little water and add in four batches. After each batch, stir the juice, wait 5 minutes or so, and take another reading. Keep adding until you are within 1 to 2 Brix of your target. A rule of thumb is to shoot low with fruit wines, and here’s why: They will often pick up sugar overnight, so your initial Brix reading can be artificially low.
Temperature adds another wrinkle. Your Brix reading will be skewed if your juice is really cold or warm. Hydrometers assume your juice is 60°F. If the juice is instead, say 45°F, you need to subtract a half-Brix from what your hydrometer reads. If your juice is 75°F, you need to add about a half-Brix. You don’t need to alter the temperature of your wine to do the hydrometer test, but you do need to know it.

Checking Acidity
Phew. OK, now you have enough sugar to ferment a wine with roughly 12 to 14.5 percent alcohol, – perfect for table wines. But what about this crazy acid thing?
The acid test confirms that your juice has enough acid to withstand aging without going bad. Acid also makes the drink taste bright, not dull. There are several ways to measure total acidity. I use a test kit where you take some juice, put a few drops of one chemical in it, then add another chemical drop by drop until the juice changes color. The number of drops you use of the second chemical corresponds to the total acidity of the juice.
Fruit wines can be all over the map on acidity. You want the total acidity (TA) to be between 6 and 10 grams per liter. In most cases, you will need to add tartaric acid, although blackberries, blueberries, cherries, cranberries, plums, and strawberries are generally high enough in acid already.
Always test your acidity, even with high-acid fruits. You might not need to adjust it, but it is good information to know. If you find your acidity is too low, use this formula: To increase the TA by 1 gram per liter, add 4 grams of tartaric acid for every gallon — yeah, I know I just gave you a formula in both metric and English measurements. Sue me. Always recheck your TA after each 4-gram batch you add, so that you don’t add too much.
Too much acidity makes an unpleasantly tart wine. More water and sugar will offset this.
Still with me? Just remember, this is the hard part. Do this and you’ve gone a long way toward making a drinkable, age-able elderberry wine that has the potential to age well – and this , which is a helluva lot more than many fruit winemakers can say.
Now, ready for the yeast? Hold your horses. First, I advise adding into the juice a pinch – less than 1 gram — of K-meta, potassium metabisulfite. This is your insurance that wild yeasts will not jump on your sweet, lovely juice until you are ready to add the good yeast. Simply sprinkle it on and stir the juice.
Cold Soaking Elderberry Wine
This next part is optional. I recommend “cold soaking” your elderberry wine for up to 3 days. It extracts more color and body from the skins of the fruit, and is an excellent choice when working with blueberries, huckleberries, and plums, too. You know those big, burly Cabernet Sauvignons from Napa? Almost all of those wineries do this. Here’s how you cold soak:
- Cool your juice to below 50°F, by any means necessary. Put it in the fridge, or drop in either a sealed ice pack or a plastic soda or milk carton filled with ice into the juice. Don’t let the juice climb above 50°F or it might begin to ferment. Keep changing the ice cartons as they melt to keep your juice cool.
- Cover the juice. Lay a sheet of plastic wrap over it—right on the top of the juice and crushed fruit. You want no air touching the juice, if at all possible. Advanced winemakers pump carbon dioxide over the juice, which is heavier than air, forming a gas seal. Gas canisters are available at brew shops.
- Be sure to add any pectic enzyme when you start this process. You want it to get to work before you add your yeast.
Even if you don’t cold soak, you will need to add pectic enzyme and any tannin into your juice on the first day, about 12 hours after you put in the K-meta. Cold -soaking or no, once you’ve added any pectic enzyme or tannin, cover the bucket and walk away until tomorrow.

The Ferment
Day Two (if you are not cold -soaking) begins with your yeast. Start by mixing into the juice half the amount of yeast nutrient, the diammonium phosphate, that you intend to use for the whole wine-making process. Now get your tap water hot, measuring it with a thermometer until it hits 100°F. Pour a one-half- cup of the hot water into a measuring cup and then add the yeast. Just sprinkle the yeast on top of the water. Wait 5 minutes before stirring it in gently. Wait another 15 minutes. Now you can add your yeast to the juice.
If your juice is colder than 70°F, just let the yeast sit on top of the juice for 30 minutes. This lets it acclimate to the colder juice; shocked yeast can die, or delay fermentation. If you are cold- soaking, you will want to let your juice come up to temperature early in the day, and pitch the yeast when it has warmed to at least 60°F. After the yeast has acclimated, stir it in and put the bucket cover on. Now walk away.
Yeast will take a day or so to get rolling, but by morning you should see it bubbling, and the temperature of the juice should have risen. Now your job is easy. Take the juice’s temperature every day. This helps you track fermentation. It will rise steadily as fermentation gets started, then drop as the initial fermentation finishes, usually after 3 to 6 days.
For elderberries and other dark fruits, during the fermentation you will also need to churn the juice at least twice a day, and up to four times a day. Simply stick your clean arm in the juice and swish it around. This aerates your yeast and blows off any hydrogen sulfide (an unwanted by-product of yeast fermentation), and will result in a wine with more color and body.
If you are making white fruit wines, aerate the juice no more than once a day; skip it altogether if you have nothing floating on the top of the juice.
On Day Two of the fermentation, add the rest of your yeast nutrient. This will help the yeasts eat up the last of the sugar.
Pressing Elderberry Wine
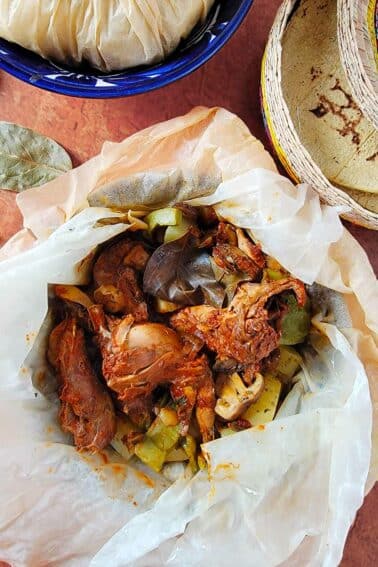
The initial fermentation should be done in 3 to 6 days; five days is normal. After the temperature tops out, ideally at about 80°F for reds, the temperature should drop toward room temperature. When it does hit room temperature, that’s a good sign the initial ferment is done. Now you’ll need to separate your wine – because that’s what it is now – from the solids. Serious winemakers use a grape press. I’d suggest something called a press bag, which is essentially a giant jelly bag. Get ready to be messy.
First, ladle off the “free run” juice into the 3-gallon carboy – this is what looks like wine in the bucket , not mushy fruit. Try not to get any debris in there. If this is impossible, pour a bit of the debris-laden juice though a fine-mesh sieve into another bucket, or a big bowl. Using the big carboy funnel, pour the strained juice from the bowl into the 3-gallon carboy.
Now you will want to get all the wine locked in the elderberry skins into the carboy. Scoop the skins into the press bag (you can use a standard jelly bag, too) and squeeze it over that fine-meshed sieve — with a layer of cheesecloth over the mesh — into a bowl. It will get gunked up frequently, so you will have to rinse the cheesecloth from time to time. Pour the strained juice into the carboy. This step will result in a cleaner, clearer wine down the road.
It is vital that you fill your carboys to within an inch or so of the bottom of the airlock stopper. This prevents your wine from oxidizing and protects it from wild yeasts or bacteria. After filling, you may have more than 3 gallons. If so, pour any excess into a glass container that will just about hold the amount of excess; you want to minimize air in the containers.
If you find yourself short of the 3 gallons for some reason, top off the new wine with a comparable wine: For elderberry wine, I typically use a commercial Mourvedre or Petit Verdot to top off. You want the wine to come up to about a one-half- inch below where your rubber stopper will be. Don’t worry about this no longer being “your wine.” The amount of commercial wine you add in the entire process will be less than 5 percent.

Mopping Up
Top the carboys with their airlocks and stoppers, and put them in a cool, dark place. This is especially important with white wines, which can oxidize and turn amber if left in the light too long. You will soon notice two things: First, the suspended solids in the juice should be settling to the bottom. Second, the wine will be bubbling slightly. This is called secondary fermentation, and it is important that this step be done before you bottle, unless you like exploding bottles.
I let my wines age in the carboys like this for several months before I begin to mess with them. A good rule of thumb is to wait two 2 months. After this time elapses, you will need to “rack” your wines. This is where that second 3-gallon carboy comes in, as well as the wine siphon.
Clean the inside of the new carboy by adding a pinch of K-meta to it, then swishing around a lot of water. Pour out and rinse well. Now add 1 gram more of K-meta: This will help the wine age safely. If you fail to use sulfites, your wine can develop “off” flavors or aromas or even turn to vinegar.
To rack your wine, use the flexible tubing to siphon it from the old carboy into the new one, making sure you get as little of the sediment that has fallen to the bottom as possible. To do this, set the full carboy higher than the empty one.
Now put one end of the tubing midway into the full carboy, and get yourself close to the other carboy. You will need to be quick on this next step: Suck the air from the tube, pulling the wine with it. The moment you get a splash of new wine on your lips, stick the tubing into the new carboy. Suction should siphon the wine from one carboy into another. It is better to leave some wine in the carboy than to transfer too much sediment.
Due to the sediment, you will have a lower volume of wine than you thought. What to do? You have a choice: Add some more commercial wine, or add oak cubes. Oak cubes simulate aging wine in oak barrels. I add oak cubes for my elderberry wine. How many? Depends. I buy French oak, toasted medium, which are pretty mild. A heavy-toasted American oak will be stronger. The more powerful the oak flavor, the shorter the time it should stay in the wine. In no case would I use more than a handful in a 3-gallon batch.
If you do add oak cubes, taste your new wine after 3 months to see if it is getting oaky. If it is, siphon the wine off the oak cubes into a clean carboy and replace the lost volume with table wine.
Bottling and Beyond
When can I drink my elderberry wine, you ask? No earlier than 6 months, if you want decent wine. Honestly, elderberry wine needs at least a year. Wine ages differently in the carboy than in the bottle, and both steps are necessary. I typically bottle my red wines after a year or so. I then age them in the bottle for several more months before drinking. But that’s just me. You can bottle anytime after 4 months or so.
When you bottle, be sure to use real cork if you plan on aging your wine a long time. Synthetic corks do not allow a wine to breathe, so they’re fine for whites and roses, but not for your big elderberry, damson, blackberry, or blueberry reds. Do yourself a favor and label your bottles. You will forget which is which if you do not.
What if, after all this, you make a bad batch? It happens, after all, even to me – and I have been making wines for more than 20 years. If it is OK, just not really worth drinking, go back to the brew shop and buy a “mother ” to make wine vinegar out of it; a mother is a starter culture for making vinegar. Pour all the iffy wine into a big crock or pail, and drop the mother in. Keep the crock covered (but let air get in), and within a few weeks you should have vinegar.
What if it is really bad? Well, it is no sin to chuck it. And the great thing about making fruit wines, is that unlike the grape harvest, which comes but once a year, you can make a fruit or flower wine anytime. Salud!
Elderberry Wine
Ingredients
- 9 to 15 pounds elderberries, stems removed
- 10 quarts water, spring water is best
- 3 to 6 pounds of sugar (see above for exact amount)
- Tartaric acid (see above for exact amount)
- 1 1/2 teaspoons pectic enzyme
- 3 teaspoons yeast nutrient
- Wine yeast
Instructions
- Crush the berries by hand, or pulse them in a food processor in batches just enough to break up the berries. Do not liquefy them.
- Pour the crushed berries into a large pot with 10 quarts of water. Add 3 pounds of the sugar. Bring to a simmer, then turn off the heat. Heating elderberries makes them easier to digest, and helps set the color of the wine.
- Pour the juice into a freshly cleaned 5-gallon bucket and let it cool to room temperature. Test the juice for acid and sugar. Both may be a little low, so be prepared to add another 1 to -3 pounds of sugar and possibly tartaric acid. Add tartaric acid to get the juice to about 7 grams per liter. You might not need to add any – I’ve had elderberry batches that needed no additional acid and, others that needed a lot. We’re dealing with a wild food, and wild foods are variable.
- Add the pectic enzyme (and tannin, for blueberries and blackberries and blueberries), and chill to below 50°F in the fridge or with ice packs. Lay a sheet of plastic wrap on the juice to keep out air. Keep the juice covered and at this temperature for up to 3 days. The longer you cold soak, the more flavor you extract. (But you run a higher risk of oxidation, which will turn the wine an unappetizing brown, or of spontaneous fermentation, which can ruin the whole batch.)
- On the third day, bring the juice up to room temperature. Add half the yeast nutrient as the juice warms. Once the juice is at room temperature, hydrate your yeast and add it in, then follow the above directions from here.
Notes
Nutrition information is automatically calculated, so should only be used as an approximation.


Wine is about 10 months old and tastes pretty sour like unripe fruit. I do not know what Elderberry wine is supposed to taste like. In general, I like eldberries and I make tasty syrup from them. I made my first batch late July per your recipe. In October, it tasted really sour and like burnt rubber. On the advice of a local wine maker, I added some K-meta and racked it 10/17 and again 12/20. It has been sitting in 3 gal carboy with a few oak cubes since. Is this just a “rough” young wine or should I do something else to help it. Is it time to bottle age it? I don’t mind waiting.
Slokiki: Sour isn’t good. Too much acid. I’d put that carboy away in the basement or somewhere for a year and then check back on it. I’ve had acidic wines that were undrinkable after a year that were nice after a couple years.
I am desperate to know how the steam juicer people wine turned out and quantities used I have fifty pounds that have been waiting two years in the freezer and any advice on a juicing recipe would assist in my endeavours. And hank what of this protein haze you speak of, will pectin enzyme remove it? Great article allows all us simililarly interested people to share our experience, thanks!
Helo Hank,
I made my first batch of wine last year with a different recipe in which it said to bottle the wine right after the first fermentation. I let it in bottles for recommended 6 month. I checked one of the bottles and its fizzy like a sparkling wine, I suppose it still has a lot of sediment. Is there any way how to get rid of the sediment now once the wine is bottled or will it get less fizzy in time?
Thank you very much for your help.
Hi Hank, we had a profusion of elderberries this year in Yorkshire I picked 43lbs and used your recpie, same as I did last year with pretty good results. Couple of questions if i may
1 your recpie…. is it in Gallons USA? as I always end up with more liqour than i think I should.
2 I have been using oak from a cabinet maker friend, which I toast lightly I use sticks 7mm square by 25cm long….. is this overdoing it?
3 How low do you take the Specific Gravity? mine goes very low to 0.090 will this make it too dry
4. I tried to check the acidity with a kit I bought, but it was really really difficult to see an end point in the titration because the wine was such a deep red. Is it OK to by a cheap PH meter and if so what pH do you think is best?
Cheers Paul
Paul: Yes, USA gallons. I am an American. Check the oak as you go – only way to tell if it’s too much. I don’t do specific gravity, so I can’t help you there.
Jan: a lot of people who don’t like wine, because of the dryness, will enjoy a glass of wine that is slightly sweet, try from 1 – 2 % sweetener by volume. Birch syrup would also work.
Hank: Very nice recipe with good instructions. Steam juicing may create a protein haze in the wine, for syrup it wouldn’t matter. Also freezing after cleaning the berries helps with extracting the juice as the freezing breaks the cell walls.
Cheers, Dieter
Thanks a lot for this blog. I just added oak cubes to my first batch. It’s 3 months now, and starting to taste pretty good. Can’t wait to taste it when the oak kicks in. Thinking about taking a couple of liters of it, and adding some honey to it, could be really tasty. Have you tried something like that?
Regards Jan (Denmark)
Jan: Nope, never done that. I don’t really like sweet wines, though.
Hank,
I followed your recipe, except for heating the elderberries, including a cold soak, and just finished the first ferment. I’ve run the wine thru cheesecloth, sieves, and a jelly bag and into the carboy for the secondary ferment. The seeds appeared to give off a very sticky tar like substance that was mostly collected in the separation process. The wine colour is a pale/light cloudy red. The cloudiness is likely from some remaining sediments. However, I was expecting a darker red similar to fresh elderberry juice. Is the light red typical, or was there too much water added?
Before the first ferment, the juice started at 5 Brix and TA at 2 grams/litre. A lot of sugar and tartaric acid was added to reach my targets of 21 Brix and TA at 7 grams/litre. The TA increased to 10 grams/litre after the first ferment. What might of caused this? Thanks
Gary: If it’s too light in color, yes, too much water added. And that tar is an occupational hazard. It’s normal, but is a weird elderberry thing.
I’ve held elderberries in the freezer for two years.
Will these be still suitable for wine making?……..thanks
Have 80 lbs. Brought to heat and simmered 10 min. Acid check ok, hydrometer check ok. Created must for three, 6 and 1/2 big mouth fermenters. Squeezed out all pulp well, only put in the juice. Fermented 7 days, transferred to carboys. Some say to leave about a inch of airspace. Some says no need to top off at this time. The day I transferred, I degassed all fast 1-2 min as one carboy did react with heavy fissing after transfer to carboy. That slowed down gas release to 1 bubble every 5-6 seconds on two of them and one stopped bubbling and no longer releases any gas. I had topped off that one. Did not top off the other two. The one with the previously heavy fissing is the only one with about two inches of foam (hydrometer 1004.) Temperature was consistent 68 degrees. Hydrometer is 999 on one that quit bubbling and was topped off. The one that was 1000 had been degassed 1-2 min, then quit bubbling then started back after a day at one bubble every 5-6 seconds. One gallon I did, quit bubbling on 4th day, transferred on day 6. Degassed also. Topped off. Been 2 days and had not restarted any bubbles. All was consistent 68 degrees. Mostly worried about not topping off the two as do not want to oxidize. Do I need to go ahead and sulfite those that quit bubbling, even tho it has been two days now since I first racked them? I realized I request a lot of help here.
Don: I’d let everything hang out for a week or two, then maybe rack and add sulfite.
Hi Hank: I have read that elderberries contain cyanide, what do you do to combat this? I have made elderberry wine for years and are just aware of this now… Thanks, Ken
Ken: Keep making it. The poisonous parts of the elderberry are not the ripe berries. Yeah, there’s a teeny amount of cyanide in the seeds, but the process of making wine volatilizes them — in other words, cooking removes it.
Hello Hank,
Great article on making Elderberry wine. I especially love the level of detail the instructions get. Unfortunately though I didn’t see your website until after I had already steam juiced my berries. So my question is do I just take 3 gallons of the straight juice or do I mix the juice with some water? If so, how much juice to water? Thanks and look forward to checking out the rest of your website.
No idea, Lisa. But if I had to guess, I’d add the water and sugar as normal.
This is my first foray into winemaking and so far am having fun. Thanks for the great directions and recipe.
You mentioned that if you have extra after topping off your carboy to go ahead and put in another closely sized container. What do you do with it then? Also how should your new wine taste, can you get an idea of how it will taste once aged?
The new wine can be pretty rough. It mellows over time, which is why I recommend aging it for a minimum of 9 months.
Hi Hank,
Just finished collecting, stripping and freezing elderberries (in Nottinghamshire UK). I have usually made a country style wine adding bananas and black currants to the wine which ends up as a smooth but Chianti type wine. Having read your notes on the web site I’ll try this now on a 3 gallon batch and see what happens against my usual method.
Good site, I enjoyed reading the comments.
Ian
Hi Hank,
I have steam extracted the juice from my elderberries. Can I still make wine with the juice, rather than the whole berries? I thought I might add some tannin, since the skins won’t be fermented. Any thoughts?
Never done that. Give it a go and let me know how it works!
Hank,
Hello, hope all is well. I agree with others posting here, your recipe was the most detailed I could fine on the internet. This is my first try at making wine and have been trying to follow your recipe to a T. I had cold soaked the berries for three days and had a nice dark must. Now on day two, my must has turned red, sort of the color of the inside of a red grapefruit. Do you think the must May have turned bad? Thanks in advance for your reply.
Allen
Huh. Never seen that before. But you should be fine.
Hello, I decided to follow your recipe as it is the best one I have found yet.
It didn’t go to plan exactly as it needed more sugar than your recipe suggested but wild fruit is unpredictable. I have however made a stupid mistake and I’m worried.
I have added tartaric acid to my 3 gallons plus of Elderberry wine mix but didn’t need to as I did the acid test wrong. It has far far too much acid now. Have I ruined it?
I hope more sugar water will fix it.
Sarah
Hi Hank!
Following your procedure for elderberries from our property. We’re starting the first ferment, but wondering about one of the later steps. You say to test the wine for oakiness after 3 months. Do you mean 3 months from starting the 2nd ferment (so 2 months would have been the secondary ferment), or 3 months after racking and putting into the carboy with oak cubes (total 5 months from starting the secondary ferment)?
Thanks for the detailed explanation of the process!
Sam
The latter, so total 5 months starting from secondary ferment.
Do you wash your berries? I just cut about 20 pounds from my bushes out back and will need to freeze them before I can get to wine making. I’d love to just chuck them in the freezer, but there is a lot of debris I don’t want to get frozen with them.
Thanks.
-James
Hi Hank,
found your website (thankfully) last year just in time for the elderberry harvest. Made 5 gallons successfully. The wine is robust and drinks like a BIG zinfandel. I think the oak chips make it amazing. Reading through the posts, I was happy to see the clarification on the boldness of the wine can be curbed slightly. I currently have 25# prepped and plan on trying to recreate last years wine and another slightly lighter version. One thing I noticed with this wine, was how cloudy it initially was compared to other wines. I try to steer away from petroleum based polymers in the clarification process and used Bentonite clay. It worked like a charm and I’m not picking up any off flavors from it. Do you use bentonite clay for clarification? Thanks again for the informative and entertaining site!
Hi Hank, Harvesting our plentiful crop of Elders right now, and are going to use your techniques and recipes. However, we are definitely not sweet wine drinkers. How does your recipe accommodate this? Any clue to the residual sugar content? Any insight to this would be appreciated.
Thanks Don.
My wines are all dry. I generally don’t like sweet wines, either.