As an Amazon Associate I earn from qualifying purchases.
Consider, for a moment, the sweet pepper. No other plant demands so much, gives so little, yet keeps us coming back for more.
Sweet peppers are the coquettes of my garden. I coddle them, dote on their every need, and in return they toss me a few fruits to play with — so few, in fact, that I can barely bring myself to eat them fresh. I preserve almost every one the little minxes give me to eat huddled, alone, in the dead of winter. Or something like that.
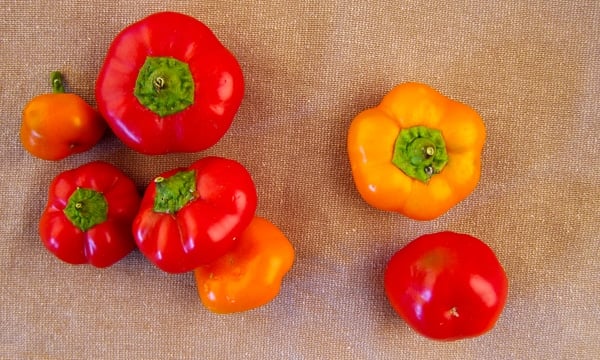
Every year I say, “I need to plant more sweet peppers.” Every year I plant a few more. It’s never enough. I could lay waste to everything else in my garden and plant only an array of red bells, piquillos, padrons, pimientos and sweet cherry bombs — and still it would not be enough. It is not possible to have too many sweet peppers. Chiles? Yes, but not sweet peppers.
What’s more, after these princesses deign to drop me a pepper or three, it has become so late in the season that they die soon afterward, our relationship barely consummated. It reminds me of some character in an Edith Wharton novel (And yes, I’ve read several. Blame my mother for that one…)
Disconsolate, I used to count the days until February, when I could start a new set of seeds under hot lights inside; even in birth, sweet peppers need to be the center of attention.
But then, one day, I found a way to cheat death.Yes, it is as simple as a heavy pot, a warm climate, and a quirk of biology.
I live in Northern California, and in my little spot of land, we get a hard frost only once every few years. Light frosts, which are enough to kill a pepper, come no more than a couple dozen times a year in my garden. But in the front of my house, which faces south, those light frosts come less than a dozen times a year, and even in the dead of winter the highs soar past 50°F — warm enough to keep a pepper alive.
But aren’t peppers annuals? No. And that is a dirty secret perpetrated by seed dealers everywhere. The coquettes aren’t eager to die after all, it seems. Only cold kills them. What they want is an even deeper commitment from you the gardener before they willingly give up their fruit. I once had a Thai chile — a Capiscum frutescens, for you pepper freaks out there — that lived five years. Peppers, like most of us, want a long-term relationship.
So I dig up a few of my peppers from the garden every October, pot them up and move them to the front yard, which is such a blast furnace in summer — routinely reaching 110°F — that it would burn most peppers; that’s why I don’t keep them in the front all year long. It works for me. And it would work for anyone who has a sunny window.
Here is a useful video of the process.
My Thai chile lasted in Minnesota until one day even the inner windowsill dropped below 30°F. (Outside it was -19°F, -30°F with the wind.) So it can be done. Once spring returns, you will find your peppers strong and ready to flower early and grow large. And mature peppers bear more fruit.
What to do with that fruit? Well, I’d venture to guess that everyone reading this has a favorite pepper recipe. I have lots on this site. But I also preserve a lot of peppers, less out of fear now than because preserved peppers take on a character totally unlike fresh ones.
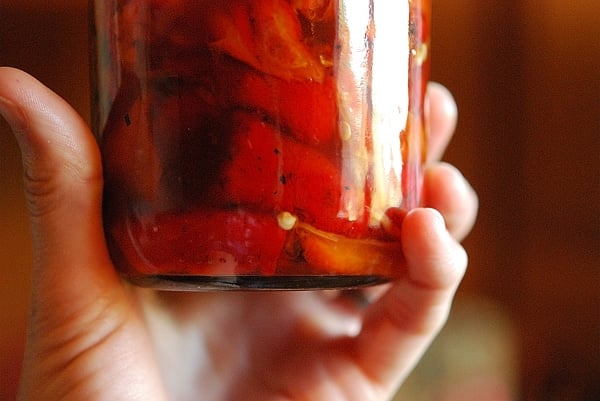
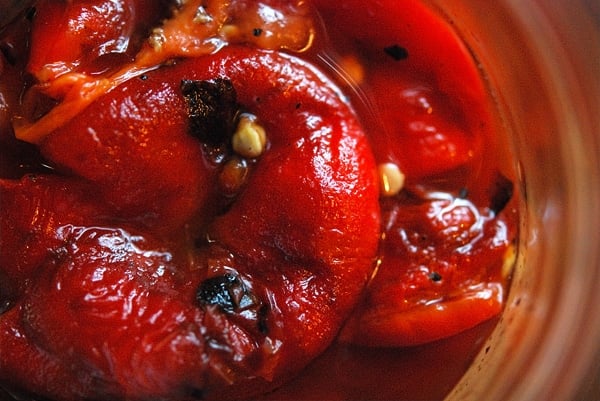
My main method to preserve peppers is to roast them over an open fire, then preserve them with a little salt, vinegar and oil. Peppers lack natural acid, so need to be pressure-canned if you aren’t using vinegar or salt.
This way of preserving does a number of things. Roasting kills any enzymes in the peppers that might deteriorate them over time, as well as softening and sweetening the peppers — not to mention getting rid of the indigestible skins. I then dredge the peppers in vinegar to up the acid level and give the peppers more tang. After that I salt them liberally to make things even more stable; salt also adds to the flavor. And finally I cover everything in olive oil to keep air out.
Some tips:
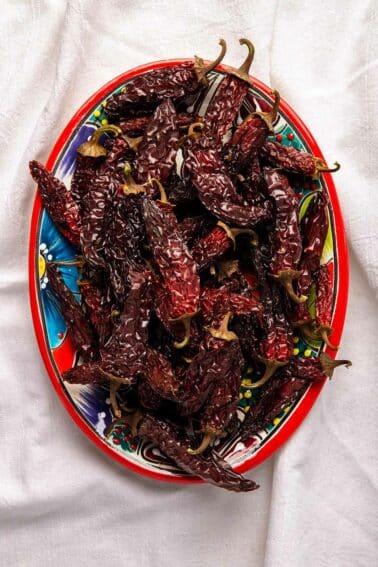
- Grill your peppers hard, as in blackened. Every sort of pepper has a skin of a different thickness. Try to do this with thick skinned peppers if you can; a thin skin can be a bear to peel off unless it is good and charred. Some thick skinned peppers are bells, Hatch-style chiles, pimientos, and paprika chiles. Poblanos are pretty easy to roast, and jalapenos are OK, but their skins are pretty thin.
- Steam the roasted peppers for a long time, in a paper bag. Take your time with this step. Walk away and do something else for a while. You’ll thank me. Nothing quite so fun as to be scalded with nuclear-hot pepper juice when you’re trying to peel them.
- Don’t wash the peppers. You want all that pepper juice you can collect, and running the peppers under water will rob you of that. This is the secret to really, really good roasted peppers.
Those of you in colder climates may be forced to choose which pepper’s charms most attract you, as you may not have space to save every one. And don’t be worried about the pepper dropping leaves in winter; it happens. Just keep it in a sunny spot, protect it from whiteflies, and keep it as warm as you can. It will repay you for your kindnesses next year.
Preserved Peppers
Ingredients
- 8 red bell peppers
- 2 tablespoons olive oil
- 1 cup vinegar (any kind)
- Kosher salt
- Canning jars
- A chopstick or butter knife
Instructions
- Roast your peppers. Ideally this is over a smoky wood fire, on a grill. Second choice is a gas grill, third an open burner on a stove. Alternatively, arrange your peppers on a broiling pan and broil them. No matter what your heating method, you will need to turn your peppers from time to time as the skins char and blacken. When the peppers are mostly blackened, remove them to a paper grocery bag and roll up the bag to seal in the steam. You want to steam the peppers in their own juices. Let the bag sit for 20 to 40 minutes.
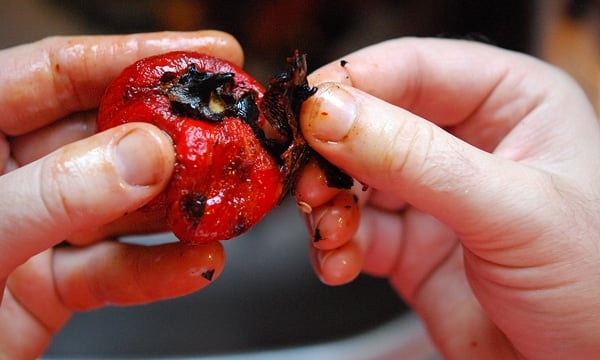
- After the peppers have cooled enough to handle, take them out one at a time and remove the skins, stems and seeds. Do not run the peppers under water, as this robs them of flavor. Once each pepper is cleaned — get as many seeds out as you can — drop it in a bowl. Do all the peppers before proceeding.
- Once all the peppers are cleaned and in the bowl, get a shallow bowl or small casserole pan and pour in some vinegar. I use red wine, cider or sherry vinegar for red peppers (sherry when I want them to be Spanish, cider for Portuguese, red wine for Italian or Greek) and white wine for green peppers. Dredge each pepper through the vinegar a few times to get it good and coated. Place it in another bowl. Do this for all the peppers.
- Sprinkle the bowl of peppers with kosher salt. Gently mix the peppers together like a salad. Sprinkle a little more salt and repeat. Sprinkle a little salt into the bowl with the pepper juice — the original bowl.
- Gather canning jars and pour a little vinegar into each one; enough to cover the bottom of the jar. Pack in the peppers, leaving 1 to 2 inches of space at the top. Use a butter knife or chopstick to run down the sides of the jars, releasing air bubbles. You will notice the level of liquid drop. Fill it with the salted pepper juice — but still leave room at the top of the jar.
- Once the air is out to the best of your ability and the vinegar-pepper juice it right at the top of the level of the peppers, pour in olive oil on top of everything to a depth of 1/4 inch. Screw the lids on the jars and you’re done. No sealing needed. These peppers will last a year in the refrigerator, although they will soften over time.
Notes
Nutrition
Nutrition information is automatically calculated, so should only be used as an approximation.


I have an unopened 16 oz jar of “Roasted Red Bell Pepper Strips” packed in water and salt. The directions state to use within 7 days in the refrigerator once opened. Can I still preserve them (for a year…) by draining them, dredging in vinegar, and covering the strips in olive oil? The only “juice” would be the salted water it came in. Or should I just return it to the store or eat them as they are? Thank you.
Helen: I’ve had those, and I’ve kept them in the fridge for more than a month, opened. They should be fine until mold forms, then toss.
This purple prose on preserved peppers is the best food writing I’ve ever had the pleasure of stumbling across.
Literally got sucked in so hard by the first sentences… what a ride
Really excellent recipe – the ‘kiss’ of vinegar and salt vs just drowning in olive oil is so tasty. Amazing how 2kg of peppers vanishes too but enjoying each and every one – hope to get a wood fire to char the next round as the addition of smokiness will be a great addition to all that natural sweetness. Thank you for the step by step too, really helps get the balance you intended! Thank you again.
So tasty, but mine keep burping and then there’s oil everywhere. What did I do wrong? I used red wine vinegar. I’m ok with a bit of fermentation, just the mess and I’m guessing these need to be eaten in a month or so now.
Michaela: They are burping in the fridge? Weird.