As an Amazon Associate I earn from qualifying purchases.
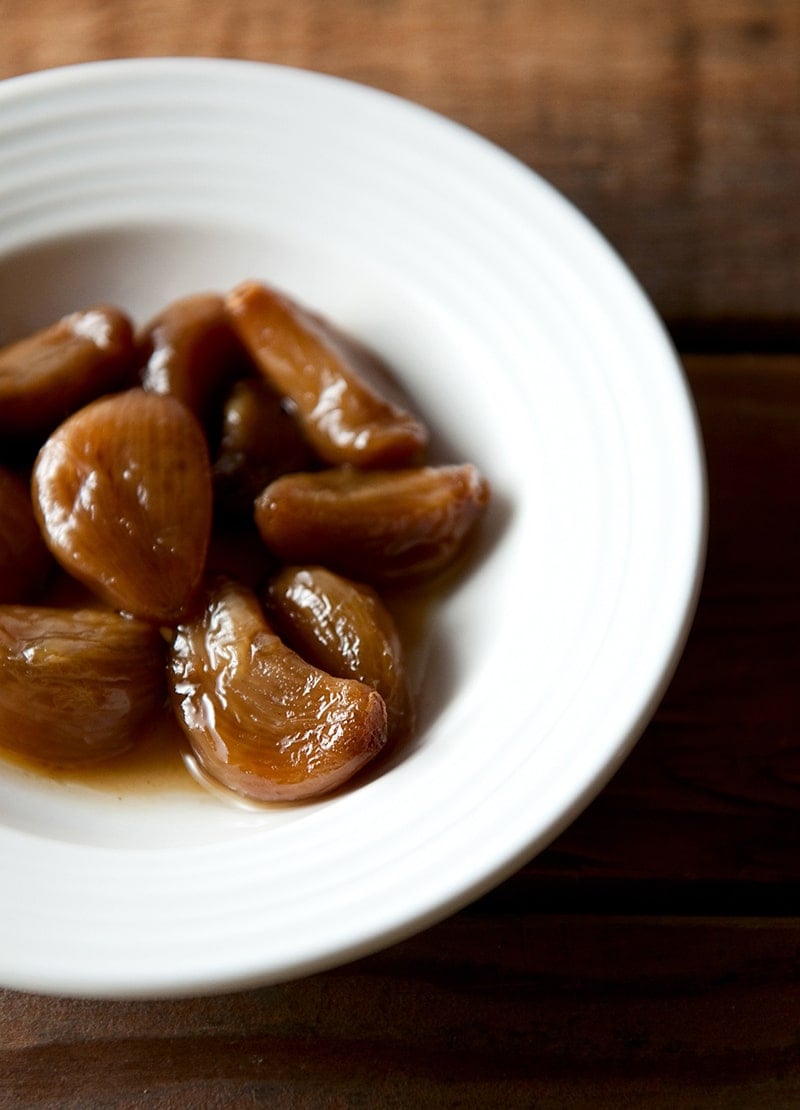
I do a lot of pickling and preserving, and I do it for many reasons: To capture abundance, to hold onto seasons past, to transform good into great. It is this last that drives me. Most preserved foods do not outshine their fresh state. Some can be just as good, only different. But a precious few foods undergo a magical transmogrification when they are preserved.
Fresh pork leg transformed into prosciutto is a classic example. As are wine and cheese from grapes and milk. So too with fresh garlic. No matter how much I love fresh garlic, it is but a shadow of these preserved cloves. Eating them for the first time was a revelation, a culinary epiphany: I must have this garlic on hand. Always.
I did not come up with this method of preserving garlic myself. It comes from my colleague Paul Virant, a fellow traveler, cook and preservation junkie who did me the honor of hosting a Hunt, Gather, Cook dinner at his Michelin-starred restaurant Vie in Chicago last fall. It was a wonderful dinner, but Paul was just as eager to show me his preservation sanctum sanctorum, tucked away in an unused room above the restaurant.
Walls of jarred deliciousness rested there. Fruits, green things, sauerkraut. Beets of all shapes and sizes. And a set of jars in the corner stuffed with what looked like roasted garlic.
Paul remarked that they were pressure-canned hardneck garlic cloves; hardneck garlic doesn’t store as well as the typical softneck you get in the supermarket, but it is vastly superior in flavor. So Paul puts up jars and jars of the stuff.
The recipe is from Paul’s book: The Preservation Kitchen: The Craft of Making and Cooking with Pickles, Preserves, and Aigre-doux. Virant’s book is one of two preservation books out now by bona fide chefs; the other, Tart and Sweet by Kelly Geary and Jessie Knadler is also excellent. (As a side note, there is a raft of canning books on the market right now, and I would add one more “must buy” to the current crop of books: Marisa McLellan’s Food in Jars.)
But Paul goes where most other canning books fear to tread: He delves into pressure canning. This preserved garlic cannot be made without a pressure canner.
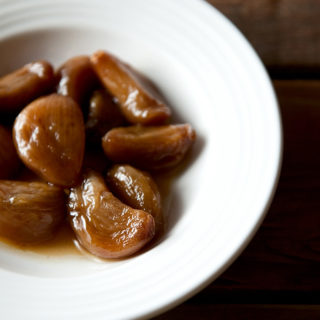
I simply don’t have words to describe how wonderful this stuff is — imagine roasted garlic that holds its shape, sweet, savory, soft, unctuous and just salty enough for you to want to eat another. And another.
I like to put a few cloves on a plate with other things, as an accent. Or you can spread them on bread. Or toss them in with eggs in the morning. They are a fantastic addition to a pan sauce.
I am posting this now because it is garlic season in most of the country. Fresh garlic is all over farmer’s markets now, and while all fresh garlic is excellent, use the hardneck variety if you can find it. It has a hard central stalk in the middle, and its cloves tend to be larger than those of a softneck.
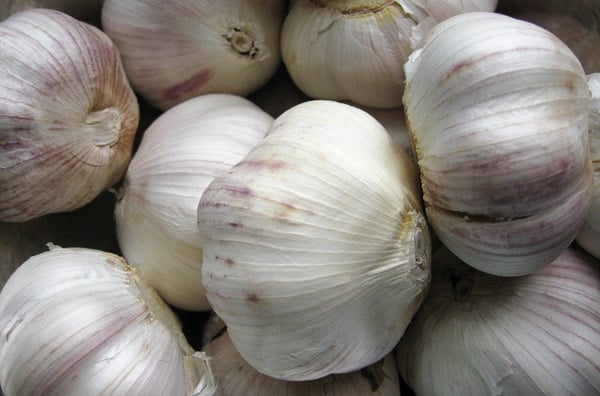
The hardest part of this entire process is peeling the cloves. But that’s not really that hard either. There is a great trick to peeling lots of garlic: Put the cloves in a bowl, top with another bowl of equal size, and shake them vigorously for about 15 seconds. The skins will all knock themselves off. (Here is a video of the process.)
The only other hurdle here is the pressure canner. If you are a hunter, angler, gardener, forager or cook, you really need to get one. They will change your life, in a good way. And all those stories of them exploding are from the 1950s. Modern pressure canners are safe and sturdy. Follow the directions carefully and you will be fine. I admit to being nervous about using the pressure canner the first few times, but I got over it.
If you make this preserved garlic, I guarantee you will, too.
Preserved Garlic
Ingredients
- 5 cups of peeled garlic cloves, about 2 pounds of whole garlic
- 1/2 cup extra-virgin olive oil
- 1 tablespoon kosher salt
- 1/2 cup sugar
- 1/3 cup sherry vinegar
Instructions
- Turn your oven to 220°F. Place 5 half-pint jars on a baking tray in the oven. (Use clean, unused lids for this recipe.) This will sterilize everything. I always put an extra jar in because yields can be variable; large garlic cloves can change things, so it's best to be ready for extra.
- In a large saute pan, heat the oil and cook the garlic cloves over medium heat. Sprinkle the salt over them. Cook, stirring often, until they begin to brown. This can take anywhere from 8 to 20 minutes, depending on the heat you're using and how moist the garlic cloves are. Once they are starting to brown, mix the sugar into the pan and continue to cook until it begins to caramelize, about 2-5 minutes.
- Add the vinegar, turn up the heat to medium-high, and cook this down for a minute or two.
- Remove the jars from the oven. Pack the garlic and the oil and juices into the jars. Leave 1 inch of headspace. Wipe the rims of the jars and seal.
- Put your pressure canner on your most powerful burner. Use your finger to wipe a film of oil around the inner edge of the canner, as this will help create an airtight seal; read your canner's directions for more detail on this. Get your tap water as hot as it will go and pour enough water into the pressure canner to come up about 2 inches. Put the jars of garlic into the canner and follow its directions to seal the canner.
- Turn the heat up to high under the pressure canner and allow it to vent for 7 minutes before setting the weight at the 10 PSI marker. Let the pressure build to 10 PSI before setting the timer. Process 10 minutes for half-pints, 20 minutes for pints. (If you are at altitude, you will need to go up to 15PSI. Follow the directions on your canner.)
- Turn off the heat and allow the PSI to return to zero before taking the weight off the steam vent. Carefully open the canner, making sure you don't get scalded by the steam. Left out the jars and let them cool before storing them in the pantry.
Notes
Nutrition
Nutrition information is automatically calculated, so should only be used as an approximation.

Can you just refrigerate instead of canning them? I’m way to old to invest in the canner
Vicky: Absolutely!
Hank,
Have you ever fermented garlic in honey? Half a jar filled with peeled gloves and filled with honey, bubbler on top and minimum 3months and usually 6. VERY slow fermentation.
The bulbs are great if a little sweet but it’s the honey that is golden. The deer camp especially enjoyed that as a basting over bone in back leg of venison.
Might not want to ferment in a living area though, the smell is good but kinda strong!
Made this and it was very good but a little too sweet for my taste. Is the sugar paramount to the sucess or safe canning of the recipe?
Thanks, John
John: You can lower the sugar.
have you tried this with smoked garlic?
This is the best thing I have preserved all year, hands down! I rarely ever leave reviews on recipes, but this is pure gold! Thank you!
Hello and thanks for the recipe! Have you ever tried it w/ frozen garlic? And if so, how was it?
When we have an abundance, we just put the whole heads in the freezer, and that is what I’d like to use up now. And fyi- frozen garlic cloves peel super easy!
Hello
Can you describe the flavor? I’m apprehensive due to the vinegar, even though it’s necessary for safe canning. I’m a garlic lover so the idea of any acidic tang is holding me back.
Thank you
I don’t notice the vinegar at all. The sherry vinegar has a sweetness about it and the sugar counteracts any vinegar taste IMO. This is now my go to for making garlic bread. Bit of butter then spread the preserved garlic.
do you have to use a pressure canner? we still do it the old fashion way, I enjoy it.
I’m worried about bacteria if I don’t pressure can, I’ve never done garlic before.
CHarlotte: Yes, this recipe is not safe without a pressure canner.
I make this once a year. Thank you for not purging the recipe from your website. I have changed in up, but so slightly one wouldn’t know (a bit more oil, as I use the oil as much as I do the garlic). It’s finally in the canner… about 21 or 22 half pints (I lost track)
Steve
How about using and instant pot ?Recommend settings and time?
Robin: Nope. You cannot pressure can safely in an Instant Pot. Sorry.
How long will it keep in the fridge after opening?
Jacqueline: Several months.
Can you use an alternative vinegar? I don’t keep sherry on hand
Jennifer: You bet. Really anything but distilled white will work. Champagne is great, so is white wine. Cider is OK, as is rice vinegar. Nothing too dark.
Could garlic confit be canned using a pressure canner?
Lori: Probably, because it is similar to this, but I can’t say for certain because pressure canning is a bit more of a science than an art.