As an Amazon Associate I earn from qualifying purchases.
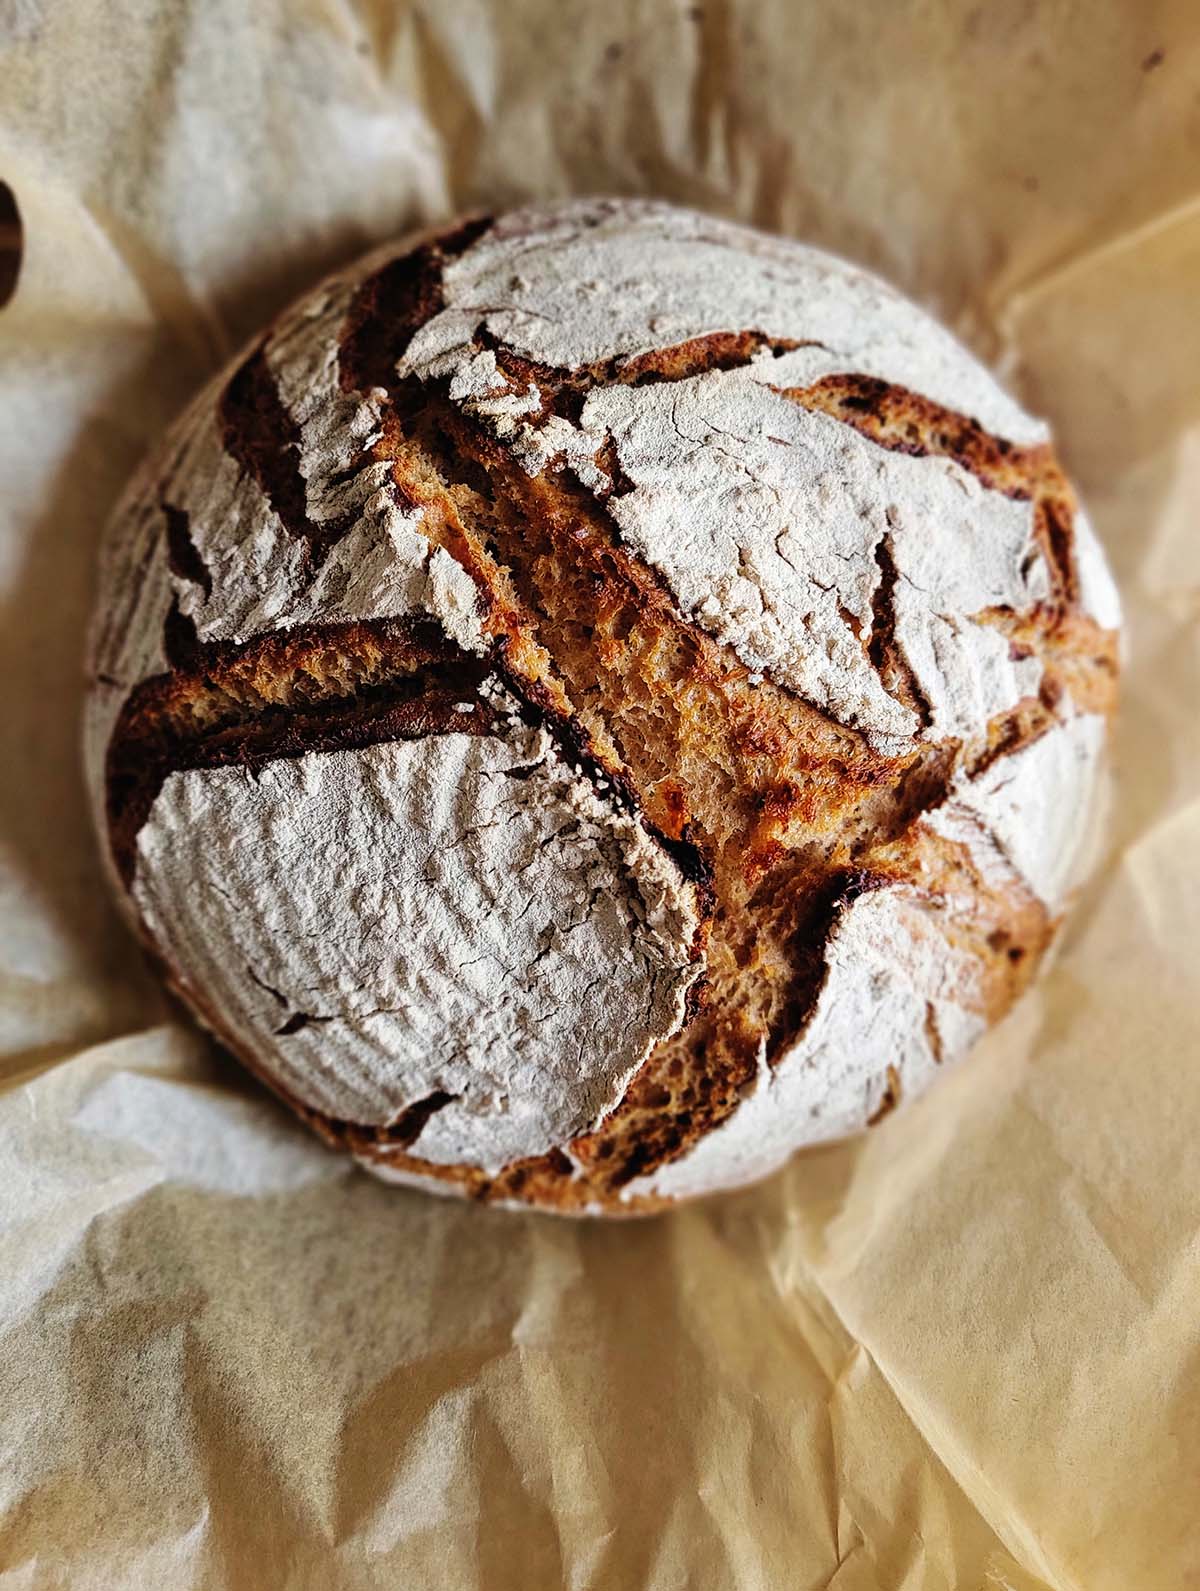
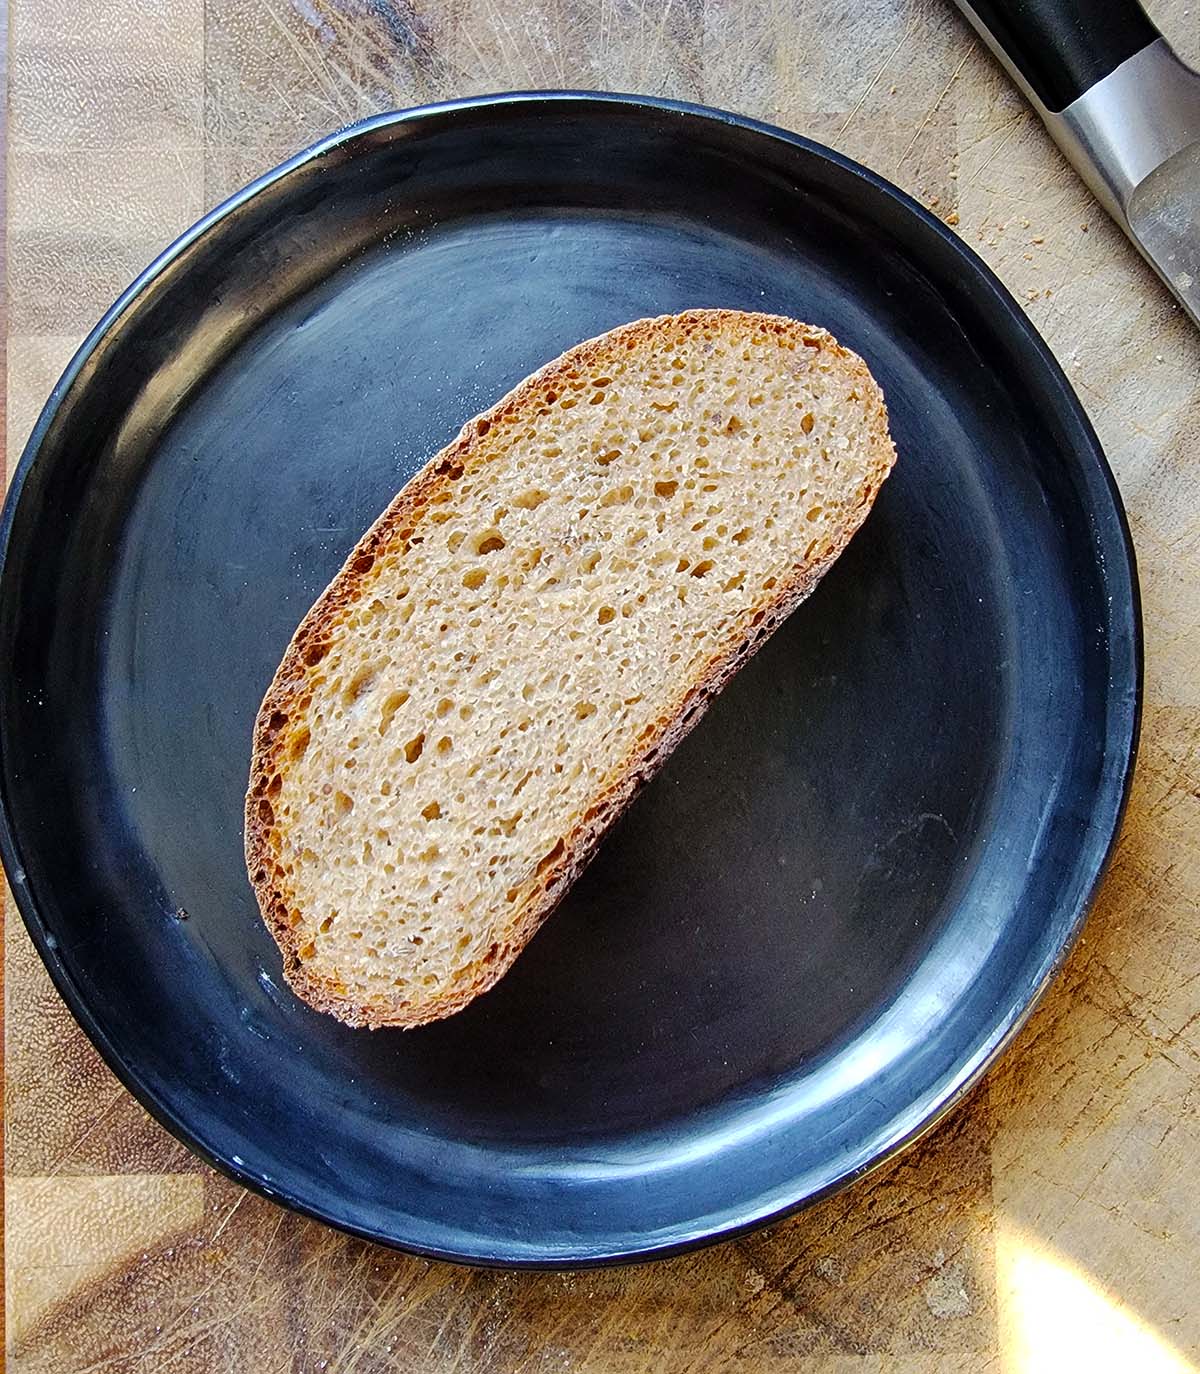
A rye sourdough recipe that makes a hearty loaf with caraway seeds. I call this bread Dakota Sour, because it was inspired by a recipe from Grand Forks, North Dakota. This is a great sandwich bread, and makes wonderful toast.

This recipe was a bit harder to master than my rye ciabatta bread — it took my six tries, tinkering each time, until I got what I wanted. Unlike the light and airy ciabatta, this rye sourdough bread is perfect for cooler weather, although I did make many versions in summer.
As with my first rye recipe, this one is inspired first by a recipe in the great book The Rye Baker, which mentions Dakota Harvest Bakers, alas now closed. I took that recipe much farther, however, with a large overnight starter that sours most of the rye flour in the bread.
You do that because by making a full rye sourdough, the dough acidifies enough so you don’t get that weird “starch attack” that can blow out your loaf — and, well, it makes a tangy bread, which I like.
I also mix the dough a long time, which develops lengthy, strong gluten strands from the bread flour. This helps with lift, so your bread isn’t flat. Ryes have a tendency towards that.
Lots of Ingredients
You’ll notice that this sourdough rye has a bunch of possibly unusual ingredients, especially if you’re used to the water + flour + yeast paradigm common in French and Mediterranean breads. I’ll walk you through them, and let you know where you can leave them out if you want.
- There’s a little bit of whole wheat flour here. I like it for flavor and color. If you don’t already have whole wheat flour handy, replace it with bread flour.
- Rye chops. These are whole rye grains coarsely chopped. You can buy rye berries in many places, then buzz them rough in a coffee grinder. They are for a heartier chew and a more rye-forward flavor. You can use more rye flour if you can’t get them.
- Brown sugar. This is for color, a little flavor, and it’s something the wee yeasties can eat as the dough ferments. Don’t skip it.
- Vinegar. Only a touch, and its purpose is to acidify the dough so you avoid starch attack. I kept a small portion from the original recipe as insurance, but the overnight fermentation of the rye should make things acidic enough.
- Caraway. It’s what most people think of when they eat rye bread. I love it, but skip if you hate caraway.
Rye Sourdough Starter
OK, to make a sourdough rye bread, you need a rye sourdough starter. You absolutely can use a regular wheat sourdough starter here, but a rye one will give you better results. You cannot make this recipe as-is without a starter.
It takes about a week to get a rye sourdough starter going, but it’ll last forever if you feed it. Making one is easy. Mix equal parts rye flour and warm water by weight, and put it in a jar with a lid. Yes, weight. I have found that I absolutely need a scale to make good bread — if I want to be able to repeat my results. So everything here will be by weight. And in grams. (Sorrynotsorry)
So mix 70 grams of rye flour and 70 grams of warm water together. Cover the jar. Each morning for at least 5 days, discard 50 percent of the jar’s contents and refresh it with a new 1:1 mixture of rye flour and water by weight. Stir this in and let it sit.
At some point, usually 5 days in, you’ll get that nice sourdough smell and the starter will be all bubbly and active. Now you can make rye bread.
Note: I make rye bread every week. I keep my starter active. You may not be so ambitious. You can keep your starter in the fridge for up to 2 weeks between “feedings,” and you can also freeze it.
Or, if you’re really a casual baker, dehydrate it at 100F until it’s a crust, then keep that dry stuff in a jar. Then, you’ll want to add fresh flour, water and this dried starter a few days before you make another batch, feeding each day.
In all cases, you will want to give the starter a day or two of regular feedings before you bake again.
Overnight Sponge
This rye sourdough starts with a large overnight sponge that includes almost all of the rye in the bread. This ferment develops yeast and sours the dough.
It’s easy to do. Just mix all the sponge ingredients in a bowl, cover the bowl, and set in a reasonably warm place. Anywhere in the kitchen should be fine until winter, when you should ferment it in a turned-off oven, which is normally warmer than your counter.

Finishing Sourdough Rye
The rest of the dough joins the sponge in a stand mixer, and you mix on low speed until it comes together, about 6 minutes. Let it rest for a bit, then really work it with the mixer on low — up to 20 minutes with the dough hook.
What this does is develop the wheat gluten, which will keep the loaf high; remember, rye loaves tend to flatten if left alone.
You’ll want a round or an oval banneton for this loaf, if possible. I like this oval banneton. No banneton? Line a basket or bowl with linen cloth — has to be linen, or the dough will stick. But I am guessing if you’ve read this far you either have bannetons or are willing to buy them.
You bake this rye sourdough either in a Dutch oven lined with parchment paper, as I did in the picture above, or with a steam pan at high temps to develop the crust, then finish in a cooler oven. All ryes should cool completely before slicing, or the interior can get gummy.
Ryes, if you’re not familiar, go stale far slower than wheat loaves. This is a half-and-half loaf, though, but it stil stays nice for 5 days or so.
Tip: Once sliced, stand the loaf upright on the cut side uncovered. This preserves the nice crust and blocks the cut side from air.
If you liked this recipe, please leave a ⭐️⭐️⭐️⭐️⭐️ rating and a comment below; I’d love to hear how everything went. If you’re on Instagram, share a picture and tag me at huntgathercook.
Equipment
- 1 Stand mixer,
- 1 oval banneton
- 1 Kitchen scale
- 1 linen proofing cloth
- 1 sheet of parchment paper
Ingredients
OVERNIGHT SPONGE
- 50 grams whole wheat flour
- 50 grams bread flour
- 50 grams rye chops (see note above)
- 130 grams rye flour, light or medium if possible
- 30 grams rye starter
- 200 grams warm water
REST OF DOUGH
- 300 grams bread flour, high protein if possible
- 50 grams rye flour
- 12 grams salt
- 2 grams active dry yeast
- 40 grams brown sugar
- 10 grams vinegar, white, cider or white wne
- 5 grams caraway seed
- 200 grams water
Instructions
- In the evening of the first day, mix all the sponge ingredients in a bowl, cover and set in a warm place (kitchen counter, turned-off oven, etc) for at least 8 hours, and up to 16 hours. I typically go for 12 hours.
- The next day, mix the sponge with the remaining dough ingredients in the bowl of a stand mixer. Mix on low speed with the dough hook for 6 minutes. Turn off the mixer and let the dough rest for 10 minutes. Scrape down the sides of the bowl, then turn the mixer back on on low speed and work the dough for 15 to 20 minutes.
- Scrape the dough off the hook, scrape down the sides of the bowl, cover the bowl and let the dough ferment until it doubles, anywhere from 1 hour to 2 hours, depending on the temperature of your kitchen.
- Flour your work space. Scrape the dough ball carefully onto the floured surface. With floured hands, form the dough into an oval that will fit into your banneton. Scoop it up (it'll be fairly soft) and put it seam side up in the banneton. Cover it with a linen cloth and let this double in size. Typically this is about 1 hour, maybe a bit more in a cool kitchen.
- Set a timer for 30 minutes, though. After 30 minutes, preheat your oven to 450°F. Put the rack in the middle, and have a rack underneath it. When the bread is getting close, boil some water on the stovetop and pour it into an oven proof tray to provide steam. You don't need to the steam tray if you're using a Dutch oven, but you want to line the Dutch oven with parchment paper and let it preheat with the oven.
- When the dough is ready, line a baking sheet lined with parchment paper if you're not using a Dutch oven. Working quickly, turn the dough onto the parchment paper and quickly slash it three or four times with a very sharp knife. If you're using a Dutch oven, cover the pot. Pop the dough into the oven and bake for 20 minutes.
- After 20 minutes, uncover the Dutch oven, or remove the steam tray and drop the heat to 425°F. Bake for another 20 to 25 minutes, until the bottom thumps hollowly when tapped. Cool on a rack completely before slicing.
Nutrition
Nutrition information is automatically calculated, so should only be used as an approximation.


love the recipe. Hank, have you played around much with a cold bulk ferment with this (or other rye doughs)? Just mixed up a double batch and I’m going to bulk ferment it in the fridge overnight, shape in the morning and bake.
This is the best rye bread that I have had in years – and I made it! I’m so happy with the results. My neighbor’s have now asked me to double up when I make a loaf.
The only thing that I don’t understand is a split that circumscribes the loaf about an inch off the base. It doesn’t affect anything other than the appearance. I am curious if this is a sign of starch attack, or if there is anything I can do to eliminate it.
If you followed the recipe and put your proofed dough seam side up in the banneton it is likely that is what split open. Some recipes suggest the seam side up for a rustic gagged look on top.
I would like to try this recipe. I have an established Guinness Rye starter I feed beer instead of water so omitting the commercial yeast should produce a nice loaf. I also use molasses in my loaves so I’m curious about the vinegar. Is it to add flavor or help it with more rise?
Cherlyann: The vinegar is to help acidify the dough so the enzymes in the rye don’t do what’s called “starch attack” which can blow up a loaf in the oven.
Made a first attempt. Flat as a pancake, or nearly so. But it smells good on the cooling rack. But just about zero oven spring.
I suspect I need to adjust for altitude. Bread tends to ovenproof here at 5400ft.
I will try reducing hydration and shorten up the proof times. That has helped with my wheat sourdough breads.
that should have said over proof, not oven proof.
great loaf of bread. nice moist texture and great crust. wonderful flavor
This is a great recipe. Worked the first time and the bread is perfect. Brings me back to me childhood eating rye bread as a german immigrant. Great taste and texture. Thanks for the great recipe
Very tasty. Thought my sponge was too thick and dry to do a thing. Wrong. Didn’t make the rye starter but used my regular starter and followed along until the chops. Didn’t have. No matter- tasty dunked in my yummy olive oil before it cooled. Internal temperature of 203 reached at 37 minutes. I will certainly make again and will look for rye chops to level it up to Hank’s full recipe.
Hi Hank
I always wanted to make rye sourdough and your recipe looks very doable.
I am trying to eliminate dry yeast starter from my life and was wondering if there is a possibility for that with rye sourdough… partially with your method/recipe. Curious to hear from you
renee
Renee: You mean the 2 grams of instant yeast? Honestly, skip it. I put it in there for extra lift and insurance. The overnight sourdough sponge should give you plenty of yeast.
Thanks Hank!
Hi Hank,
I’m four days into the starter for this recipe and I’ve noticed since day two that the funky sourdough smell, I was expecting has a different “flavor“. It’s much more sour almost on the level of a funky cheese. Is this because it’s rye instead of wheat, or do I have a contaminant of some sort?
Thanks for all your great recipes!
Okay. Would it be possible for me to take my starter (regular flour), split it, and feed a small batch with rye flour? Do you think I could possibly get the same results (maybe multiple feedings before making this recipe)?
I only ask because this is the most “Boudin” starter I have ever had (has that nice sourness even if I completely botch my loaf).
Brenda: Yes, I’d use part of your regular starter, feed it rye for a few days before doing this bread.
Hank — I love all of your books! And, I make sourdough bread every week as well. I am most definitely going to try out this caraway rye recipe. Thank you for all you do!
My first attempt was very dense with very large air pockets under an outer skin on the loaf. I feel like the dough is under hydrated. The dough is very dense, my mixer is straining, there is nothing to scrape down from the sides of the mixing bowl etc… The over night sponge was dense as well, but I could see small air pockets looking through the bowl.
I still ate most of the loaf toasted with butter and it had the best rye bread flavor I have ever had.
I am attempting this recipe again using new high protein bread flour and will follow everything exactly as written to see if I get a better result.
Michael: Thanks! Yes, I use high protein bread flour. Always err on volume, not time, when it comes to both the bulk ferment and the proofing. If your room is cool, I’ve found it can take twice as long as if it’s warm. One thing I do in cool weather is to ferment and proof in the oven with the light on. That creates a breeze-less, 70F environment. I remove the proofing bread 30 minutes before it should be done to preheat the oven, and if it’s chilly in my kitchen, I set the banneton on a seed starting mat, which provides a gentle heat.
You do a great job of explaining a fairly complicated and, for most folks, challenging process. Thank you! The only thing I could wish for is a comment re: hand-kneading vs. using a stand mixer. Some of us old folks still do things manually LOL But I’m sure I’m in the very small minority of bakers in that regard. LOL Enjoy your bread! It looks beautiful and I’m sure tastes the same.
Pat: I was that way, too, but with many, many rye breads, the dough is too wet and sticky to knead by hand. I’ve tried, and it was maddening.
It’s been fun to see and taste the different versions as you’ve developed this, all of them have been better than any rye I’ve made!
I’m going to give this one a try…I make sourdough bread regularly, and let my loaves rise in parchment lined bannetons or bowls. When ready to bake, I transfer the loaves (one at a time) on the parchment to a covered, pre-heated Dutch oven, drop in a couple of ice cubes for the steam, and cover and bake 20-25 minutes, then remove the lid and continue to bake until proper internal temperature is achieved.
This looks like a lovely loaf of bread!