As an Amazon Associate I earn from qualifying purchases.
Spruce tip beer is, in one form or another, a very old style of beer. Back in Colonial times, hops were rare, so the colonists made a beer with molasses and used spruce or fir tips in place of the hops. This is not that beer.
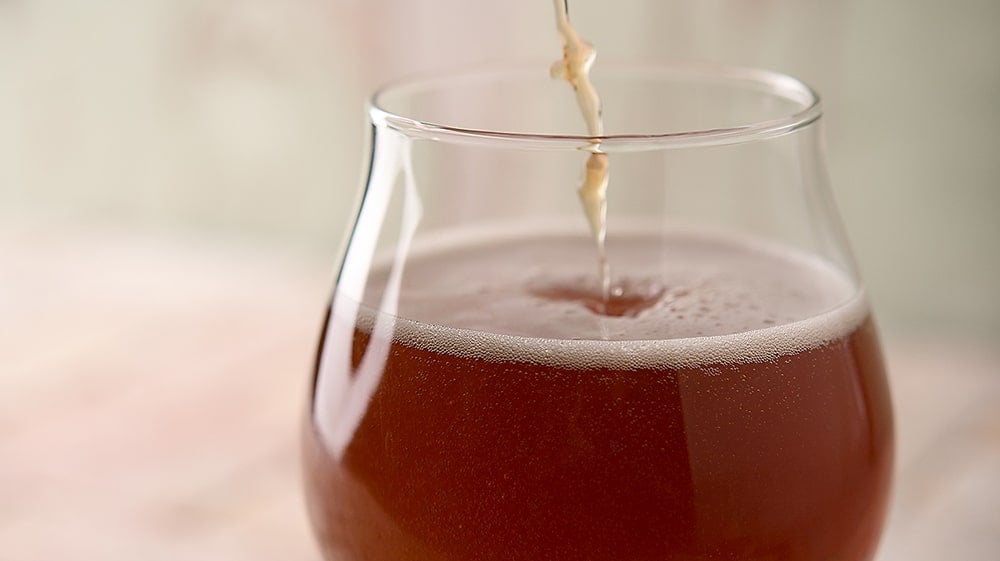
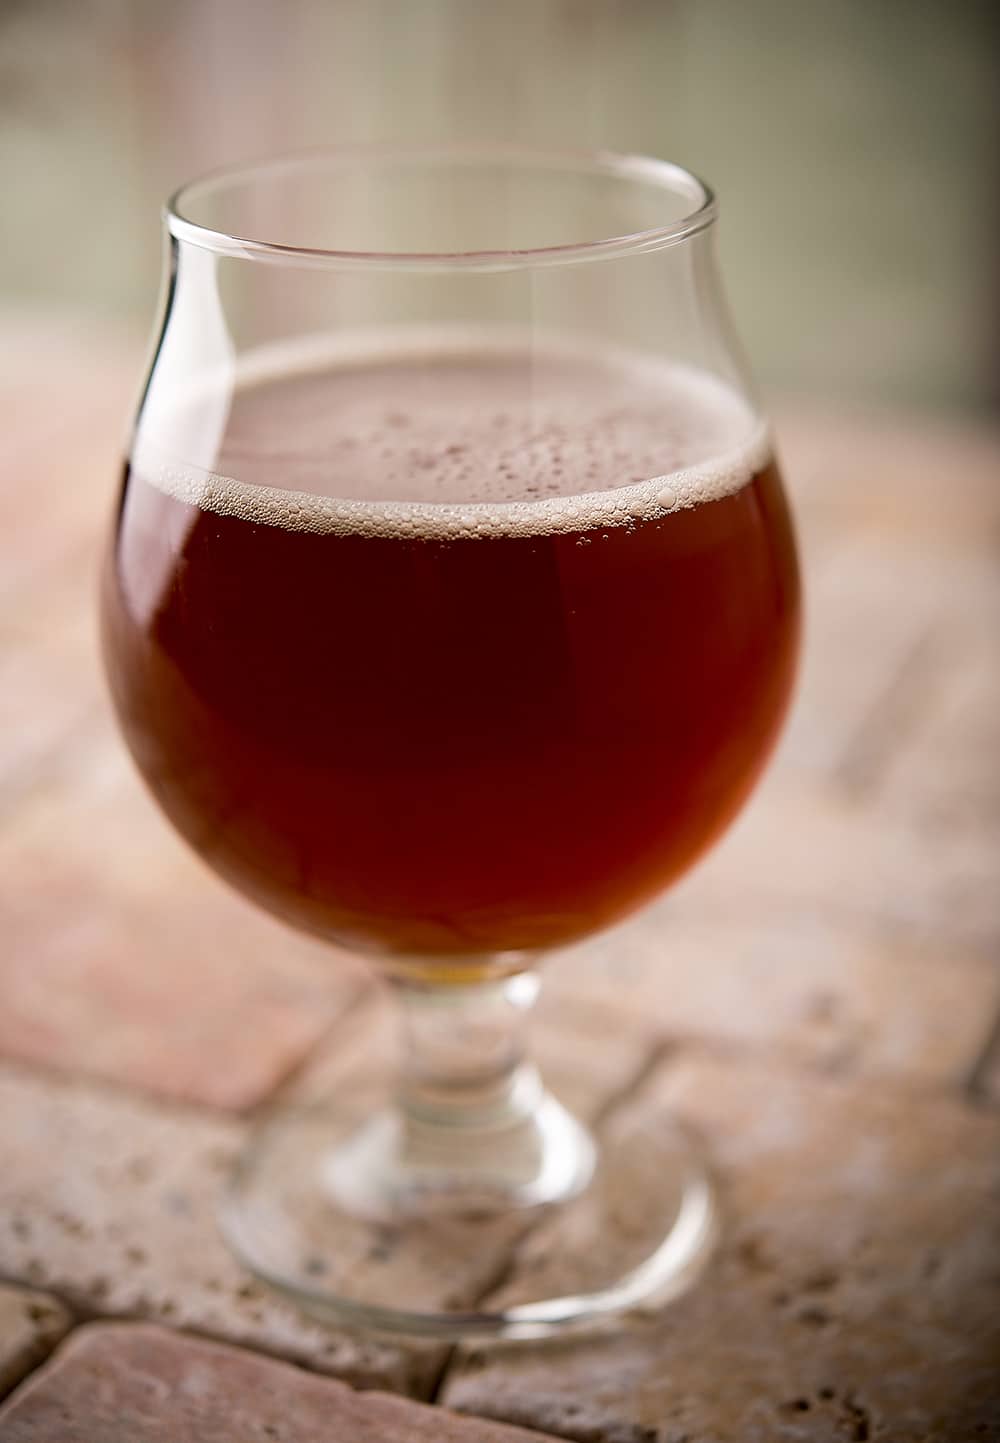
This is a modern interpretation of a spruce or fir tip beer that is a rich amber ale with enough hops to give it backbone — and lots of fir tips, which lend a balsamic, citrusy flavor.
It is a wonderful beer to drink in a tulip glass, as you get all those amazing aromas full on; it’s like drinking with Vikings in the Northwoods.
What is a spruce tip? The brand new springtime growth of spruce, fir, redwoods, pines and other conifer trees is a pretty pale green. At first they are little compressed bullet-like structures, but as they mature they begin to look just like older growth, only lighter in color. You can use them at any point, and can even use older growth if you must, but the older the needles get the less citrusy and more turpentine-like they become.
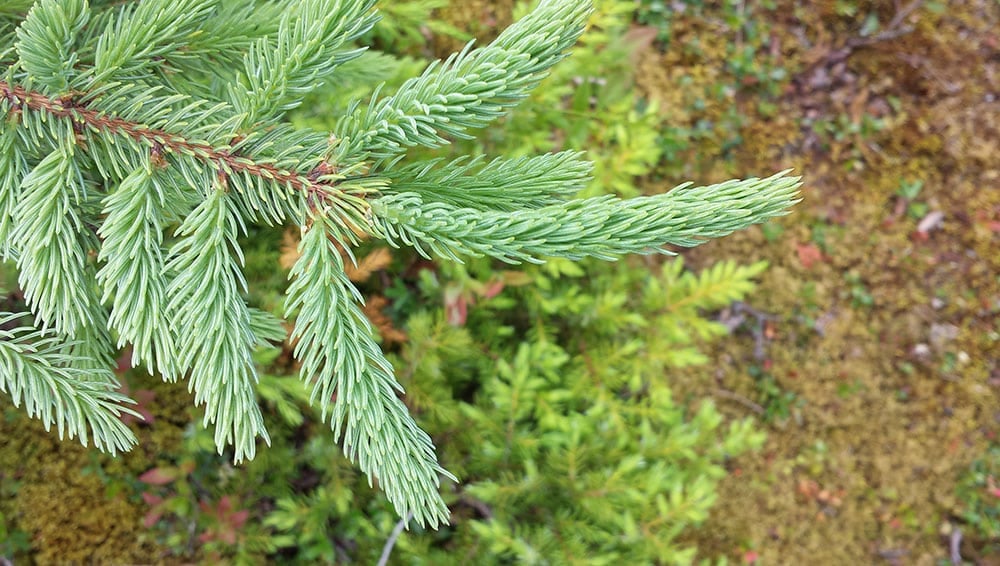
Note that when I say springtime, I mean spring where the tree is. Where I live in Northern California, I can get the new growth of fir trees all the way into August, depending on how high I go. I picked some lovely Engelmann spruce tips in Arizona in late July. My advice is to gather a lot, vacuum seal them and freeze so you can make this beer all year ’round.
As for the foraging part, taste test many different trees, as each one will be slightly different. Then, when you find one you like, pick from that one — but not too much, as you don’t want to hurt the tree. And never, ever pick the growing tops of small trees. You will stunt them.
My main advice with this recipe is to age the beer a month or more in the bottles. It starts out harsh and bitter, but mellows wonderfully after a month and will continue to smooth out over time.
To make a fir tip or spruce tip ale, you need to be set up for brewing. If you are, you’re good to go. If you’re not, there is substantial equipment you really do need to do this right. At a minimum, you will need:
- A large pot, or several slightly smaller ones. I used a regular stockpot plus another soup pot before I got a proper brewing kettle.
- A thermometer. I highly recommend a laser thermometer. I use this one
 .
. - A gram scale. Yep, precision matters in beer making. This is the scale I use.
- Something to ferment in. I prefer glass carboys, which are large jugs, but some people prefer buckets.
- An airlock. You need to keep air off the fermenting beer at the same time you let CO2 escape. The airlock does the trick.
- A strainer. A fine-meshed strainer removes debris, called trub, and the stray bits of seasoning and hops.
- Sanitizer. Yes, you need it. There are any number of good ones out there, but I use either Iodophor or Star-San.
- Bottles, caps and a capper, or a kegging system.
And, of course, you need malt and hops and yeast. Your nearest homebrew store will have all of this stuff, or you can buy it online.
I chose to make the beer rather dark because that’s what I wanted. But if you would rather make this a pale ale, add the extracts late in the process (they darken as they boil) or just go with a lighter grain bill. I chose the Northern Brewer and Saaz hops because I wanted something to play backup to the spruce tips, and because Northern Brewer’s flavor is pretty piney to begin with. They play nice together.
Here are the estimated stats on this recipe:
- Estimated Alcohol by Volume (ABV): 6%
- IBUs: 52, but the spruce tips will add hoplike bitterness and aromas to this
- Original Gravity and Final Gravity: 1.064, going down to 1.018
Fir or Spruce Tip Ale
Ingredients
- 40 ounces dry light malt extract (50%)
- 12 ounces dry wheat malt extract (15%)
- 1 cup liquid Munich extract, about 1 pound (20%)
- 12 ounces pale crystal malt, cracked (15%)
- 20 grams Northern Brewer hops, added at 60 minutes to go in the boil
- 10 grams Saaz hops, added at 30 minutes to go
- 35 grams fresh fir or spruce tips, added at 30 minutes to go
- 1 Whirlfloc tablet, added at 10 minutes to go (helps clarify beer)
- 15 grams Northern Brewer hops, added at knockout
- 85 grams fresh fir or spruce tips, added at knockout
- White Labs Scottish Ale yeast
Instructions
- Steep the crystal malt. Put the crystal malt into a grain bag or tie it up loosely in cheesecloth and cover it with 2 quarts of water. Bring this to 150°F to 155°F over medium heat and hold it at this temperature for 1 hour. Remove the bag and set it over the pot in a strainer. Pour 2 quarts of water heated to 170°F over it to rinse the grain. Let the bag drain for 10 minutes, then remove. Discard the grain or feed it to animals.
- Start the boil. Add 3 more gallons of water to the pot and bring this to a boil. As the water heats up, stir in all three extracts, making sure there are no lumps. When you reach a boil, add the hops and set the timer for 1 hour. Add your first hops.
- Add fir tips and hops. With 30 minutes to go, add more hops and your first addition of spruce or fir tips.
- Whirlfloc and chiller. If you are using it, add the Whirlfloc to the boil along with the wort chiller, if you have one. This allows it to sanitize.
- Knockout. Turn off the heat and add the final addition of hops and spruce or fir tips.
- Crash chill the wort. Use your wort chiller to chill the wort back to 75°F or cooler, depending on how warm your tap water is. Or, put the pot in a cooler with lots of ice water in it. Use a clean metal spoon to create a whirlpool in the wort, which will help it chill faster. Hopefully you will see gnarly bits in the wort that look like egg drop soup, or separating miso in soup: That's cold crash trub, and seeing it means you will have a clearer beer.
- Move the wort to the fermentor. Add the Scottish ale yeast to the fermentor; I use a glass carboy. Pour the contents of the pot through a sanitized strainer into the fermentor. If the strainer gets all gunked up with trub, remove it before continuing. Put a sanitized airlock on the fermentor and put the beer in a place where it can ferment cool, ideally 66°F to 69°F. Leave it there for 1 week to 10 days.
- Rack the beer to a secondary. If there is a lot of gunk in the fermentor, rack the beer from the primary fermentor to a sanitized secondary fermentor -- this one needs to be a glass carboy. I do this only if there is a lot of crud in the fermentor. Either way, let the beer finish fermenting for 1 more week.
- Bottle or keg the beer. If you are bottling, you want to add enough priming sugar to the batch to get about 2.4 volumes of CO2, about 2 1/2 ounces or 72 grams for 3 gallons. Bottle condition 2 weeks before opening the first bottle. This beer ages well.
Notes
Nutrition information is automatically calculated, so should only be used as an approximation.


Anyone interested in brewing beers from foraged or local ingredients needs to check out this book by Scratch Brewing Company. I received my copy last night and was very impressed. It has everything from brewing with mushrooms, fermented acorns, horseradish, paw paw fruit, oak leaves..you name. I have been to their brewery and had several of their beers. Very interesting stuff they make!
https://www.amazon.com/Homebrewers-Almanac-Seasonal-Making-Scratch/dp/1581573499/ref=sr_1_1?ie=UTF8&qid=1469058798&sr=8-1&keywords=homebrewer%27s+almanac
Don’t forget to loosely cover the sides of that carboy with a towel to block light. I just bottled and have a sneaky suspicion that I skunked it by not doing so. It was in my basement for 2 weeks, but some light does come in via low windows. I noticed a faint skunky smell when bottling. We shall see. They will be ready this weekend. Oh well… Maybe a good lesson learned.
Have you tried Yards’s modern version of a spruce beer, Poor Richard’s Tavern Ale? https://www.beeradvocate.com/beer/profile/450/26892/
I have to admit I haven’t tried hemlock tips. There aren’t many in central Montana!
I’ll make a point to try them if I get west of the divide or back east.
Well….I made a ‘tea’ to test the unripe cones. Added a little sugar and lemon juice after I steeped the cones (which I cut in half) for about 30 minutes. My first sip, I thought it was pretty decent. By my third sip, I had pretty much changed my mind. It was a little harsh and left a nasty slick feeling and aftertaste in my mouth. I think I’m gonna go find a spruce tree!
Hemlock is high enough in tannins that it used to be used for tanning leather so it might be a little harsh. I have a couple friends that make spruce tip beer every year and it is one of my favorites.
Joshua: I think they all are, once they get old. Have you tried tasting very young hemlock tree tips?
Ive gotta give this recipe a try. Beer looks fantastic! I don’t have much access to fir or spruce but I have 10 Eastern Hemlock trees in my yard. There are a ton of miniature green cones on them. Wonder how well they would work?
Jason: I honestly don’t know. But taste test it: It could be nice, could be awful.