As an Amazon Associate I earn from qualifying purchases.
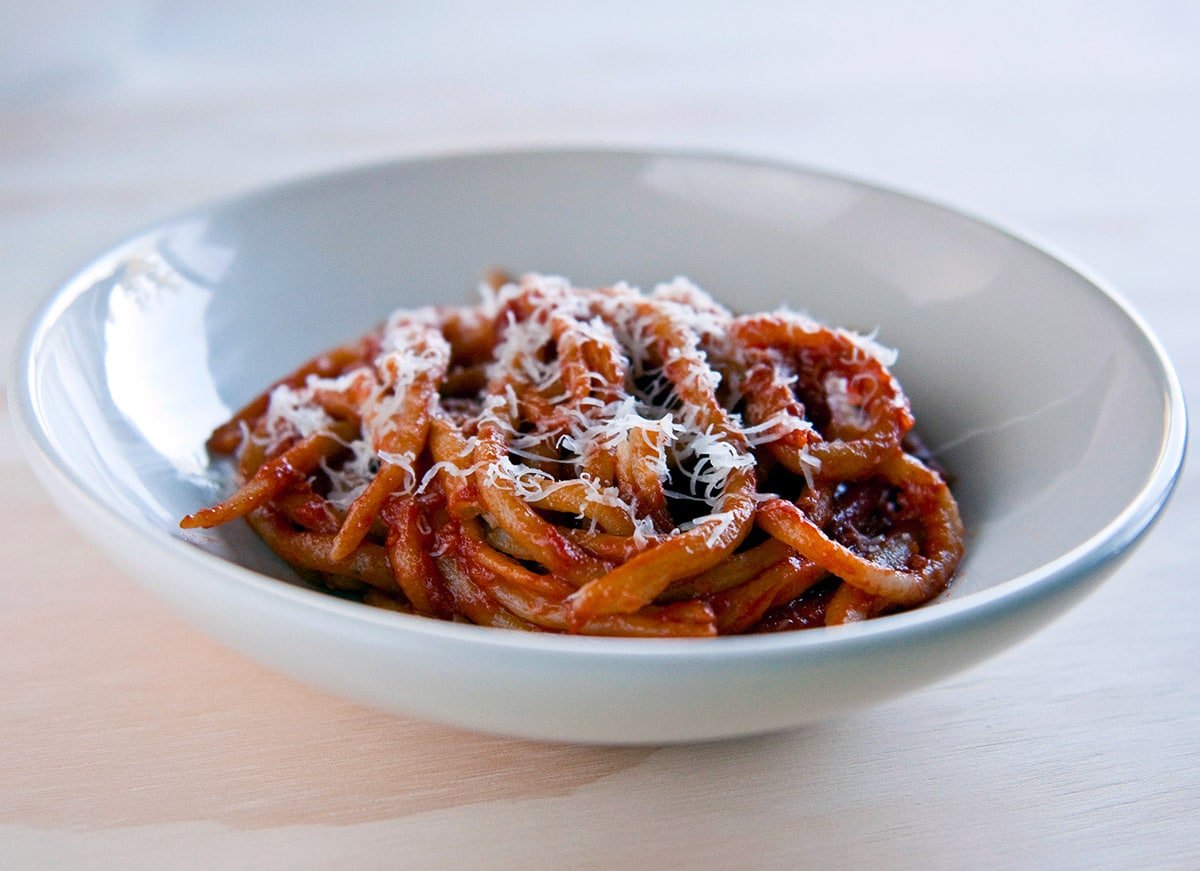
Pici, also called stringozzi, is a fantastic pasta shape you can make without a pasta machine. Here’s how to make pici pasta at home, using just a rolling pin, a knife and your hands.
Ove the years I’ve received a lot of questions about the pici pasta I serve with my tomato-fennel sauce, so I thought I’d do some step-by-step instructions on how to make pici by hand.
Pici are essentially fat, hand-rolled spaghetti. The name comes from Tuscany, and it has a lookalike in Umbria the locals call stringozzi. The pasta is also seen in Emilia-Romagna, too. It is a rustic and irregular pasta, which makes it a great shape for beginners.
According to the excellent book the Encyclopedia of Pasta, most versions of pici or stringozzi use a combination of flours: The Tuscans often add some semolina flour, and the Umbrians often use farro flour. It makes the pasta a little rougher, which helps when you roll it out by hand.
Below is the recipe for the dough, and I’ll walk you through how to make pici pasta in visual instructions after that.
Pici Pasta Dough
Ingredients
- 1 cup semolina flour (see below for alternatives)
- 1 3/4 cups all-purpose flour
- 1 tablespoon olive oil
- A pinch of salt
- 7/8 cup water
Instructions
- Mix the flours and the salt together in a large bowl, then add the olive oil and water. Mix well and knead thoroughly for 5 minutes. Wrap the dough in plastic or cover with a damp cloth and let rest 1 hour. If you are short on time, you can vacuum seal the dough and it will instantly be hydrated.
- Follow the directions below for shaping the pici pasta.
Notes
Nutrition
Nutrition information is automatically calculated, so should only be used as an approximation.
Making Pici Pasta
When you are ready to make the pici pasta, form the dough into a shape that can be cut into 4 to 6 even pieces. Cut the pieces and cover them all with the plastic wrap; this keeps them moist.
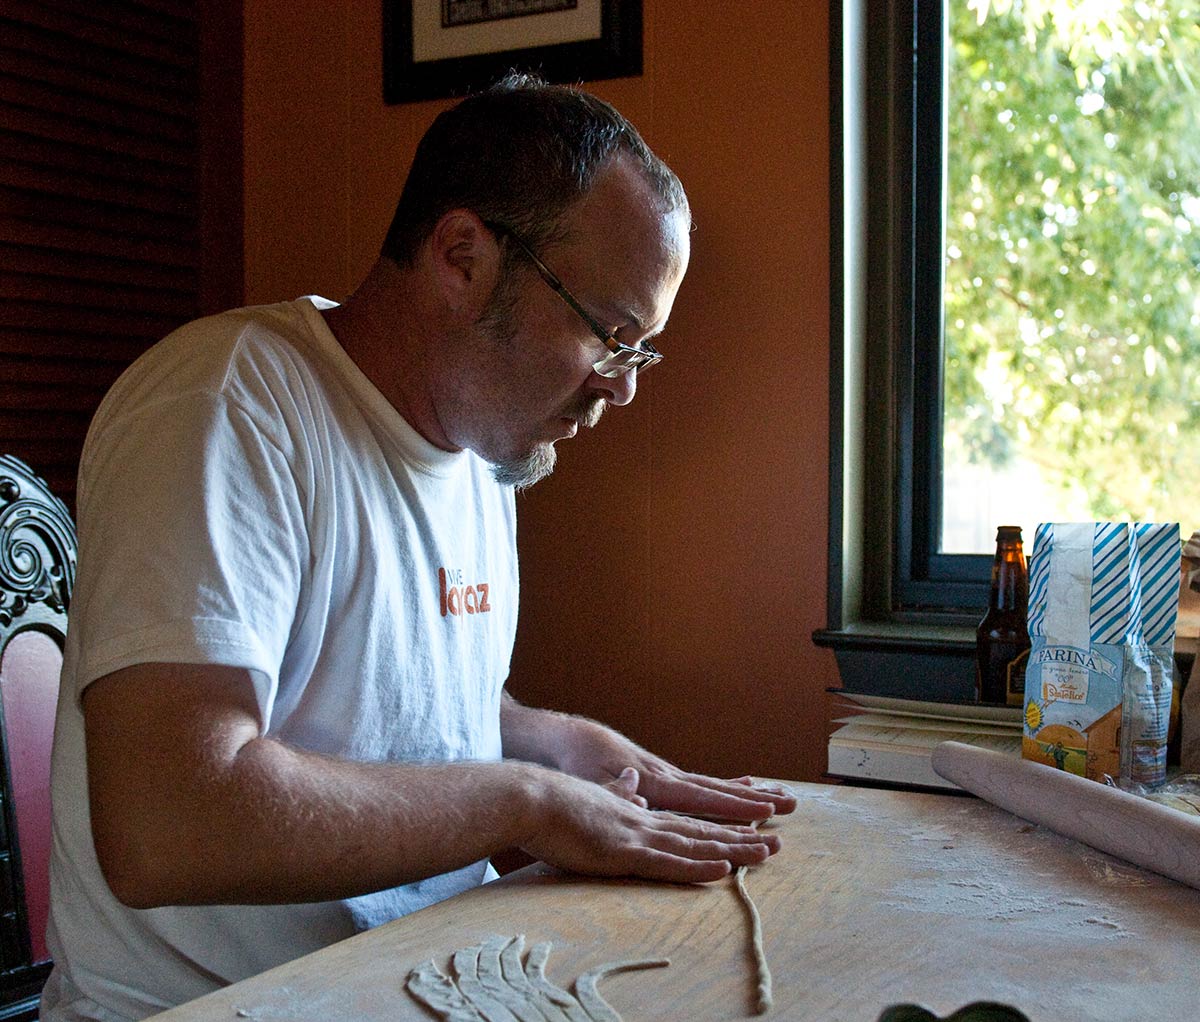
Set out a large area to work in. Because I make so much pasta at home, I have made myself a pasta board. I went to Lowe’s and bought a three-foot square of maple plywood — hardwood is vital because you do not want residual pine resin getting into your pasta.
I sanded the board well and added one special touch: I cut a two-inch slice off the board and bolted it to one end. Why? Because when you work with pasta, you are often kneading, rolling or otherwise doing energetic things. You do not want the board to slip, right? So the bolted-on lip goes over the edge of the table and keeps the board from slipping. Nice, eh?
First thing to do when rolling out pici is to flatten your piece of dough with your hand.
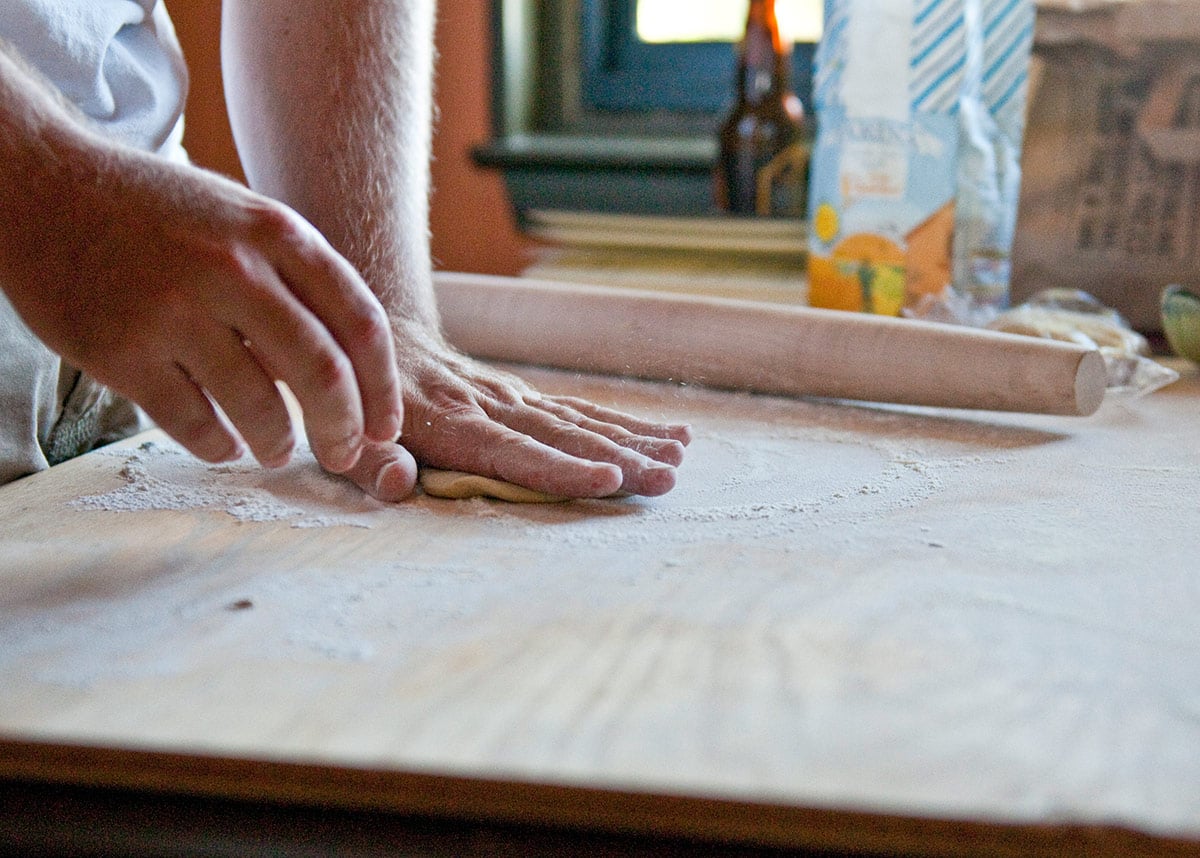
Now make sure it is well floured on both sides. Roll it out with a pin, an Italian pasta rolling pin if possible. A pasta pin does not have rollers and is longer than a regular pin. This gives you more control and allows you to roll out large, thin sheets of pasta by hand.
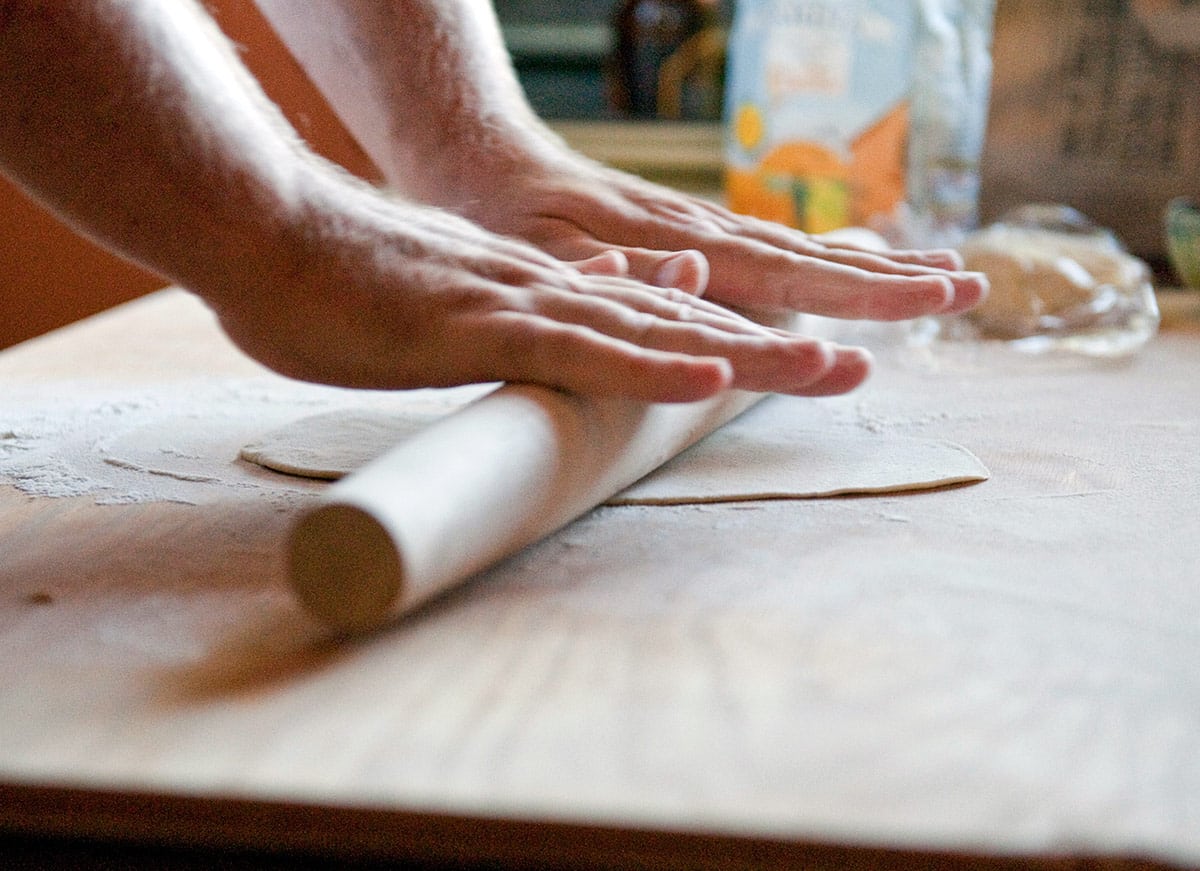
You see how thick the pasta is in the picture? That’s what you want. Nothing overly thin — about 1/8 to even 1/4 inch is fine for pici pasta.
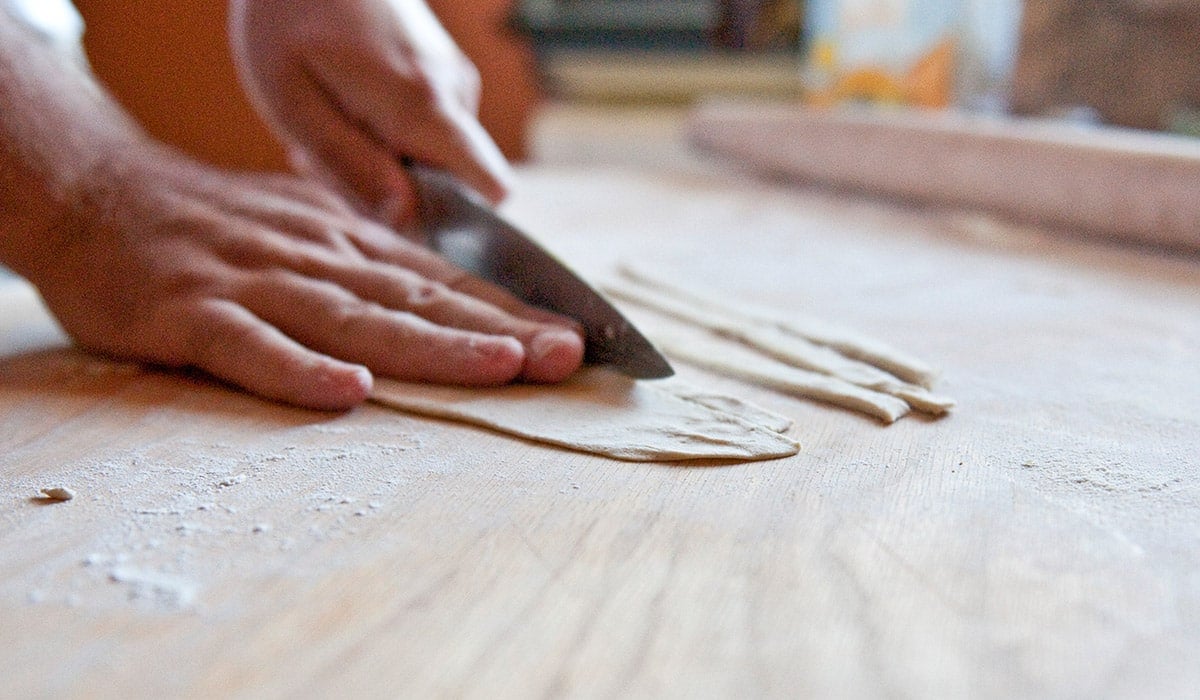
Now you slice the pasta into 1/4 inch lengths. It does not matter if some are longer than the others.
Rolling Pici Pasta
Here’s how you roll out the pici pasta. You work from the outside of the slices inward. This keeps them as moist as possible by limiting air contact with the edges. If you are in a dry environment or are just learning to make this shape, cover the slices you are not working on with a cloth or plastic wrap.
Unlike many pasta shapes, you do not want too much extra flour around when making pici or stringozzi. You want everything to be a little tacky, which helps you roll easier.
Take a slice and pinch it from a flat noodle to something roughly approximating square or round. Key word “rough,” as you are only doing this to make it easier to roll the pasta with your hands.
Now, with your hands flat, roll the pasta from the center outwards rapidly.
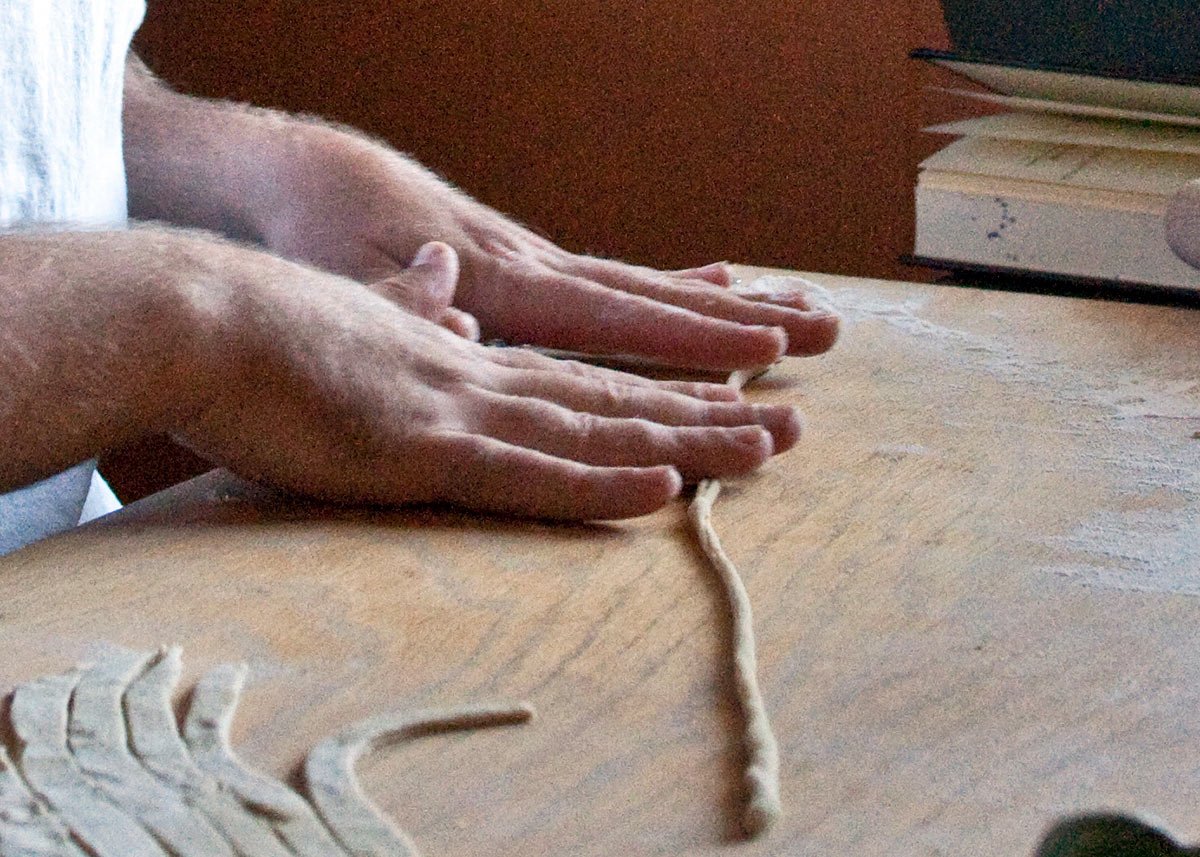
If the pasta is moist enough, you will get a nice roll immediately. Keep rolling it out — center to edges — until the pasta is about 1/4 to 1/6 of an inch in diameter. Pici pasta is supposed to be fat, but the skinnier you can make them, the better.
Make sure you extend your hand out past the edge of the pasta when you roll — this prevents the ends from being fatter or flatter than the center. Still, fat ends happen. If you do have one, you can concentrate on just that side. Be careful you do not stress the rest of the pasta enough to break it.
Finished pici (or stringozzi) should be at least eight inches long, and you can make them up to about 18 inches long. Any longer and they get tricky to dry and eat.
They will be irregular, which is the point, and the surface should be rough, which helps the sauce adhere to it.
As you make the pasta, lay them out on a cookie sheet dusted with cornmeal or semolina pasta. When you complete a sheet, cover it with a cloth. This recipe makes two large cookie sheets’ worth.
Boil the pici pasta in lots of salty water for 2 to 3 minutes. Once they float, boil for another minute or two. Be sure to have your sauce already done before you put the pasta in the water.
What to sauce pici or stringozzi with? Stringozzi typically have herb sauces, truffles or porcini ragu, or a lamb sugo. In Tuscany, pici are usually served with a tomato sauce or with a duck ragu. You could invent your own sauce, or try any of these sauces:
Meatless Spaghetti Sauce
A Greek style tomato sauce great in summer. It features fennel, a little ouzo or Pastis, and lots of herbs.
Read More
Sardinian Gnocchi with Wild Boar
I normally serve this meaty Sardinian ragu with dumplings, but it’s great with pici, too.
Read MoreEat your pici pasta the day you make them. They get brittle and break if you try to store them. Besides, once you get the hang of it, making pici doesn’t take much longer than it does to make a homemade tagliatelle or spaghetti — maybe 45 minutes to an hour, once you have the dough ready.
One of the coolest things about this pasta is that it requires no special equipment: You don’t even need a pasta rolling machine, and even the rolling pin, while useful, can be replaced by an empty wine bottle. And if you don’t have an empty wine bottle lying around, well, there’s only one way to empty it — salud!
If you liked this recipe, please leave a ⭐️⭐️⭐️⭐️⭐️ rating and a comment below; I’d love to hear how everything went. If you’re on Instagram, share a picture and tag me at huntgathercook.