As an Amazon Associate I earn from qualifying purchases.
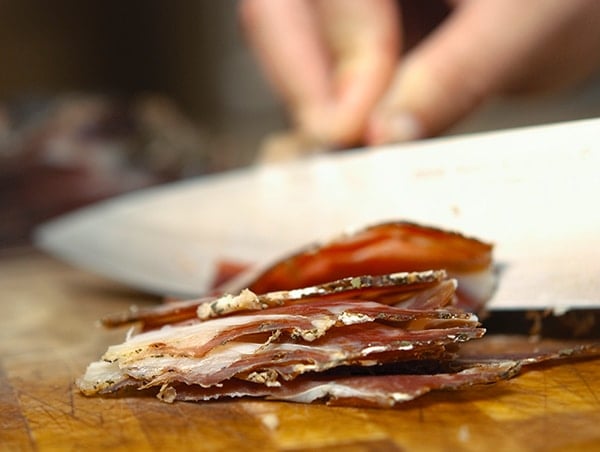
I present to you: mocetta. It was my first-ever dry-cured ham, and it does not come from a pig. This is venison ham.
Mocetta (MOE-chet-uh) is a Northern Italian air-dried goat ham that, I’ve discovered, works well with venison, too.
I wish I could tell you I have an old recipe handed down by the nonnas from Alto Adige, but that’d be a lie. A good lie, yes, but a lie nonetheless. Actually making mocetta became something of a detective job. I can read Italian well enough to read recipes, so I turned Google onto it and read scores of accounts about mocetta, product descriptions in Italian online catalogs, references to it in books, etc.
What I found is that mocetta always has “Alpine herbs and spices.” Um, what the hell does that mean? I decided to go with a piney, aromatic mix of juniper berries, rosemary, bay leaves, black pepper and garlic. Most of these ingredients are mentioned in someone’s mocetta description, so I figured I was close enough.
Why make mocetta? Because it’s a skinless ham. Skinless hams cure easily but are tougher to age well because they can dry out fast. But since we all skin our deer, it’s what you can do.
I do the standard two-step cure many of us use with big hunks o’meat: Rub half the cure mixture on the meat, put in the fridge for several weeks, then rinse and repeat. Yes, you will need to have a leg or two lurking in your refrigerator for the better part of a month. Get a big Tupperware or just deal with it…
Once it’s time to hang the mocetta, you will need a curing space with high humidity and pretty low temperatures. I started mine at 80 percent humidity and about 55°F. As the meat ages, the humidity needs to go down and the temperature needs to go up. At the end, my goat hams were at 60 percent humidity and 60°F.
Mocetta is not cured for very long, relatively speaking, precisely because it is skinless.
Why? Because originally the Italo-Swiss who made it used wild ibex that lived in the Alps — not easy to haul a wild goat out of the mountains with skin on, only to scrape the fur off to preserve skin like you would a real prosciutto. I was very glad to hear that even in Italy, where some of their best products are massive pains in the asses, they took the “easy” way out on this one.

Still, mocetta needs 2 to 5 months hanging. Better than the 12 to 18 months for a real prosciutto, but long enough to begin to develop those mysterious esthers and flavors that a truly old ham gets. Funky yet aromatic.
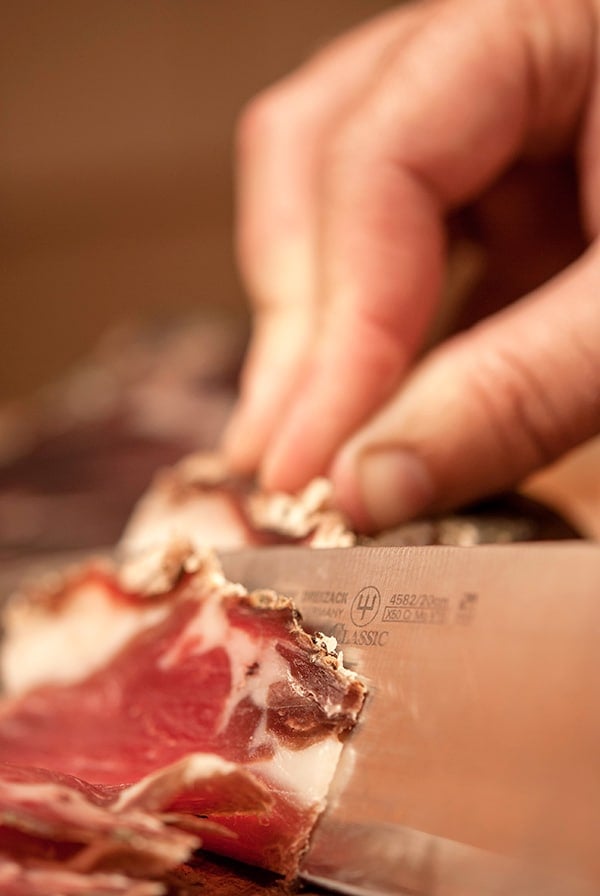
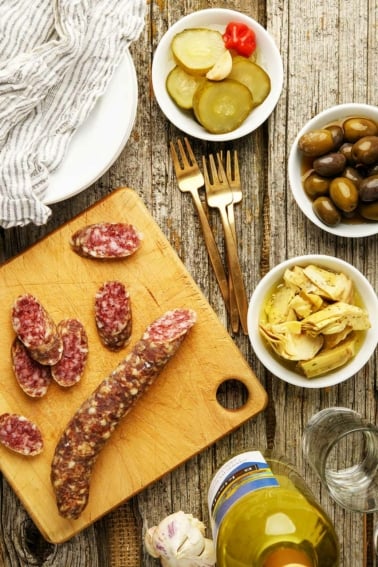
Make no mistake: I do not think my venison ham tastes anywhere near as good as real jamon iberico. But sliced thin, it is excellent: Good color, firm but still supple, meaty, fatty and with an aroma that is just this side of goaty. I like it a lot with a husky red wine.
A note on salt. You will need to weigh your meat in grams and then weigh out 2.5 percent of that in sea salt or kosher salt, then another 0.25 percent – that’s one-quarter of one percent – in cure no. 2, which contains sodium nitrate. I use Instacure No. 2.
Mocetta, Italian Venison Ham
Ingredients
- 1 small hind leg of a deer, about 5 pounds
- Instacure No. 2 (see above)
- Kosher salt (see above)
- 1/2 cup white sugar
- 25 grams garlic powder
- 10 grams juniper berries
- 12 grams black pepper
- 5 grams dried thyme
- 12 grams fresh rosemary
- 15 bay leaves
Instructions
- Grind the juniper berries, black pepper, thyme and bay leaves together until fine. Mince the rosemary. Combine all the spices with the salts and mix well. Divide this mixture in half. Put one part of the cure away in a sealed container.
- Carefully rub half the mixture into the goat legs, making sure to get lots into the ball joint that had connected the leg to the pelvis; this is where leg cuts often spoil. Massage the spices and salts into the meat.
- Put the legs into a large container and refrigerate for 2-3 weeks. Drain off any liquid that seeps out of the meat. You will know it’s about done when the meat has firmed up quite a bit.
- Rinse off the cure and pat the legs dry. Repeat Step 3 with the second half of the cure.
- Let the legs cure in the fridge for another 7-10 days. The longer you go, the saltier the meat will be — and the longer it will last without spoiling.
- When you are ready, rinse off the cure again and soak the legs in fresh water for an hour. This relieves a little of the saltiness and results in a moister cure — you needed to cure with so much salt for so long to make sure it penetrated all the way through to the bone. The water soak removes some of that salt so it won’t be overpowering when you ultimately serve the mocetta.
- Hang for 2-5 months. You want a temperature between 40 and 60°F (colder at the beginning, and warmer near the end), and a humidity starting at about 80 percent and slowly decreasing — say, 5 percent a week) until you are at about 60 percent humidity.
- Once it’s ready, you can cut the meat from the bone and slice thin, or slice bone-in. Serve at room temperature with cheese and a husky red wine. Wrap closely and store in the fridge, or seal it and freeze it.
Notes
Nutrition information is automatically calculated, so should only be used as an approximation.

Hi Hank,
Greetings from the Netherlands. Soon i want to try your recipe to make mocetta. My question to you is: can i use the hind leg of a roe deer (calf) too? And if so…do i need to change the ingredients or time of curing/dry. Because there is no fat on roe deer. With kindly regards
Anita
Anita: Yep, you can use a roe deer hind leg. And there is no fat on our deer, either. My advice is to weigh the meat and use 2.5% of that weight in salt, plus 0.25% in sodium nitrate, which is Cure No. 2. That is a better cure than what I have in the recipe.
Couple questions:
1) How much of the outer silverskin layer do I want to remove? I assume all of it down to bare muscle so the cure will sink in easier? That said, if it will penetrate all the other layers of silverskin surrounding the inner muscles maybe its best to leave it all on?
2) Should I leave the shank on and do the whole leg or just the last joint up?
I was hoping to chat with you at your Old Major dinner about this recipe and a couple others in Denver but you never made it to our table. I didn’t want to be rude and interrupt you while you were chatting around. Thanks for your help, your knowledge has done wonders for me in the kitchen.
Zach, sorry I missed you in Denver! I really try to get to everyone, but that was a huge night. I know I missed some people, and I am sad you were among them.
As for your questions, I remove the thickest layers of silverskin, but not all of it. And yes, remove the shank, as it will not improve in this process. I had to learn that the hard way!
Interesting. I have been corning beef and venison for years, just never dried them. I have an underground cellar, I think it is time to try Mocetta.
I also debone during butchering, so I am planning making a “string bag” using butcher string like the ones used for prosciutto.
Isn’t there a gland in the rear legs of deer that you remove when processing or they can get a bad bitter taste? Do you remove that before curing or cut around it when you’re slicing the finished product? Thanks,
Tim: Sorta. Yes it’s there, but it’s normally removed long before you get home. It’s at the last joint between the shank and the hoof. And it’s only nasty when the deer are rutting.
Hi Hank:
I am enjoying reading and using your recipes. I just returned home to the central CA coast with an antelope. I am thinking of trying the Mocetta idea. When I travel, which since relocating here from better hunting and gathering country up north, I do a lot, I almost always bone out my animals for the trip home (2 antelope fit in a 72 qt cooler this way…). My question: I assume doing this boneless will work?
John: Sure, but you will need to rig up some way to hang it.
Hey Hank – I have a really nice whole leg from a 1.5 year old Iowa buck, so it’s big. Just shot it 2 days ago and want to try this. What could I use for a container to do the initial dry brine in? Would a garbage bag work or does it need to seal? Then wondering about porportions… you just increase by double if it’s twice as big as the ham you describe, etc? Thanks! Love your books and recipes.
Nick: Doesn’t need to seal. I use a big tupperware tub. And yes, increase in proportion to the weight in the recipe. Also, I no longer keep the shank on for this. I remove it and only cure the main part of the leg.
Just started two whitetail legs down the mocetta path!
Hi Hank,
Awesome site! My kids have been pushing me towards making salami, etc. and eventually prosciutto… … … I was considering making a climate controlled cantina in my basement, but your used refrigerator contraption will fit the bill nicely to start. The reason I’m commenting is that you said you read Italian well enough to figure out recipes, and that you have used Google successfully. Have you tried Google.it, the Italian Google? I use it for authentic Italian recipes all the time. A quick search for Mocetta turned up lots of results! Hopefully I’ll be posting in a month or so with the results of some of your recipes.
So I would like to try this with antelope in the fall (if I am lucky and get one). I am nervous though because I would hate to have something go wrong and waste the meat. How would you recommend the average Joe deal with humidity? Short of buying a humidor I don’t see a straight forward way to control this.
Would you recommend another style if humidity control is an issue? Say a prosciutto. It might not be as good because of the reasons listed being lean and so forth but my main concern is not ruining a entire leg.
Stephen: Humidity control is vital here. I’d buy a humidistat to check the ambient humidity in your basement. Or, you can set something up easily in a spare fridge.
Hank- sorry for all the questions but just want to give myself the best chance of success so who better to ask then the master. When not using the lard paste do you still wrap the hind in cheese cloth?
Steve: I don’t.
if I decide not to do the lard paste should I follow your humidity control in this article or would you suggest something different?
Steve: I’d use my humidity schedule. It has worked for me.
Would you recomend another way other then the lard paste?
Steve: You can skip the fat paste, but if you do you will need to keep the humidity very well controlled so the outside does not dry out too fast.
Hi Hank. I am in the salting process right now with a hind quarter from a young deer. My question to you is do you do a lard paste on the hind for the curing process like is done with pork?
Steve: You certainly can. I have only done it once, though. It worked fine.
So I plan on curing a venison ham and would like to age it as you mention. Not sure how I would set the humidity as you detailed. Would it be possible to keep it in an otherwise empty fridge and possibly add something to get humidity to the right amount? Sorry if this is a dumb question, first timer here
Hoosier: It’s pretty important if you want to get it right. Important enough to buy a humidifier and put it in the fridge. I would not try this recipe without a way to set humidity.
Started the aging on January 2nd. Set temp to 50°F and 90% RH. Dropped the humidity to 85% and raised the temp to 51°F after the first week. Is a drop of 5% RH per week too rapid do you think?
Also, I used a mold starter culture to add an extra level of protection against drying out too quick. Just checked it today and it has a really nice layer of pure white mold.
Hank: Could you do this with the back leg/ham from an adult doe? Could I remove one of the larger muscles from the leg and cure the remainder?
Dave: Yep. But be very careful about humidity. You want it pretty humid so the meat does not develop a hard crust on the outside.
Hank gave it a try with two 10lb wild hog hams. They have turned out fabulous as did the lonzino that I made from the same boar. Thanks for posting such great and easy to follow recipes. Curing meat is no longer a mystery to me. Thanks again.
How about the small pig ham?
Ernest: Give it a go. Should be fine.
Hank would a deer shoulder or small wild pig ham work?
Ernest: I would not do it with a shoulder, but yes, a deer ham would work.
Thanks. I’ll closely follow the recipe (first timer) and see how it goes on the principle of knowing the rules before breaking them.