The Best Way to Make Acorn Flour
September 26, 2013 | Updated February 12, 2021
As an Amazon Associate I earn from qualifying purchases.
There is really only one good way to make quality acorn flour: Cold leaching.
Leaching, as is pulling something out. In this case, that something is tannin, which is present in all acorns. Different acorns have different levels of tannins, but in general oaks of the red oak family have more, the white oak family less. One, the Emory oak of the Sonoran Desert, has almost none at all.
Before I go much further, let me answer the question in many of your minds: Why the heck would I bother making flour from acorns? First, flavor. It’s a lot like chestnut flour: Nutty, a little sweet and just generally interesting. Second, nutrition. Acorns vary in nutrition. Some are very starchy, some oily, a few high in protein. Third, it’s just kinda fun to make something useful and tasty out of something many of us mistakenly believe is poisonous.
In my original post about eating acorns, I recommended the boiling water method of leaching out all those bitter tannins. This works fine, and is comparatively fast; you can have a batch of acorns leached in the time it takes to watch a football game, which is about three hours for those of you who have never actually watched a football game.
The problem? The resulting acorn flour is very dark, and the boiling process destroys a key starch in the acorns — a starch that acts a lot like gluten in wheat, i.e., it helps the acorn flour stick to itself, or to thicken gravy or a roux.
I have found myself using acorn flour mostly for making roux, coating meats or as a flour additive in baked goods, tortillas, and pasta. So that starch is pretty important to me.

Cold leaching solves this problem. It preserves the starches and, when dried properly, keeps the flour lighter — closer to whole wheat than that dark chocolate brown you can get with boiling water-leached flour. The tradeoff is time. It takes at least a few days to “clean” your flour, and it can take more than a week.
But it’s easy time. All you need to do is tend your flour once or twice a day. Here’s how to go about it.
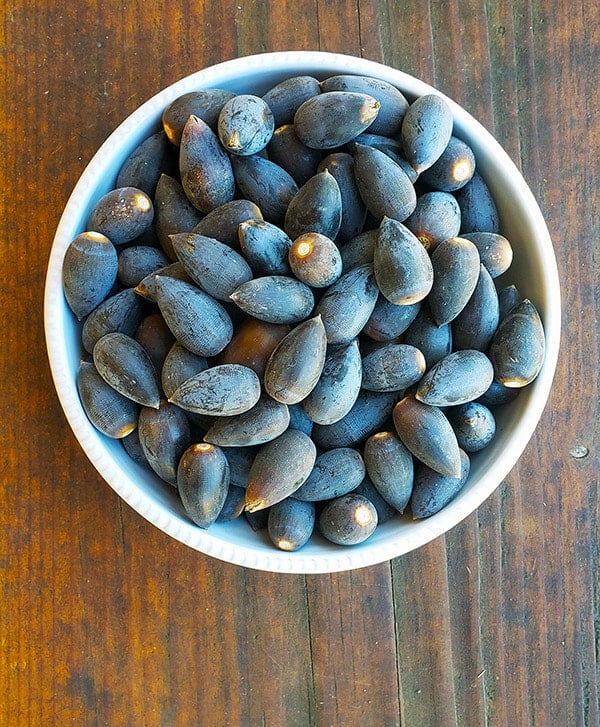
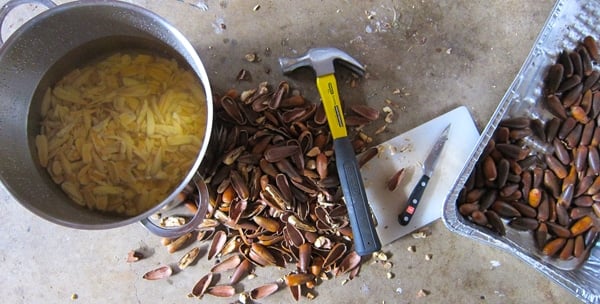
Start with acorns. I know, obvious, right? But know that they need not be fresh. Last summer I made a batch of flour from some red oak acorns I’d picked the previous October. I’d laid them out in a shallow layer in a large tray and just let them dry out. When it came time to crack the shells, it was so much easier than with fresh acorns; fresh acorn shells are pliable, and don’t crack like, say, a hazelnut’s shell.
You will need to soak your shucked acorns in water overnight, though — and it’s the devil to get the papery skins off dried red oak acorns. Those skins darken the flour and are very tannic.
I don’t really bother working too hard at removing the skins, but there is a trick that helps get them off (the skins are called the “test”): Freeze your acorns fresh. When they thaw and you crack them, the skin comes off a lot easier. The problem is storage. Acorns are bulky and can take up a lot of space in your freezer. But hey, if you want that skin off, it will help.
Regardless, shuck your acorns into water. This helps prevent them from oxidizing. I find that if I leave acorn nutmeats out, they turn brown over time. If they are fresh acorns, the papery skins should slip right off once the acorn has soaked a bit.
If you have some acorns with worm-eaten bits, you can cut off the bad part if you want to and toss the good part into the bucket of water.
Once your acorns are all shucked, put enough of them to fill a blender or food processor (use a food processor if your blender isn’t too strong) up about 1/3 of the way. Add enough water to fill the bowl of the processor or blender up halfway. Buzz the crap out of it until you get what looks like a coffee milkshake. Play a mean trick on your friends by pouring them some, and watch the hilarity.
Now, you will need a large container. The absolute perfect container to my mind are those big glass jars you get at the Asian market to make kimchi. You can buy gallon glass jars online or in many hardware stores for about $15. Pour the “coffee milk shake” into the big jar and keep adding more until you have about 50 percent ground acorns and 50 percent water. Cap the jar.
Put the jar into the fridge or just a cool place — it must be below 75°F or the flour will ferment — and walk away. Each morning, pour off the water, being careful to not lose too much of your acorn flour. Refill the jar, cap it and shake the hell out of it, turning it upside down to make sure all the acorn flour is suspended in the water. Repeat as necessary.
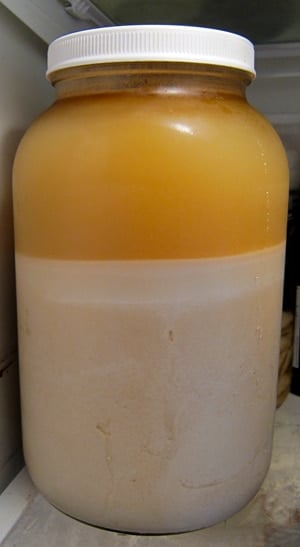
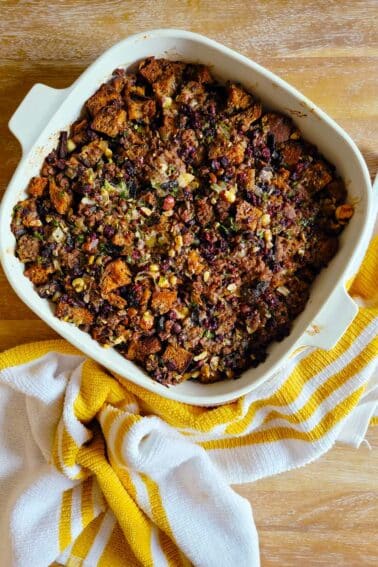
Now, there is an added tip you can do to make an even higher quality acorn flour: Strain the water every day through cheesecloth. Why? Look at the picture above: See the top layer that’s lighter in color? It’s acorn fat and starch.
It’s so light some will pour off every day as you change the water. Straining through cheesecloth preserves this fat and starch and will make your flour even richer and tastier. Do this and you will be rewarded with flavor later.
You know your acorn flour is ready when you roll some around in your mouth and it tastes really bland. Not tannic or bitter at all. Roasting can eliminate a little bit of tannin, but we’re not roasting in this case, so you want the flour to be as “clean” as possible.
For California Valley oak acorns, Eastern white oak acorns or other “sweet” acorns, this process could take as few as three days. But 5 days is more normal. California black and blue oaks take about a week. And Eastern red oak acorns? They took 10 days. When in doubt, go another day. You can’t hurt the flour by leaching a few extra days.
Now you have a bunch of soaking wet flour. First thing you will need is cheesecloth. Any supermarket will have it, but I have taken to using real cheesecloth, i.e., cloth actually used in cheesemaking. You can buy real cheesecloth online or in specialty shops.
Line a fine-mesh strainer with some cheesecloth and set it over the sink. Pour the water in the jar through it, catching all the flour.
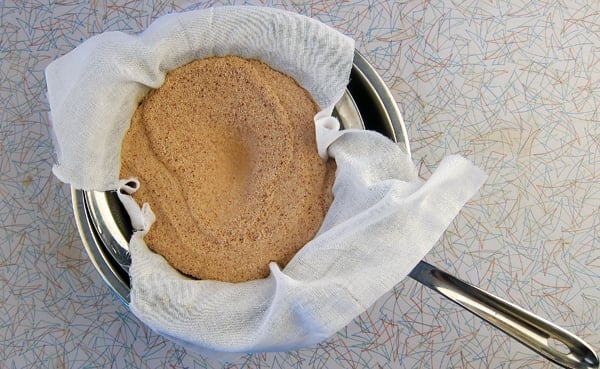
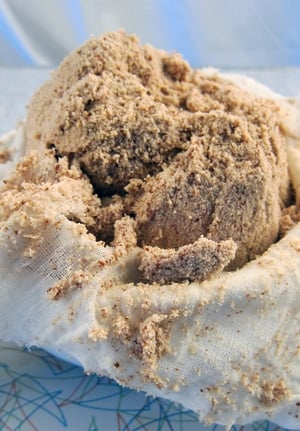
Squeeze the cloth tight around the flour to extract as much water as possible. This is why I use real cheesecloth — the cheap stuff at most supermarkets is too porous and thin to do the job very well, forcing you to squeeze less and spend more time drying — and the longer the drying time, the darker the flour. You will be left with what looks a lot like a ball of clay.
Tip: Let the water in the bowl settle for 1 hour. Carefully pour off the water and you will see a layer of what looks like beige house paint or melted coffee ice cream. This is acorn starch and fat. Use a spatula to scrape it into the container you are drying your acorns in.
Now you need to really dry your flour, unless you plan on making something with it right away. I almost never do this.
Spread your wet flour on a baking sheet, or on a solid dehydrator tray; the trays you use for fruit leather. I prefer the dehydrator because I can dry at a lower temperature. Or, if you do this in summer, you can dry outdoors or in a hot garage.
Dry at as low a temperature as you can. I use a dehydrator set at 95°F. Check in on your flour every few hours, turning it over so it dries evenly. This can take anywhere from an hour to a day. You want the flour to be dead dry. No moisture.
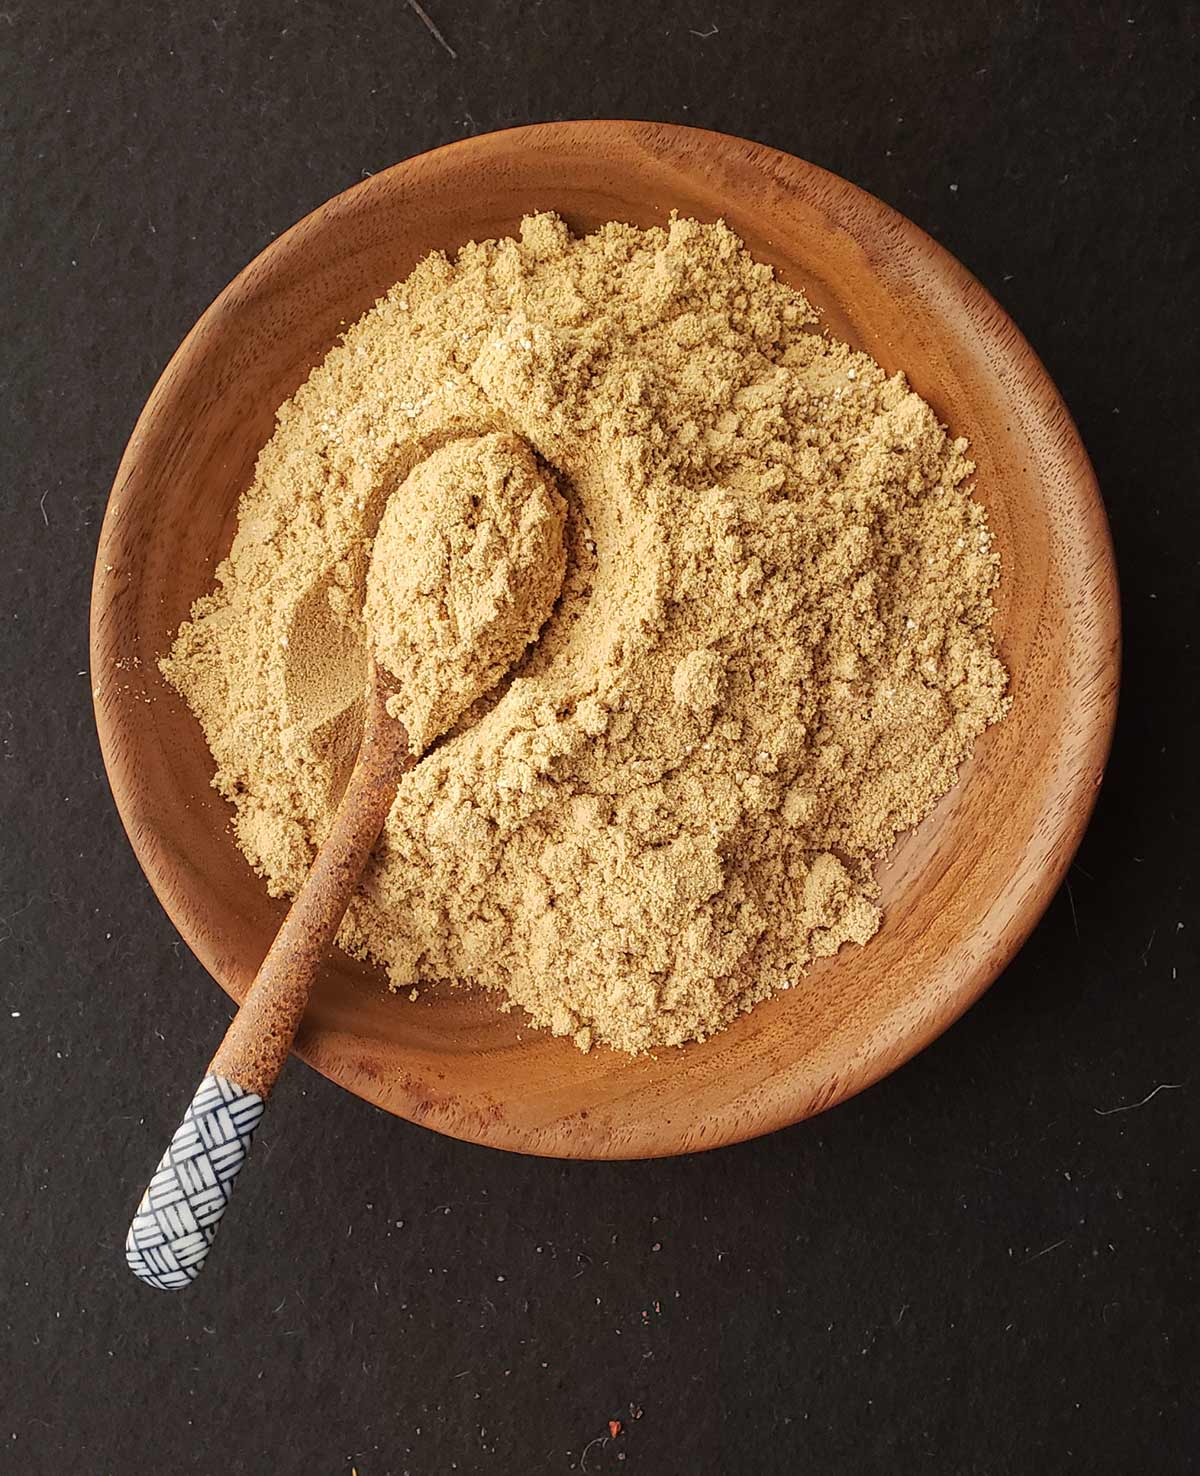
You are almost there. You now have what is essentially acorn “corn meal,” a gritty, coarse “flour” you can use to make polenta with; it’s pretty good, actually. But to make real flour you need to grind it one more time.

To turn your acorn polenta into acorn flour, grind the dried meal in a spice grinder, coffee grinder, or, best yet, a Vitamix fitted with dry blades. This is what I use, and it is worth every penny.
If you have a flour sifter this is a good time to break it out. Grind and sift into a clean bowl until you have nothing but pure, powdery goodness. A typical coffee grinder will require about 35 seconds of grinding to get there, my Vitamix takes only 15 seconds.
Your acorn flour is mildly fragile, especially if you are dealing with high fat acorns, like blue oaks, live oaks and red oaks. I store mine in quart Mason jars in the fridge or freezer. Stored this way, the flour will last for several years — which is good, because oaks don’t drop huge amounts of acorns every year.
Does all this sound like a lot of work? Well, I won’t lie to you: It is. And like I said, this process makes the highest quality acorn flour possible. There are easier ways, but the quality of the flour is inferior. This will make you quite aware about how we take regular wheat flour for granted. Do this and I can guarantee you will not be tossing around acorn flour the way you would with all-purpose. It’s too precious.
How to Make Acorn Flour
Equipment
- Cheesecloth
- A large jar
- Blender
Ingredients
- 3 pounds acorns
- Water
Instructions
- Start by shelling your acorns into a bowl of cool water. This will take about an hour, more or less. I typically do it while watching television. Putting the shells in water immediately will prevent them from oxidizing.
- Once you have all the acorn meats shelled (a little of the brown skin, called the test, is OK), puree them with water in the blender. Pour this into your large jar and set in a cool place, cooler than about 60°F. I will often refrigerate it. Temperatures too warm will cause it to ferment.
- Every day, up to twice a day, carefully pour off the water and replace it. As an added, but optional step, you can pour the last of each day's water -- the stuff with the most fine sediment in it -- into a baking sheet and let the water evaporate from it. What's left is pure acorn starch, which you can use exactly like corn starch.
- After about four or five days, taste the meal. It should be bland, not bitter. If it is still bitter, keep changing the water until it's not. Each species of acorn will need different leaching times.
- When the wet meal is ready, move it to a strainer lined with cheesecloth. Strain out as much water as possible. In this step, you really do want to capture this last water because it is loaded with starch. Let that water evaporate from a baking sheet.
- Lay out your wet acorn meal to dry. I use a dehydrator set at 95°F. Shoot for conditions like that. An oven is too hot and will turn the flour dark brown.
- When the meal is completely dry, add it and any chunks of acorn starch to a spice grinder or blender and buzz until completely fine, like wheat flour. Store in a jar in the fridge or freezer, so the acorn fats don't go rancid. It will keep this way a year or more.
Notes
Nutrition information is automatically calculated, so should only be used as an approximation.


Hey Hank, thank you so much for this tutorial! I started out with whole acorns soaking, then a rough grind, then a finer one. It’s my first time and I was experimenting. At this point it’s been soaking for well over two weeks in the fridge, as I’ve only changed the water once a day and didn’t make much progress while the acorns were whole. It’s finally not bitter anymore, but I’ve noticed the white layer of what I hope is starch has been collecting on the bottom, whereas yours has collected at the top, as did mine last week. I’m wondering if this is an indication of something amiss, or if there’s a duration of time in the fridge where things start to go off.
Natalie: I’ve had acorns leaching in the fridge a month with no problems, so I don’t think the meal has soured. And yes, the starch is likely the layer on the bottom. Not sure why it’s there and not the top, but hey. Nature.
This is my second time trying to make acorn flour. Both times it looked just like your photos until after the drying step. The acorn meal turned quite a dark brown during the drying process. Is this normal and ok to eat?
Brianne: it’s normal, but it means you dried the meal hot. The cooler it dries, the lighter it will be.
I’m glad I found this site. I was looking for acorn flour recipes and this is well explained. Thanks you. This year, where I live (East TX), the white oak varieties are loaded, unlike the past 3 years. Also, I’m going to give some flour to a brewer I know to see what we could make. Acorn beer?
We have access to different kinds of acorns. Would it be ok to mix the type of acorns & make a batch of flour with more than one type, or would you suggest single-type batches? Thank you for sharing this recipe, Hank. I look forward to trying the process with my children & from hearing back from you.
Rachel: Yes, you can do that, but the flour will be ready when the most tannic of the acorns has leached clean, so longer than if you had just used white oak acorns. I really prefer single variety batches because different species have different ratios of fat vs. starch.
Ok, thanks, this was very informative! I’d like to see if I understood the process correctly. So here are the steps, I think?
1. I’m using live oak acorns that are about 1/2 inch size with the caps on but they are brown.
2. Remove the caps.
3. Remove the shells dropping the meats into cool water. (limit amount of test as much as possible).
4. Puree them in new water in a blender. Pour puree into clean jar and refrigerate (In Florida, this is essential.). Probably 10 days or more because they are live oak.
5. Daily decant the water and replace it with new water. After 10+ days taste the coarse sediment. If it is bitter, continue this process until the sediment is pleasant tasting.
Would decanting twice a day speed up the reduction of astringent? (live oak acorns)
6. Save the cloudy water and fine sediment that is poured off.
a. Dry the decanted old water & the fine sediment on a baking sheet to make acorn starch or powder.
OK to use heat or a fan to speed the drying up?
Could the acorn powder be used as to control bleeding in first aid? (Is it astringent enough to reduce bleeding?)
Would the dried acorn powder be safe to use as a “baby powder”?
7. Strain the non-astringent slurry through cheese cloth pressing to remove “all” the moisture possible. Taste the mash. If it is still bitter tasting, repeat step 5&6 until mash is pleasant.
8. Dehydrate the mash or meal in a dehydrator (95 degrees). When it is completely dry add in the acorn starch and grind until desired fineness is achieved.
9. Store the completely dry fine flour in a jar in the refrigerator or freezer.
10. Shelf life is approximately 1yr in cold storage; maybe 6 months at room temperature.
Susan: Yes, that’s basically it. To answer some of your questions… Yes, decanting 2x a day speeds things up. Yes, a fan is fine. No idea on wound healing. Not my area of expertise.
Hello Hank,
In the interest of saving energy (always important to me with foraging foods), I plan on drying my burr oak acorns from fall to when the weather starts getting cold. Once cold, I plan to do the cold leaching process outdoors. Then, I’d like to leave it in that state until summer comes again, and then dry it with the summer heat. What’s the best way to store it in the interim? I imagine it’s a bad idea to keep it in the water the entire time? Have you ever tried that? My other option would be freezing still wet in freezer bags in a deep freezer. Do you think this will work?
Leah: Don’t think that will work. Once the meal is leached, it will begin to ferment if left there too long. But I am betting you could lay it out in a thin layer in the garage in winter to let it dry in the cold environment.
Does it produce alcohol when it ferments, and is it any good?
Abram: No, it does not.
Hi! Thanks for this detailed recipe. I’m excited to try it!
If I’m not going to process my acorns for a while, is it better to freeze them in the meantime or just let them dry? And if I freeze them, should I let them dry first?
Thank you!
Joanna: Freezing them can help to remove the papery “test,” the coating around the nut itself, so I’d freeze them whole.
Hello! Thank you so very much for all of your incredible recipes and resources!! I’m going to attempt to make acorn flour with Burr Oak acorns (HUGE acorns wildly available in my midwest region). I’m wondering, please, what is the best time of year to harvest acorns? My ancestor cells are saying the fall, when the acorns start to fall; is this correct, or are there other times of the year that acorns can be harvested? Thank you!!
Amy: Yes, you collect acorns in autumn, when they fall.
Hi Hank—I tied this recipe using CA black oak. After I shelled and blended with water, I think I might have blended too fine because leaching water was cloudy for first couple of days. Do you think this was a lot of the starch suspended in the water? Do you think one can blend it too fine in the beginning, causing too much loss of starch?
Also, I tasted some of the meal after two weeks (!) and it seemed mostly non-astringent, def edible. However, when I cooked it up to try and make Korean acorn jelly, it came out extremely astringent. I’m stumped as to why it tastes so astringent, almost like I didn’t leach it at all. Is drying it out important to reducing astringency? I just drained it, then added water and cooked it down to try and make jelly.
Luckily I have more acorns to try again, but I’m not sure why leaching time was so long and why it was still so astringent in the end, after seemingly being done leaching. Thanks Hank, if you’re able to reply.
Hi Grace! It’s supposed to be cloudy, and in fact remains cloudy for days and days, even after shaking and refilling and pouring off the previous day’s water… which might be why yours was astringent. Did you change the water every day? That is vital to the process. In fact, I will sometimes change it twice a day in the beginning. It’s the changes of water that leach away the astringency.
I have been soaking for a couple of days and suddenly got a super dark (almost black) skin that formed in the top. Now each half day has a skin like that (though not as dark). Did I get some contaminant in that is fermenting/making a scoby? It doesn’t smell but I am using a large container that isn’t really sealed.
Nathan: I think that is the tannins leaching out. Just keep changing the water once or twice a day.
Question about the leaching process: The first few days the supernatant was brownish, but transparent, but starting on day 3, the supernatant became cloudy (milky). Is this normal, or did I do something wrong?
Ellen: 100% normal. Tannins are dark in color, and as you leach them out, the water gets lighter in color.
I’ve just started processing acorns and scaling up my production. I find that letting the acorns dry out before shelling makes it less labor intense. I can bag the shelled nuts and use them as I need them. I picked up a 1940’s vintage meat grinder to grind the nuts prior to leaching. It works like a charm and I wind up with a course flour with the largest pieces being 6mm or less. Smaller pieces cuts the cold leaching time down. The last day or two of leaching I use a lye solution of 1tsp of food grade potassium hydroxide per half gallon of water. I rinse thoroughly through a filter of clean muslin cloth. If rinsed well enough there should be no bitter taste and the pH should be 6 to 8. KOH is easy to detect since it will taste bitter so pH paper really isn’t needed. I enjoy the larged dried pieces mixed with walnuts and raisins in some gorp.
Hi, I read somewhere to let the acorn meat dry out once you shelled it. So I shelled it and left it out overnight. I am worried I let it all oxidize. Is it worth finishing at this point? Thank you for your help!
Thanks for sharing this! I’m at the point where it’s sitting in our refrigerator. My flower is still in little chunks. I’m blended it for probably 5 minutes but it’s not fine like wheat flour. It’s little tiny chunks like you would find on a beach. Little chunks of sand or rock. Is that okay?
Alisha: Yes, that’s OK for now. You will grind it finer later, after dehydrating it.
Hi! I’m excited to use this recipe, and I was wondering how many cups of flour you could make per pound of acorns? I know you used 3lb in this recipe, how much flour did that make?
Sophia: Couldn’t tell you because all acorns are different shapes and sizes. The three pounds make a quart of flour in my case.
I am just trying this for the first time, and unfortunately, I do not have a food dehydrator, so am stuck with the oven method. I know it will result in browner flower; however, can you give me a ballpark time by which it should be completely dry? Do you recommend drying the same batch in multiple, shorter bursts, to avoid the toasting effect? And will the heat from the oven do the same thing to the gluten-like protein in the acorn that hot water processing does?
Nola: Yes, I’d recommend putting the oven on “warm” to do it, and stirring the flour around from time to time. If it gets hot, remove and cool, then repeat. It might take the better part of 4 hours, total.
Hi, if I have green acorns will they turn brown over time and be usable for flour?
Andrea: Start making flour with them now. It will still work. Next time use brown ones.
Thanks for laying this out! There was a large drop of acorns all around the soccer fields where my girls play, so I harvested a bucket full and went through this whole process. Like you said, a lot of work, but really cool and the end product was great!
Hi Hank, I’ve just picked quite a few green acorns right off the tree with caps still on. Understand now that maybe this wasn’t the best idea, however is there anything I can do with the green acorns? Maybe a liqueur similar to a walnut liqueur (nocino) or maybe pickled acorns?
I’ve laid them all out in a shallow tin to see if they’ll ripen off the tree, do you know if they will brown this way?
Thanks in advance!
Sophia
Sophia: I’d process them as usual. They should be OK this late in the season. Might be more tannic than normal, though.
I too have many young, pale green to medium brown colored acorns and the thin skin under the soft shell is stuck like glue to the inside white meat. I have soaked these nuts for days changing water and rinsing once or twice daily. Cannot remove those inner skins and they are very bitter. Is there anything that can be done? Is freezing the soaked nut at this point helpful? These are from black oak trees. Thanks
Dee: I’d just carry on. It’s happened to me, and I ground and leached the acorns as usual. It will all work out.
Hi I have multiple questions.
1. Can you use green acorns?
1a. If yes would the possess be the same?
2. One of the comments said don’t use the acorns with the cap on them is this correct and if so why?
3. Can you use different varieties of acorns in the same batch?
4. How can you tell what type of acorns you are picking ie red oak black oak?
Rebecca: 1. No. 2. Yes. They will be buggy. Oaks jettison their acorns early, cap and all, when they have a larva inside them. 3. It’s not ideal. Because the leaching times won’t be the same. But if you go until the whole batch is clean, you’d be OK. 4. Learn your trees. Each has a distinctive leaf, bark and acorn shape.
Why can’t you use green acorns?