The Best Way to Make Acorn Flour
September 26, 2013 | Updated February 12, 2021
As an Amazon Associate I earn from qualifying purchases.
There is really only one good way to make quality acorn flour: Cold leaching.
Leaching, as is pulling something out. In this case, that something is tannin, which is present in all acorns. Different acorns have different levels of tannins, but in general oaks of the red oak family have more, the white oak family less. One, the Emory oak of the Sonoran Desert, has almost none at all.
Before I go much further, let me answer the question in many of your minds: Why the heck would I bother making flour from acorns? First, flavor. It’s a lot like chestnut flour: Nutty, a little sweet and just generally interesting. Second, nutrition. Acorns vary in nutrition. Some are very starchy, some oily, a few high in protein. Third, it’s just kinda fun to make something useful and tasty out of something many of us mistakenly believe is poisonous.
In my original post about eating acorns, I recommended the boiling water method of leaching out all those bitter tannins. This works fine, and is comparatively fast; you can have a batch of acorns leached in the time it takes to watch a football game, which is about three hours for those of you who have never actually watched a football game.
The problem? The resulting acorn flour is very dark, and the boiling process destroys a key starch in the acorns — a starch that acts a lot like gluten in wheat, i.e., it helps the acorn flour stick to itself, or to thicken gravy or a roux.
I have found myself using acorn flour mostly for making roux, coating meats or as a flour additive in baked goods, tortillas, and pasta. So that starch is pretty important to me.

Cold leaching solves this problem. It preserves the starches and, when dried properly, keeps the flour lighter — closer to whole wheat than that dark chocolate brown you can get with boiling water-leached flour. The tradeoff is time. It takes at least a few days to “clean” your flour, and it can take more than a week.
But it’s easy time. All you need to do is tend your flour once or twice a day. Here’s how to go about it.
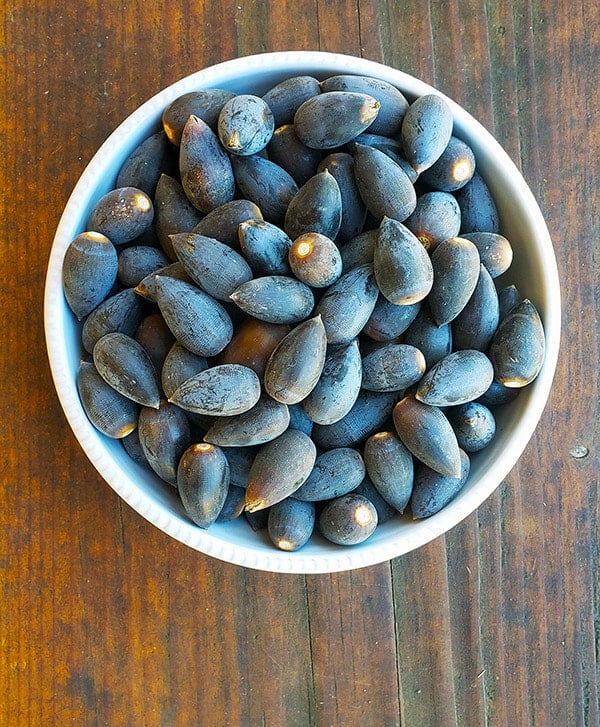
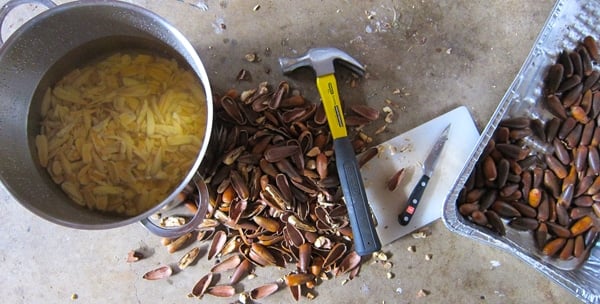
Start with acorns. I know, obvious, right? But know that they need not be fresh. Last summer I made a batch of flour from some red oak acorns I’d picked the previous October. I’d laid them out in a shallow layer in a large tray and just let them dry out. When it came time to crack the shells, it was so much easier than with fresh acorns; fresh acorn shells are pliable, and don’t crack like, say, a hazelnut’s shell.
You will need to soak your shucked acorns in water overnight, though — and it’s the devil to get the papery skins off dried red oak acorns. Those skins darken the flour and are very tannic.
I don’t really bother working too hard at removing the skins, but there is a trick that helps get them off (the skins are called the “test”): Freeze your acorns fresh. When they thaw and you crack them, the skin comes off a lot easier. The problem is storage. Acorns are bulky and can take up a lot of space in your freezer. But hey, if you want that skin off, it will help.
Regardless, shuck your acorns into water. This helps prevent them from oxidizing. I find that if I leave acorn nutmeats out, they turn brown over time. If they are fresh acorns, the papery skins should slip right off once the acorn has soaked a bit.
If you have some acorns with worm-eaten bits, you can cut off the bad part if you want to and toss the good part into the bucket of water.
Once your acorns are all shucked, put enough of them to fill a blender or food processor (use a food processor if your blender isn’t too strong) up about 1/3 of the way. Add enough water to fill the bowl of the processor or blender up halfway. Buzz the crap out of it until you get what looks like a coffee milkshake. Play a mean trick on your friends by pouring them some, and watch the hilarity.
Now, you will need a large container. The absolute perfect container to my mind are those big glass jars you get at the Asian market to make kimchi. You can buy gallon glass jars online or in many hardware stores for about $15. Pour the “coffee milk shake” into the big jar and keep adding more until you have about 50 percent ground acorns and 50 percent water. Cap the jar.
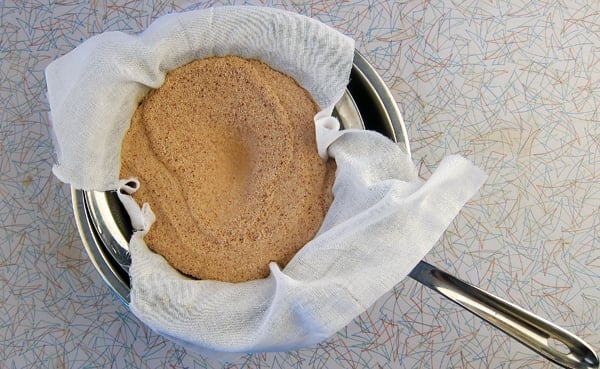
Put the jar into the fridge or just a cool place — it must be below 75°F or the flour will ferment — and walk away. Each morning, pour off the water, being careful to not lose too much of your acorn flour. Refill the jar, cap it and shake the hell out of it, turning it upside down to make sure all the acorn flour is suspended in the water. Repeat as necessary.
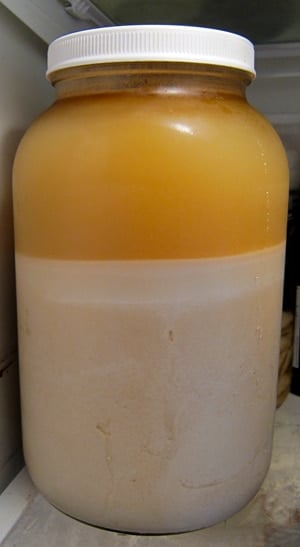
Now, there is an added tip you can do to make an even higher quality acorn flour: Strain the water every day through cheesecloth. Why? Look at the picture above: See the top layer that’s lighter in color? It’s acorn fat and starch.
It’s so light some will pour off every day as you change the water. Straining through cheesecloth preserves this fat and starch and will make your flour even richer and tastier. Do this and you will be rewarded with flavor later.
You know your acorn flour is ready when you roll some around in your mouth and it tastes really bland. Not tannic or bitter at all. Roasting can eliminate a little bit of tannin, but we’re not roasting in this case, so you want the flour to be as “clean” as possible.
For California Valley oak acorns, Eastern white oak acorns or other “sweet” acorns, this process could take as few as three days. But 5 days is more normal. California black and blue oaks take about a week. And Eastern red oak acorns? They took 10 days. When in doubt, go another day. You can’t hurt the flour by leaching a few extra days.
Now you have a bunch of soaking wet flour. First thing you will need is cheesecloth. Any supermarket will have it, but I have taken to using real cheesecloth, i.e., cloth actually used in cheesemaking. You can buy real cheesecloth online or in specialty shops.
Line a fine-mesh strainer with some cheesecloth and set it over the sink. Pour the water in the jar through it, catching all the flour.
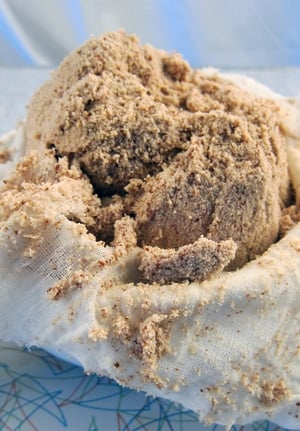
Squeeze the cloth tight around the flour to extract as much water as possible. This is why I use real cheesecloth — the cheap stuff at most supermarkets is too porous and thin to do the job very well, forcing you to squeeze less and spend more time drying — and the longer the drying time, the darker the flour. You will be left with what looks a lot like a ball of clay.
Tip: Let the water in the bowl settle for 1 hour. Carefully pour off the water and you will see a layer of what looks like beige house paint or melted coffee ice cream. This is acorn starch and fat. Use a spatula to scrape it into the container you are drying your acorns in.
Now you need to really dry your flour, unless you plan on making something with it right away. I almost never do this.
Spread your wet flour on a baking sheet, or on a solid dehydrator tray; the trays you use for fruit leather. I prefer the dehydrator because I can dry at a lower temperature. Or, if you do this in summer, you can dry outdoors or in a hot garage.
Dry at as low a temperature as you can. I use a dehydrator set at 95°F. Check in on your flour every few hours, turning it over so it dries evenly. This can take anywhere from an hour to a day. You want the flour to be dead dry. No moisture.
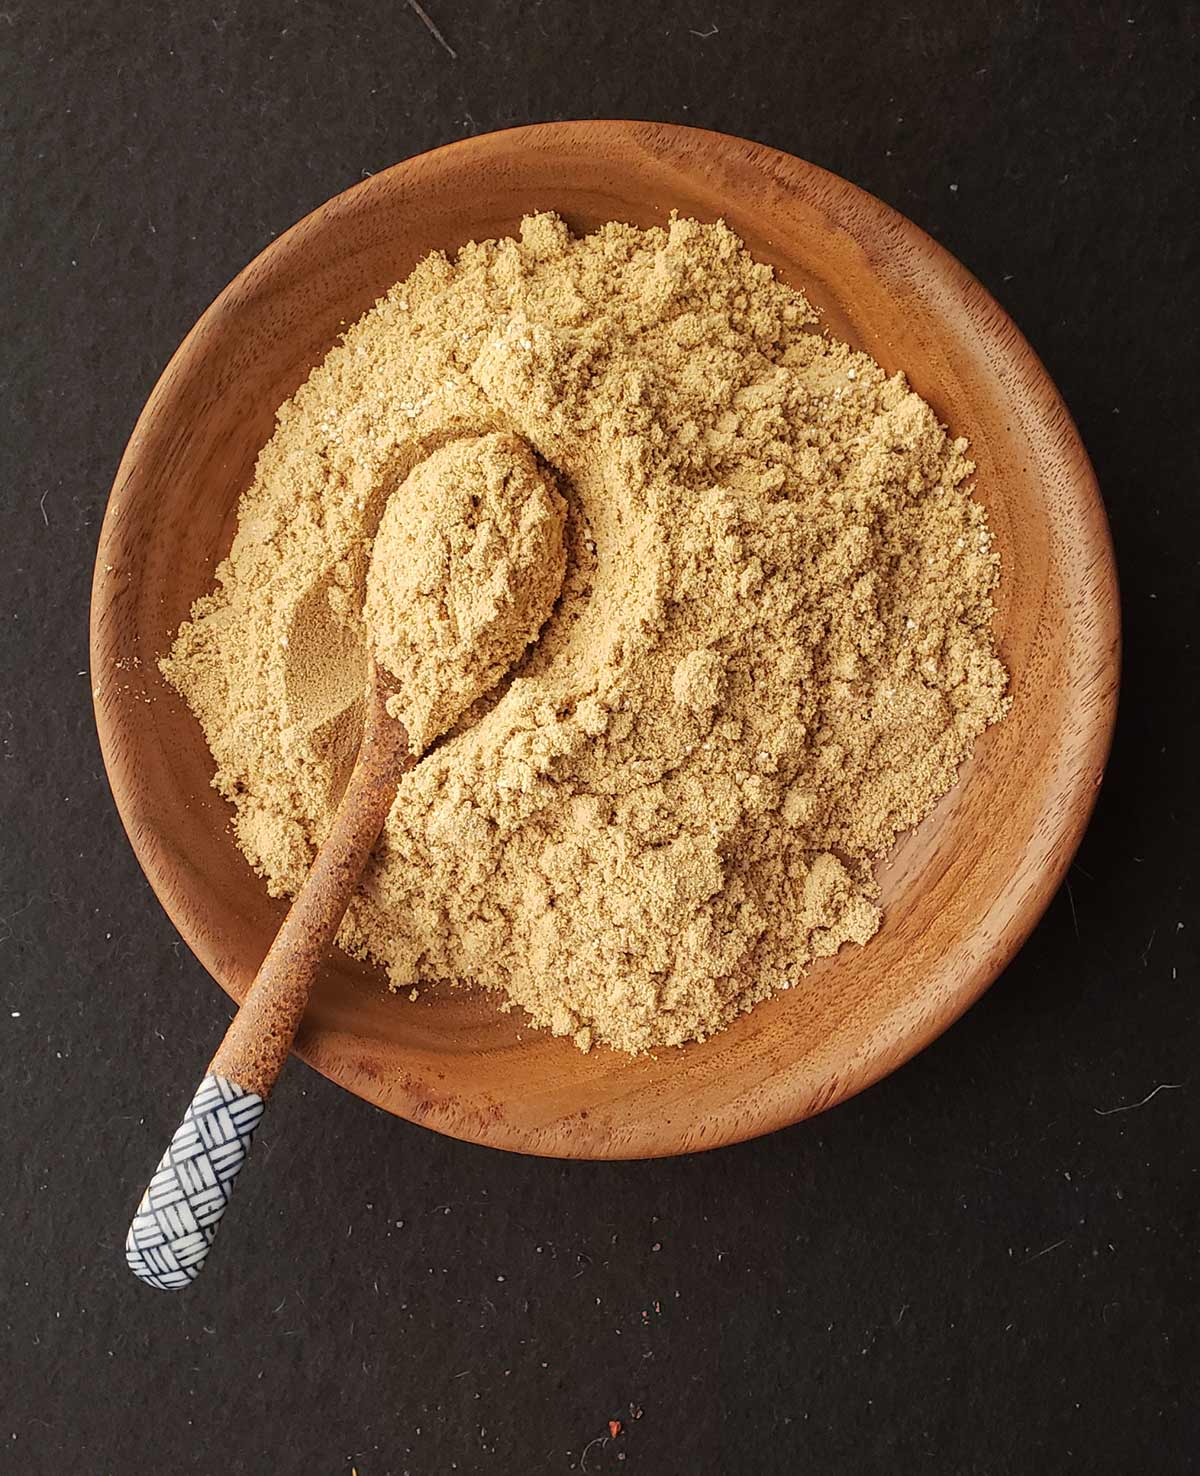
You are almost there. You now have what is essentially acorn “corn meal,” a gritty, coarse “flour” you can use to make polenta with; it’s pretty good, actually. But to make real flour you need to grind it one more time.

To turn your acorn polenta into acorn flour, grind the dried meal in a spice grinder, coffee grinder, or, best yet, a Vitamix fitted with dry blades. This is what I use, and it is worth every penny.
If you have a flour sifter this is a good time to break it out. Grind and sift into a clean bowl until you have nothing but pure, powdery goodness. A typical coffee grinder will require about 35 seconds of grinding to get there, my Vitamix takes only 15 seconds.
Your acorn flour is mildly fragile, especially if you are dealing with high fat acorns, like blue oaks, live oaks and red oaks. I store mine in quart Mason jars in the fridge or freezer. Stored this way, the flour will last for several years — which is good, because oaks don’t drop huge amounts of acorns every year.
Does all this sound like a lot of work? Well, I won’t lie to you: It is. And like I said, this process makes the highest quality acorn flour possible. There are easier ways, but the quality of the flour is inferior. This will make you quite aware about how we take regular wheat flour for granted. Do this and I can guarantee you will not be tossing around acorn flour the way you would with all-purpose. It’s too precious.
How to Make Acorn Flour
Equipment
- Cheesecloth
- A large jar
- Blender
Ingredients
- 3 pounds acorns
- Water
Instructions
- Start by shelling your acorns into a bowl of cool water. This will take about an hour, more or less. I typically do it while watching television. Putting the shells in water immediately will prevent them from oxidizing.
- Once you have all the acorn meats shelled (a little of the brown skin, called the test, is OK), puree them with water in the blender. Pour this into your large jar and set in a cool place, cooler than about 60°F. I will often refrigerate it. Temperatures too warm will cause it to ferment.
- Every day, up to twice a day, carefully pour off the water and replace it. As an added, but optional step, you can pour the last of each day's water -- the stuff with the most fine sediment in it -- into a baking sheet and let the water evaporate from it. What's left is pure acorn starch, which you can use exactly like corn starch.
- After about four or five days, taste the meal. It should be bland, not bitter. If it is still bitter, keep changing the water until it's not. Each species of acorn will need different leaching times.
- When the wet meal is ready, move it to a strainer lined with cheesecloth. Strain out as much water as possible. In this step, you really do want to capture this last water because it is loaded with starch. Let that water evaporate from a baking sheet.
- Lay out your wet acorn meal to dry. I use a dehydrator set at 95°F. Shoot for conditions like that. An oven is too hot and will turn the flour dark brown.
- When the meal is completely dry, add it and any chunks of acorn starch to a spice grinder or blender and buzz until completely fine, like wheat flour. Store in a jar in the fridge or freezer, so the acorn fats don't go rancid. It will keep this way a year or more.
Notes
Nutrition information is automatically calculated, so should only be used as an approximation.


Hello dear nature friend,
How does the English Oak rank on tannins or edibility? Thanks
I’ve been harvesting live oak acorns this year. The shelling is really tedious but i am going to try the cold soaking! It’s nice to be able to use this resource. If you grow your own grain, the harvesting and threshing and winnowing by hand really isn’t much more tedious honestly!
I live in a forest of mature blue oaks. If you can time picking up your acorns to just as they fall (main fall not early usually green wormy ones) the shell is as soft as a chestnut and the inner peel mostly sticks to the shell any remaining peels off like nothing. Easiest at that point to just cut them in 1/2 right through the shell then pop them out-too soft to “crack”. Watch your fingers sometimes they roll as you cut.
How about burr oak acorns? We usually have bountiful acorns each year except last. We had none because of strange weather. This year it has been a hailstorm of acorns. We have red, white, burr oaks and maybe another kind. Would love to make use of the acorns.
Gramma: I love using burr oaks!
Thanks for the information!
Hey there! I am currently in the process of making some acorn flour for the first time, and I have hit a few bumps in the road.
I have looked up many guides online, so what I’ve done so far doesn’t totally match what you’ve written here.
I collected a bit over a gallon of large acorns (I don’t know what kind they are). I tested them for bad ones by putting them in water and tossing the floaters.
I used a knife to cut a bunch of them in half, putting them in water to prevent them from turning brown. I then put them in the oven at 250 degrees F for 20 minutes. When they came out, some of them were dry, but some of them had drops of moisture on them. Over the next two days, I removed the meat from the shells. This leads me to….
Problem 1: Some of the meat has discolored, turning various shades of brown and black. They were NOT black when I first cut the acorns open. Is this a normal occurrence, does it mean something is wrong with the acorn, or did I do something wrong? Did I let them sit too long?
And now, the next issue.
Knowing that I wouldn’t be able to process them all in one day, I only did that first process to about 1/4 of the batch. The rest I towel-dried from being in the water previously, then put them in an airtight container. I realize now that this was a mistake. So….
Problem 2: The container of unprocessed acorns has bits of mold all over. It’s pretty minor, but many have been unaffected. Does this make them unusable? Is it still okay to use an acorn that has a bit of mold on the outside as long as the inside looks okay, or do I need to toss any acorn that has mold on it?
I’m willing to toss this batch, gather some more, and start over, but I want to make sure that I know what I’m doing first. I don’t want to waste time!
Jordan: Why on earth would you put them in the oven? That is the cause of your color problems. And mold = ruined acorns. Sorry.
I collected acorns from a large tree limb that came down in a storm. Should I expect or do something different because of so many green acorns? I am drying/aging them in the sun on the driveway to let them brown up.
My tribe has been eating acorns for thousands of years, so we pretty much have it down to an art. I’ve never heard of freezing to help get the skin off! I’ll definitely try that! Anyhow, here’s a tip about leaching:
The more you leach it/disturb it, the more it loses flavor and nutrients, so leaching should be a quick process. The key is spreading the flour out in a wide, thin layer.Most people make the mistake of leaching in a deep bowl or jar, etc…that just means it takes forever for the water to reach the acorn on the inside of that mass, which is why it takes so dang long. Instead, make yourself a leaching tray (I simply use a big cookie sheet and punch a ton of holes in it (downwards). Then place a cotton pillow case across it, spread the flour out thin (1/4″), and pour three or four large pitchers of cold water over it. That is literally enough to leach all the bitter out. You need to use a “water break” so the force of the water doesn’t push aside the flour. We use a short bough of needles/leaves off a spruce tree, cedar tree, or pine needle tree. Lay that across the flour and pour the water onto that rather than directly onto the flour.
Happy acorn eating!
Tima: That’s a GREAT idea, thanks a ton!
I followed your directions and made about 2 liters of fully ground acorn flour. I think I may have over cooked some of the flour while drying it because I had to use my oven which requires constant attention to prevent over cooking. I made a batch of corn bread and replaced 4 table spoons of flour with 4 table spoons of acorn flour. I took it out of the oven while the center was still a bit undercooked, yet after it had rested it still tasted a bit dry. I need to try again and figure out how to get it more moist.
Thank you for theses instructions! Have you tried this with live oak acorns? Savannah Ga and we have soooo many live oak acorns!
Thanks for the tutorial, I have a 5 gallon bucket full of acorns (after the float test I imagine I’ll have to toss a third of them). Looking forward t trying this over the holidays!
How many pounds of shelled acorns does it take to make a 50/50 blend of water and acorns?
Gus: However many pounds you have. Every species of acorn is different, it’s depends on whether they are dried or fresh, and, well, how much flour do you want to make. No possible way to quantify it.
Fantastic article! I’m making my first batch but cannot grind them wet before leaching.
I rough cracked and dshelled what I could. Is it ok to leach when the nuts are halved?
I have what I think are chestnut acrons?
Rebecca: You need to crush them more. They won’t leach well in large pieces.
I am processing acorns for the first time. I am using black oak acorns. I shelled them today and soaking to get the skins(tests) off – but they don’t seem to want to come off. What shall I do?
Stephanie: They’ll be fine with the skins, although it’ll take a bit longer to leach out all the bitterness.
I have MANY White Oak Acorns. Are the green ones that blew down early in a storm still good to use? Is there such a thing as extra virgin white oak oil?
Frank: It depends. Typically yes, those green acorns are fine. But some will have acorn weevils. Look for holes or scars on the acorn. And don’t pick up acorns with their hats — they’ve been jettisoned. And yes, there is acorn oil. Hard to do, though.
Hi, Hank – Thank you so much for all of this information. I have been cold leaching my acorns. Everything works as I expect right up to the point where I squeeze the water with the good cheesecloth and then wait an hour for the starch and fat to settle out of the water. A little layer of water does seem to separate out, but the starch/fat is still too thin to glop up with a spatula. It’s as runny as the water. When I try to tip the water off, everything pours out, white stuff and all. Is it just too thin to be worth it? (Same thing happens when I strain my jar with the cheesecloth.)
Erin: Ah, the key is to let the water evaporate!
Hi Hank. I wanted to use some of this process, but for me it is not necessary to have a particularly flourlike texture. I would like to use acorns in a sour beer- so I need to remove tannins and at least a significant portion of fats, but my main concern is to do so without losing too much flavor. Any specific alterations to the process?
Giuliano: Don’t grind the acorns as much. Other than that, same process.
Hi Hank, the link from Acorns and the Foragers Dilemma is broken, it goes here and I wanna go there 🙂
This is really brilliant! I’m not gluten-free or require a special diet, thankfully, but why not acorn flour?!!!
Just gathered my first acorns to make flour. So this newsletter was very timely. Thanks for the GREAT instructions. I was a kickstarter buyer of your new book and think it’s excellent. Glad to hear it has been so successful.